
PHASE 1: Target
After the ideation phase, I consulted with ChatGPT to help set up the circuit. I needed to make adjustments because certain electronic components require specific voltages or amperages. Additionally, my limited budget was another reason I turned to ChatGPT for assistance.
https://chatgpt.com/share/68dab188-2c24-8010-afa3-c80cf1b273f9
ChatGPT - Arduino nano circuit setup
이야기를 들어주고, 배우고, 도전하는 대화형 AI 시스템
chatgpt.com

After searching for electronic parts on Amazon, I came with two plans - use 1) buzzer, and 2) mp3 player module and micro SD card.
Plans: https://docs.google.com/document/d/1ueKChgXSH6wxTV65q7X5AVxxWDqXaMW2q-GvxCj05-w/edit?tab=t.0
Dream Toy Project: Hardware setup
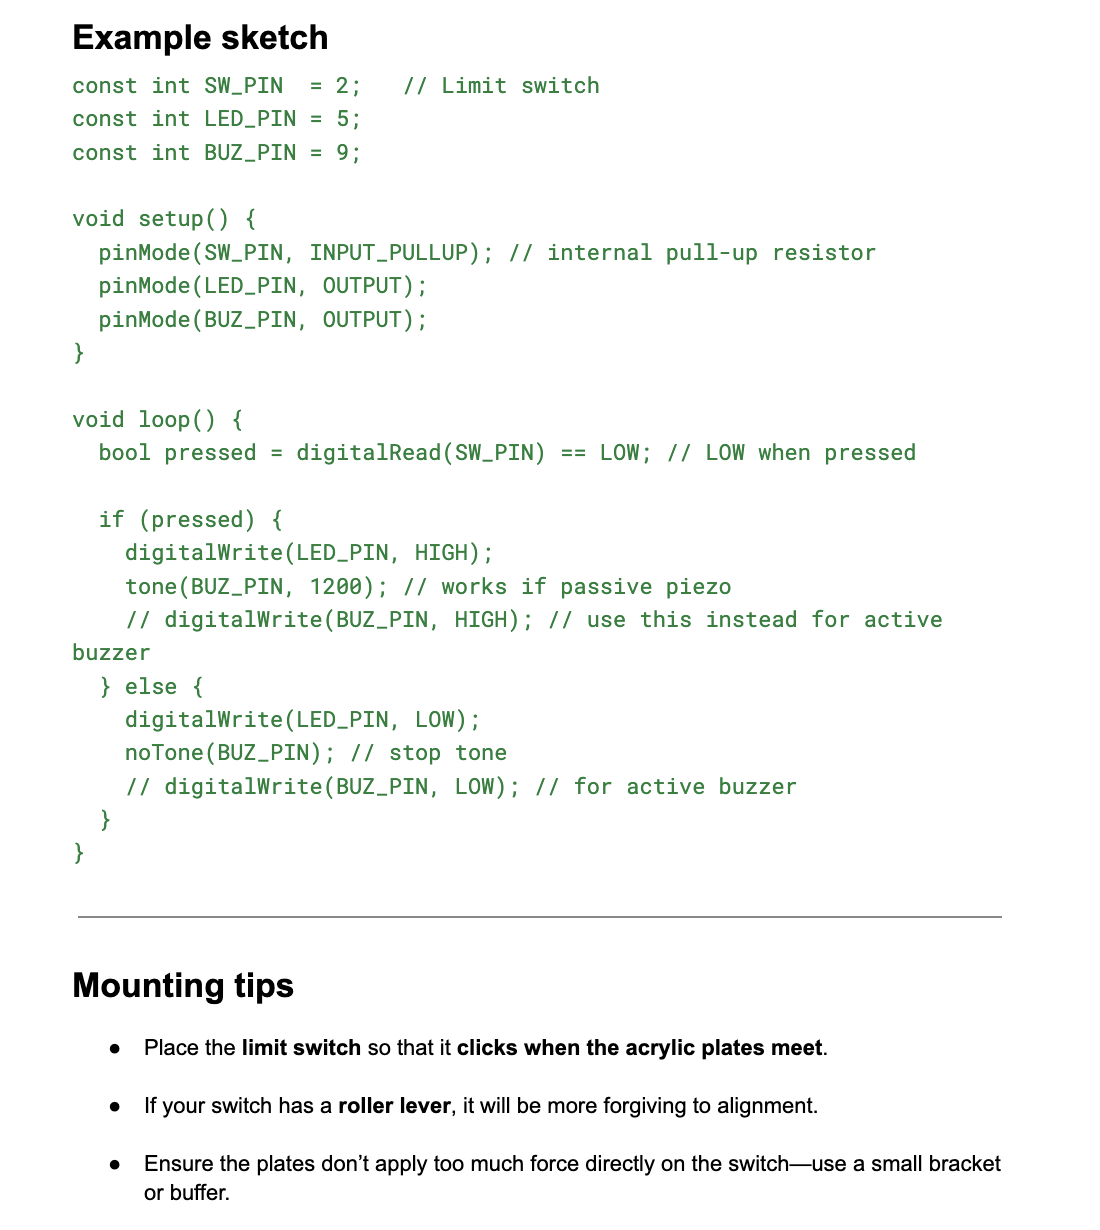
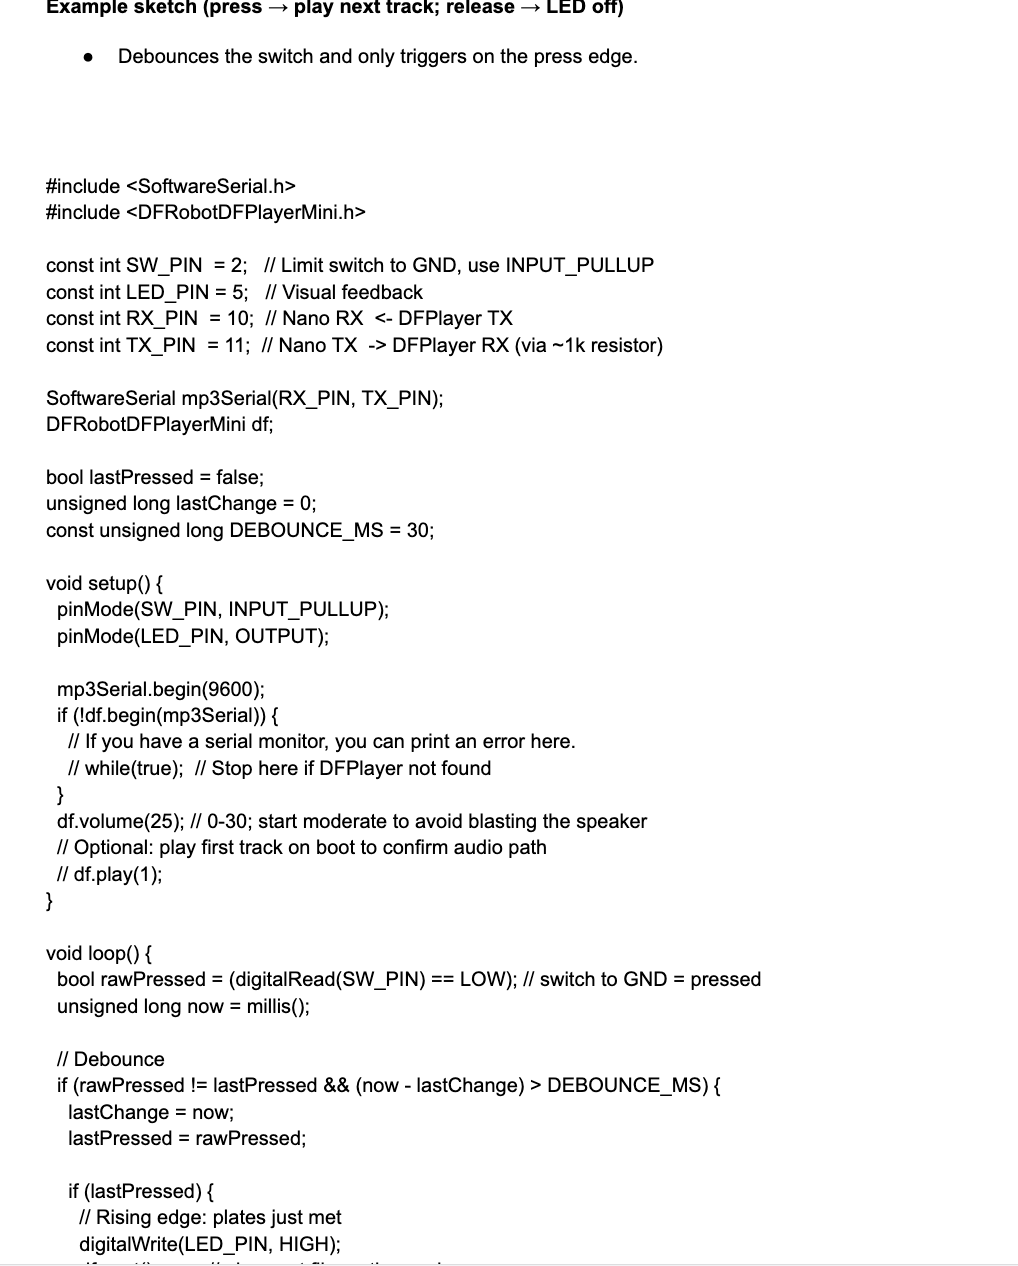
Hardware setup Parts needed Arduino Nano (5 V) Limit switch (mechanical, SPDT or SPST-NO type) Resistor (10 kΩ, only if you want an external pull-down, but usually not needed with INPUT_PULLUP) LED + 220 Ω resistor (or LED module) Buzzer (active piez
docs.google.com
1) Buzzer


Using buzzer would decrease the budget, however, Ruda would not be able to edit the sound as his favorite pockemons.
2) mp3 player module and micro SD card
| Item name | Link | Unit price | unit | Total price |
| 3PCS Mini MP3 Player Audio Module with 5PCS Metal Shell Round Internal Magnet Speaker 2W 8Ohm MP3 Voice Decode Board TF Card U Disk IO/Serial Port/AD Board DFPlayer Audio Music Module for Arduino | https://www.amazon.com/gp/product/B08FFLH5XL/ref=ox_sc_act_title_2?smid=A39S0U3UP1U7UG&psc=1 | $12.99 | 1 | $12.99 |
| GIGASTONE 8GB Micro SD Card 2-Pack, Full HD Video, Surveillance Security Cam Action Camera Drone, 85MB/s Micro SDHC Class 10 | https://www.amazon.com/gp/product/B0858FBL8V/ref=ox_sc_act_title_3?smid=A2SFGDK0SQGMP8&psc=1 | $6.98 | 1 | $6.98 |
| Micro Limit Switch, CYT1073 AC 2A 125V 3Pin SPDT Rocker Switches Long Hinge Lever for Arduino (30 Pack) by MUZHI | https://www.amazon.com/gp/product/B088W8WMTB/ref=ox_sc_act_title_4?smid=A3PXX08VVBPF5M&psc=1 | $4.19 | 1 | $4.19 |
| 3PCS Nano V3.0 Board With Cable, ATmega328P, CH340G Chip 5V 16M, Microcontroller Compatible With Arduino (USB C Port) | https://www.amazon.com/gp/product/B0DFGX3MSL/ref=ox_sc_act_title_5?smid=AA8JFJR0F3SWY&psc=1 | $14.99 | 1 | $14.99 |
| TOTAL | $39.15 |


On the other hand, the module would increase the cost. Since I have experience working with MP3 modules and Raspberry Pi, coding or managing hardware was not an issue.
After hearing about Professor Schneider's own example, David and I decided to adjust our project direction. We shared concerns that the project was becoming too focused on technology, rather than centering on Ruda's interests and needs.
PHASE 2: Maker Tool Box
We ideated from the maker kit that the boy likes.

We researched existing tools and I was surprised to discover a variety of products available to students—many of which I had never seen in Korea! However, we noticed that most of these tools simply imitate those designed for adults. This led us to decide to create a maker toolkit specifically for him, allowing him to use the kit alongside other tools to prepare materials and fabricate whatever he wants.
I came up with several ideas to make handling cardboard easier:
The first tool is designed to create dots or dashes on the board, making the cardboard easier to fold. I was inspired by a pizza cutter and wanted to allow for interchangeable blades to produce different line patterns.
The second tool helps make zigzags, which can serve as hinges to connect different boxes.

I chose wood as the material because it needs to be sturdy and hard enough to make lines on the cardboard.
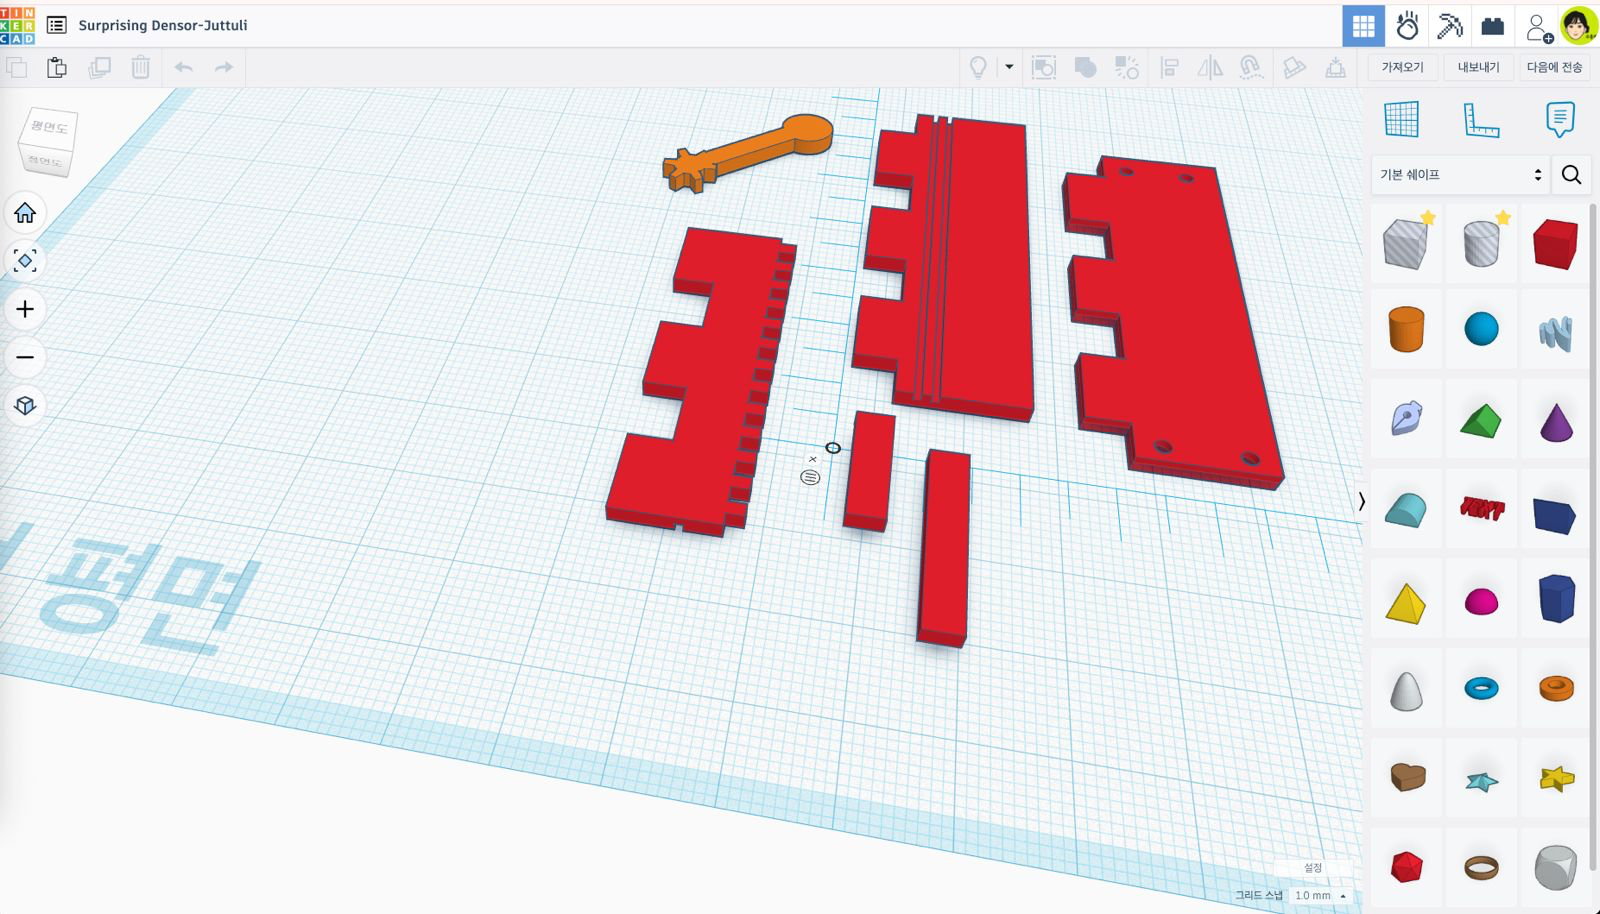
First, I created the design in TinkerCad. I initially built the complete model and then took it apart to identify all the necessary components.


I designed with CorelDraw.


I used 3mm plywood and assembled the pieces.
I need to:
- Make the moving part shorter
- Make the teeth sharper
- Shorten the handle
I plan to create prototypes using cardboard.
Meanwhile, David worked on the maker box, which includes the flashlight bulb and a ring for making holes in the board!
I am looking forward to the tinkering process and I would do my best to develop it for Ruda.
'STUDY > Ed.M.' 카테고리의 다른 글
| [T519] Dream Toy Project(4): Final (0) | 2025.10.24 |
|---|---|
| [T519] Dream Toy Project(3): Developing prototypes (0) | 2025.10.13 |
| [T519] Dream Toy Project: Interview (0) | 2025.09.29 |
| 보스턴에서의 58일: 학습 후기 (0) | 2025.09.26 |
| 보스턴 캠브리지 메이커 문화와 메이커 스페이스 (1) (0) | 2025.09.24 |


댓글