
For the first project, I created a name tag using a laser cutter at the Gutman Makerspace.
이 수업의 첫번째 프로젝트로 레이저 커터를 이용해서 이름표를 만들었습니다. 저희 학교 건물 2층에 메이커 스페이스가 있거든요 :)
We used CorelDRAW 2019 to design the files, and I chose ply wood as my material.
프로그램은 CorelDRAW 2019를 사용하였고, 재료는 합판을 사용했습니다.
The project requirements were following:
이 프로젝트의 요건은 다음과 같습니다:
- Must display your name for use in class 이름이 꼭 있어야 함
- Must stand on its own 혼자 설 수 있어야 함
- Must include at least one glued joint 관절이 하나는 있어야 함
- Must include at least one engraved part 새긴 부분이 하나는 있어야 함
- Must use materials no larger than 12x18" 재료의 크기가 12x18"를 넘지 않아야 함
- Must be inspired by my Gear Essay 지난 시간 작성한 Gear Essay와 관련있어야 함
Practice : Monocycle Name Tag
연습: 외발 자전거 이름표
To practice laser cutting and joint techniques, I first created a monocycle-themed name tag to revive my making skills and experiment with joint design.
레이저 커터를 사용했던 경험을 떠올리고 관절 부분을 만드는 기술을 먼저 연습하고 싶었습니다. 그래서 외발 자전거 모양의 이름표를 먼저 만들어보았습니다.
1. Hand Drawing 손그림
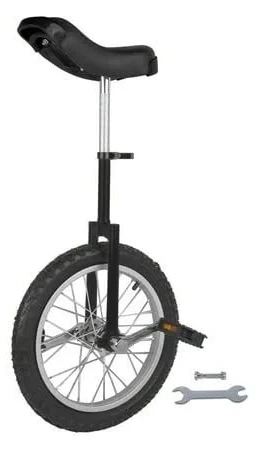

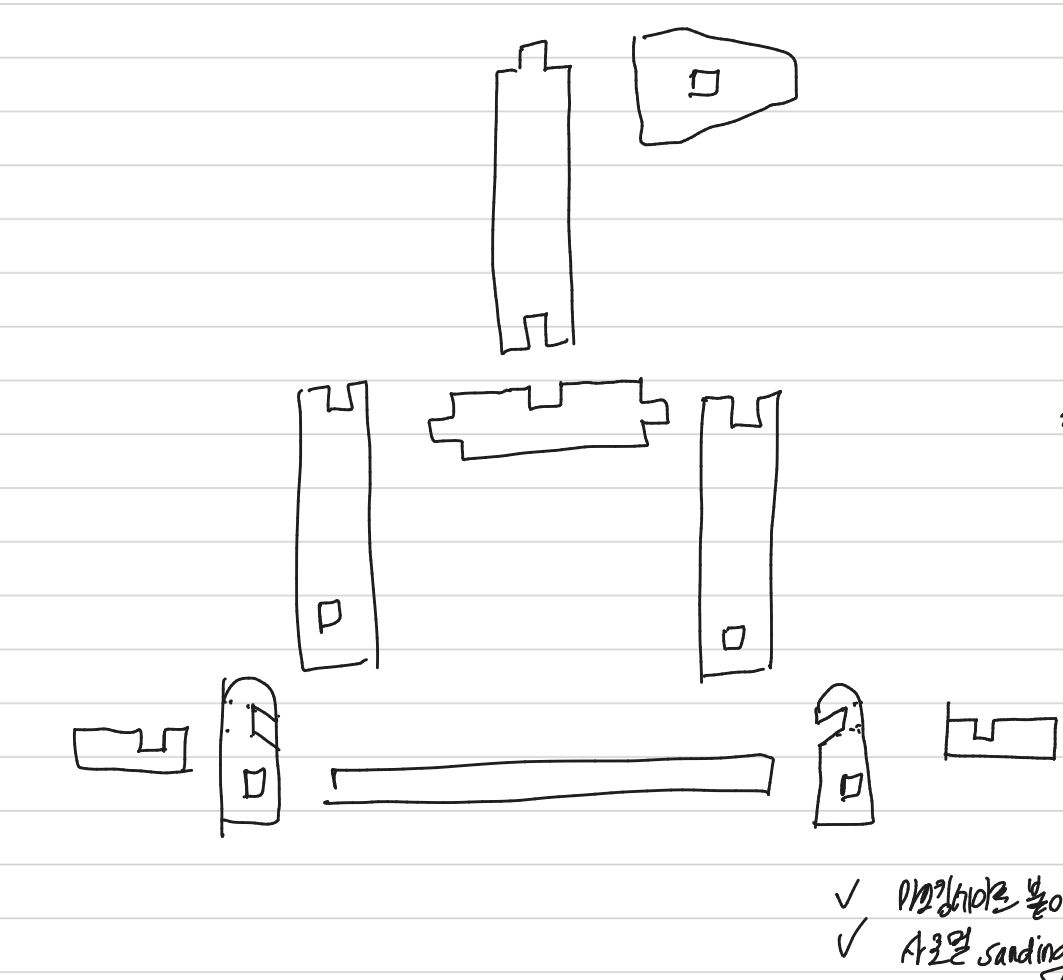
I began with a hand-drawn sketch inspired by a unicycle image found online. The first design mirrored the reference photo, but I realized areas where the direction changed were structurally weak. I revised the design accordingly.
먼저 인터넷 상에서 찾은 외발 자전거 이미지를 바탕으로 손으로 좀 그려 보았습니다. 그런데 그려놓고 보니 연결 부분이 많이 약해보였습니다. 그래서 디자인을 조금 바꿔보았습니다.
2. Design & Cut 디자인 & 자르기


Using CorelDRAW, I prepared the cutting file. Some challenges that I encountered:
CorelDRAW에 손그림을 옮긴 다음 레이저 커터로 잘라 보았습니다. 옛날에 램프를 만들었던 경험이 새록새록 생각이 났습니다. 그런데 다음과 같은 문제에 봉착했습니다..!
1) Finger joints needed better calibration. The fingers were too short, and indents too long.
연결 부위를 더 튼튼하게 만들어야 할 필요가 있었습니다. 겹치는 부분의 면적이 더 넓어야(길어야) 했습니다.
2) I accidentally used cross-lap and tab-slot joints without knowing the terminology at first. I learned:
이래저래 생각을 하다가 다른 연결법을 적용해보았습니다. 나중에 찾아보니 cross lap joint, tab-slot joint 라고 부르더군요!
- Cross lap joints need deeper indentations for strength. Cross lap joint 는 더 깊은 것이 나아 보였습니다.
- Tab-slot joints are easier to connect when the object is small. At first, I just covered up the finger joints to make them stronger. Holes for tab-slot joints should be smaller. As the laser burns away additional material, the hole would be larger than designed. So, I set the hole size as 0.12*0.12". However, it was still a little too large.
작은 작품을 만들 때에는 Tab-slot joint이 더 튼튼하게 고정되었습니다. 타는 부분이 있다 보니 구멍은 더 작게, 넣을 부분은 더 크게 자르는 것이 나을 것 같았습니다.
3) I used Titebond wood glue to reinforce the joints. Holding the pieces in place during drying was difficult but yielded satisfying results.
작품의 크기를 고려했을 때 타이트본드보다 글루건이 금방 굳어 좋았습니다. 단 글루가 잘 보이는 것은 좀 아쉬웠습니다.
3. Result
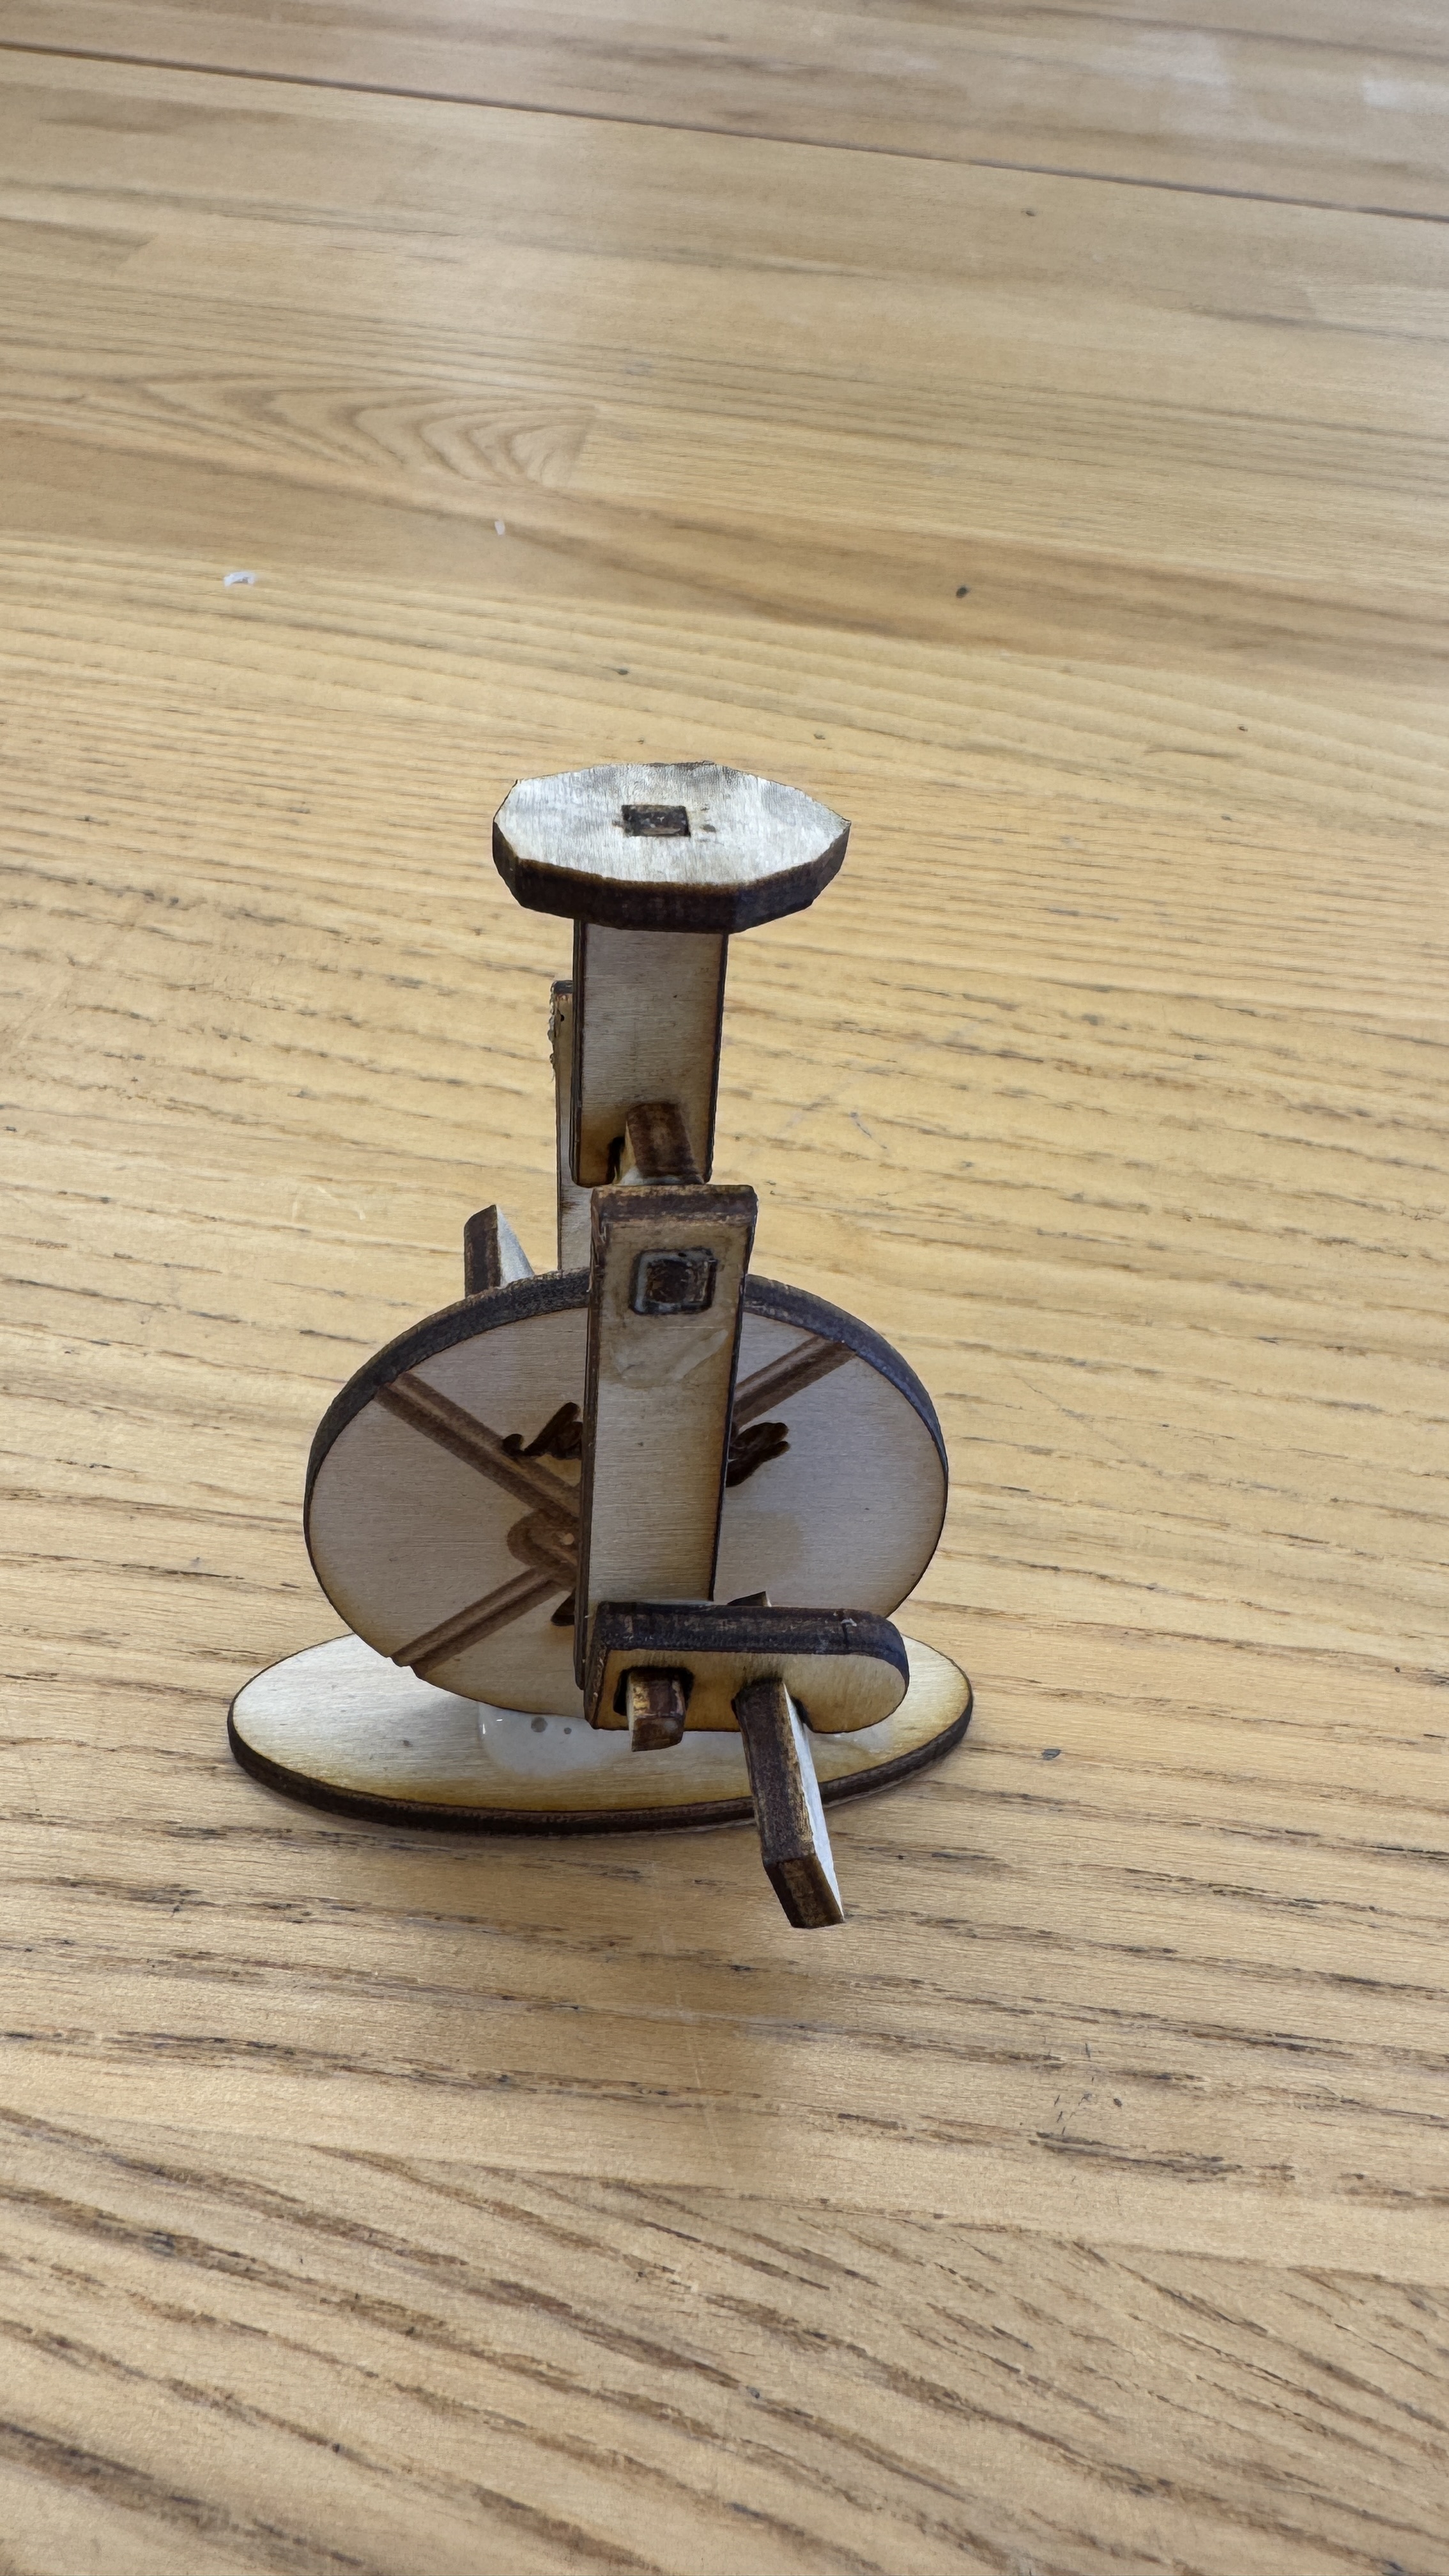

This is the revised version of the demo.
Real Work : Gear Puzzle Name Tag
1. Inspiration
This project was based on my gear essay, where I explored how jigsaw puzzles reflect my personality-srcutiny, resilience, and a preference for questions with clear answers. I aimed to make a 3D object using puzzle pieces.
Additionally, I was inspired by a visit to the Boston Institute of Contemporary Art (ICA) during a dorm trip on Thursday evening. The museum was hosting an exhibition for the 2025 James and Audrey Foster Prize.


As someone interested in woodworking, a piece by Alison Croney Moses immediately caught my eye. I was drawn to the flowing curves and wondered how she managed to bend the wood. The form felt full of movement, even though it wa physically stable. This led me to think about gears as representations of motion.
Another work resembled the image on the right. I really liked the concept of having a vacant space inside the wooden shell. It resonated with my original idea of making a cube with puzzle pieces, symbolizing the inner workings of my mind.
2. Hand Drawing


As soon as I returned from the museum, I began sketching the design.


At first, I wanted to make the structure float. Then, I decided to include gears inside the cube. I thought it would be great to turn it in to an automaton that could be opened using a handle. I was inspired by a money box for the children like the one in the photo on the right. It opens automatically when a coin is inserted. I borrowed the mechanical idea for my own design.

Additionally, I came up with joint structures inspired by nails and washers.
3. Design

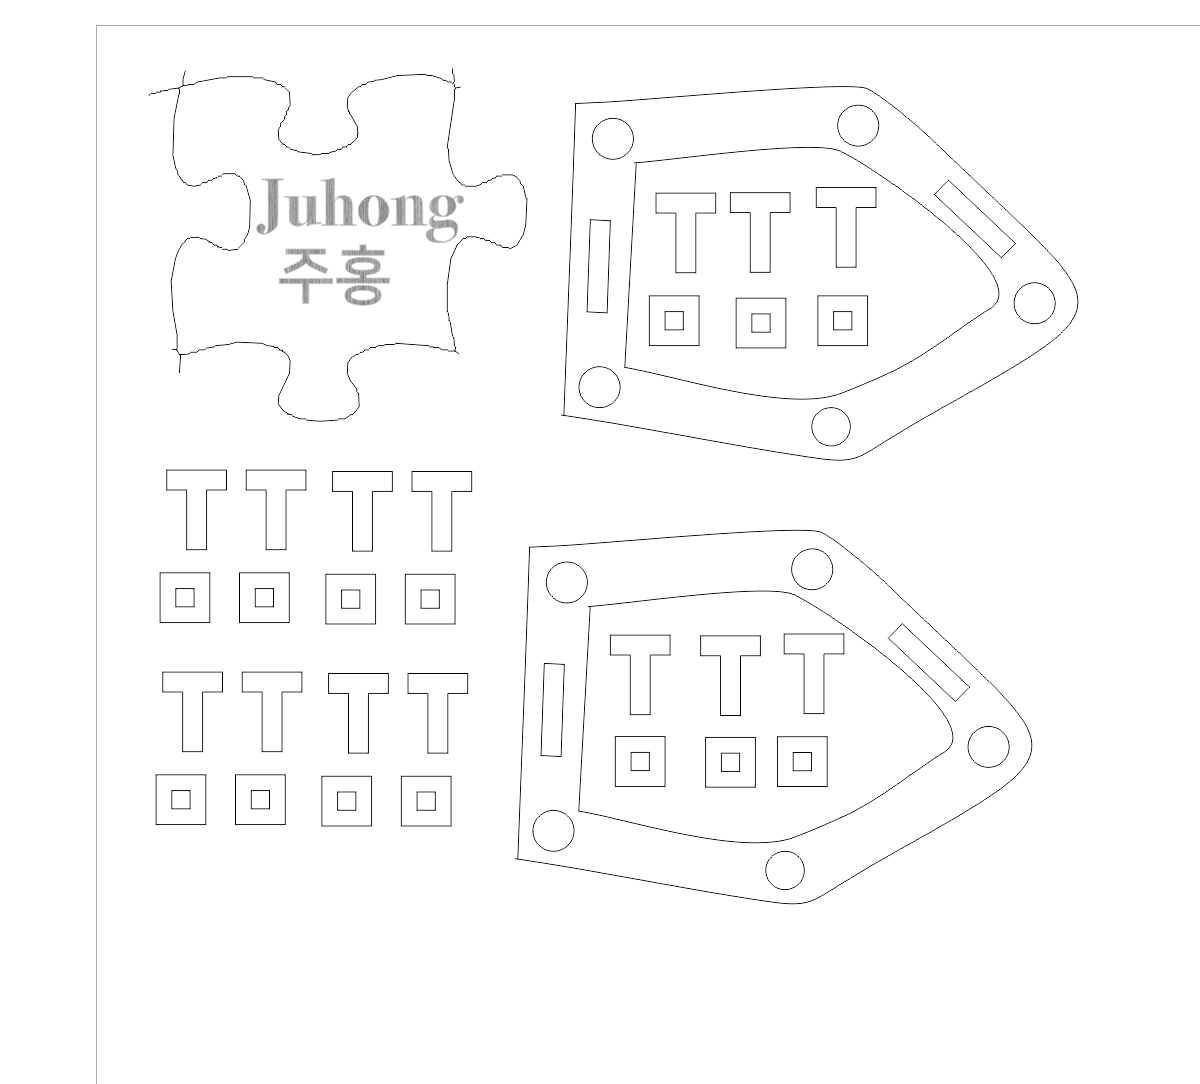
I designed the model using CorelDRAW.
Here's a tip for converting an image into a vector format (I found it!):

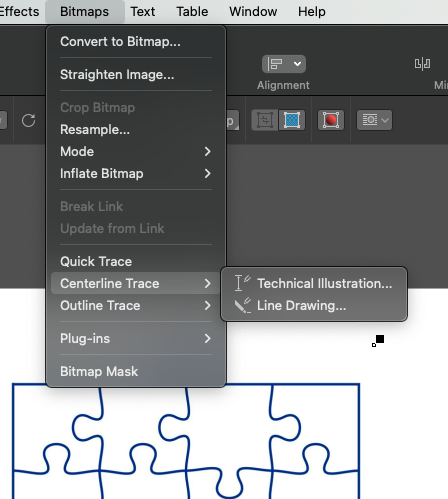
1) Find a black and white image. It would be better if the background is transparent.
2) Copy and paste the image into your CorelDRAW file.
3) Click the image, then go toBitmaps>Centerline Trace>Technical Illustration.


4) When the settings window appears, set Detail to 100 (this worked well for me).
5) If you do not want to remove the background, choose Remove: None.
6) Click OK!
4. Cutting
I cut the wood, but there were some issues to keep in mind:
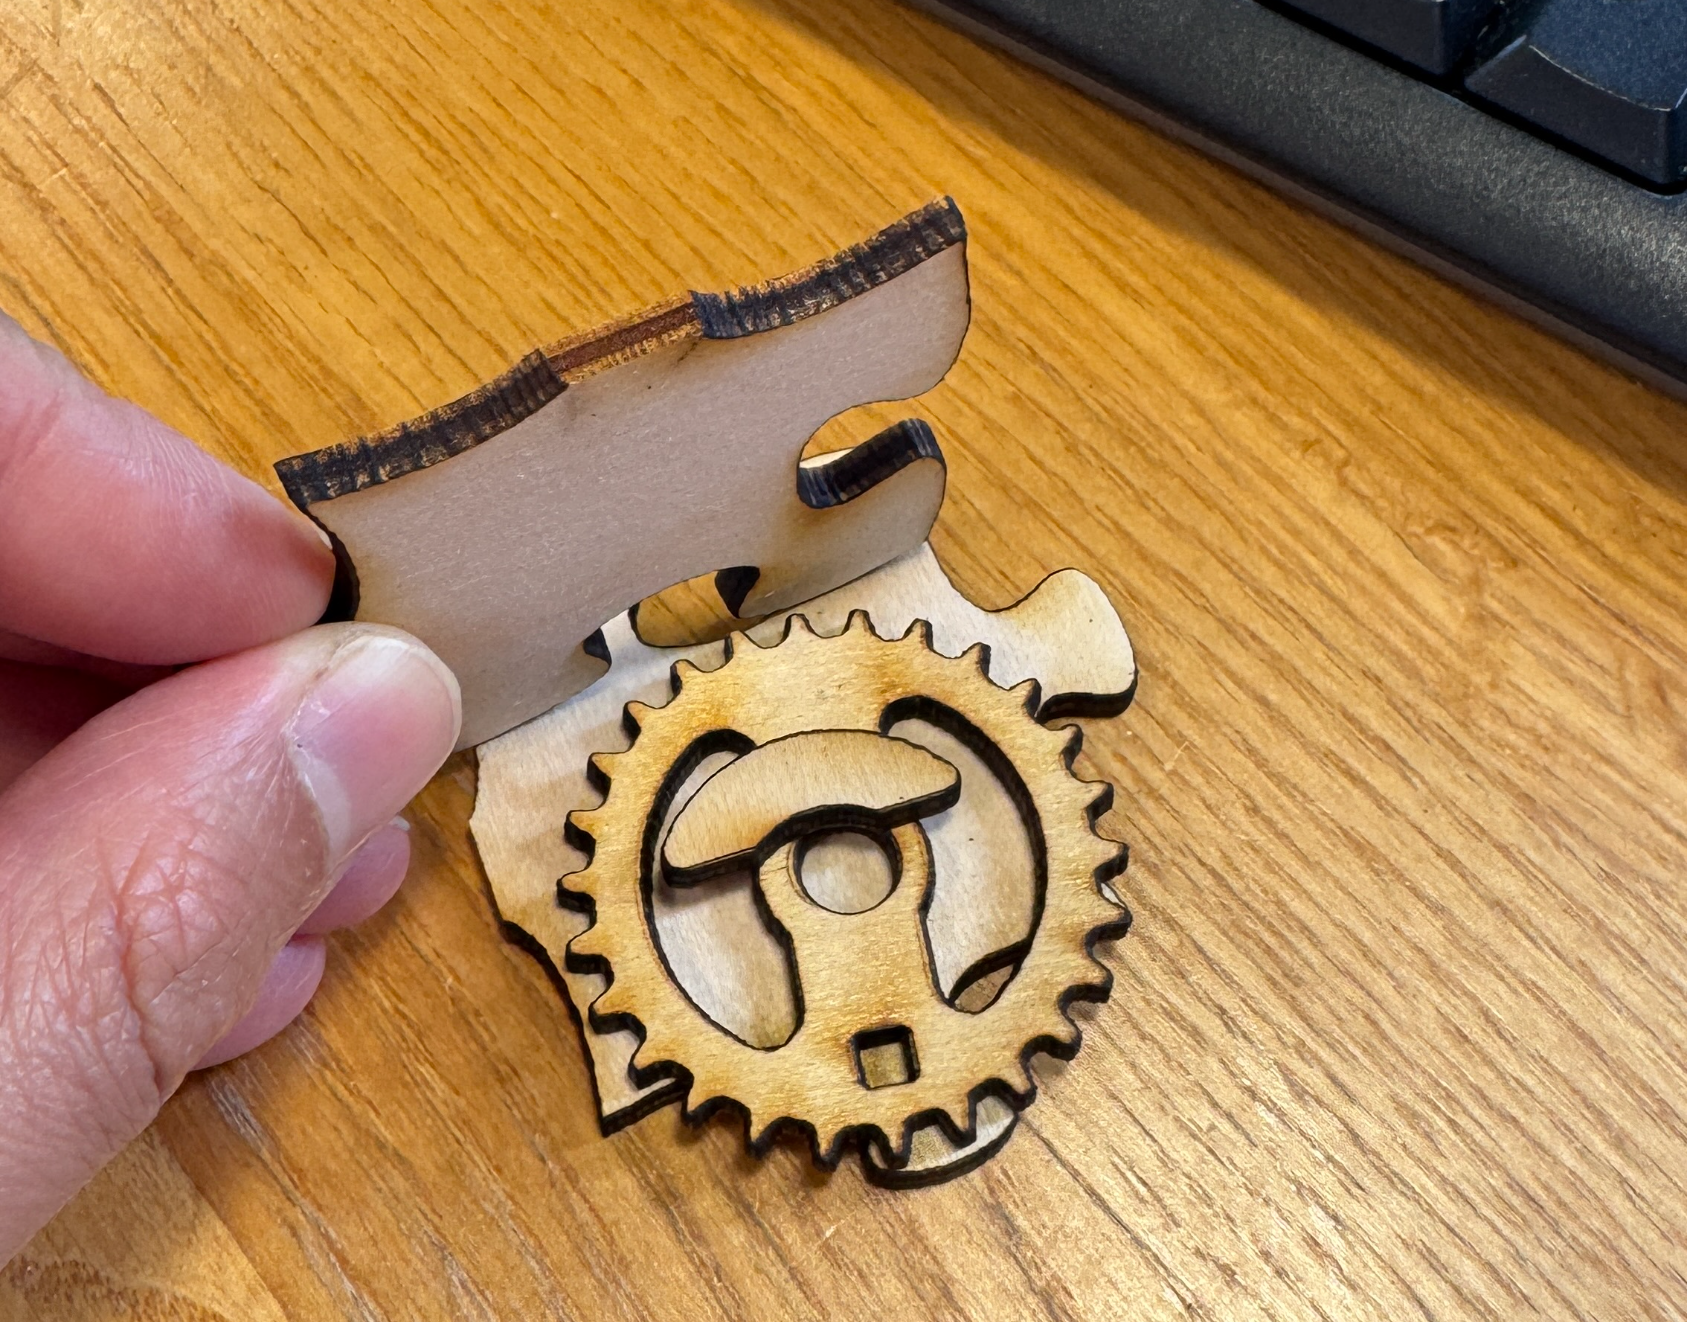

1) The gears should be smaller. Since the edges of each side were curved, they overlapped slightly. Therefore, the gears needed to be a bit smaller. But they should not be too small because they still need to engage properly (left photo).
2) The teeth should be deeper. When I tested the movement, the gears sometimes spun without traction. (right photo)
3) I also needed to consider the handle. I now understood why automata usually require a large base. I prefer a more minimal design, so I'd like to experiment later with ways to simplify and reduce the base size.
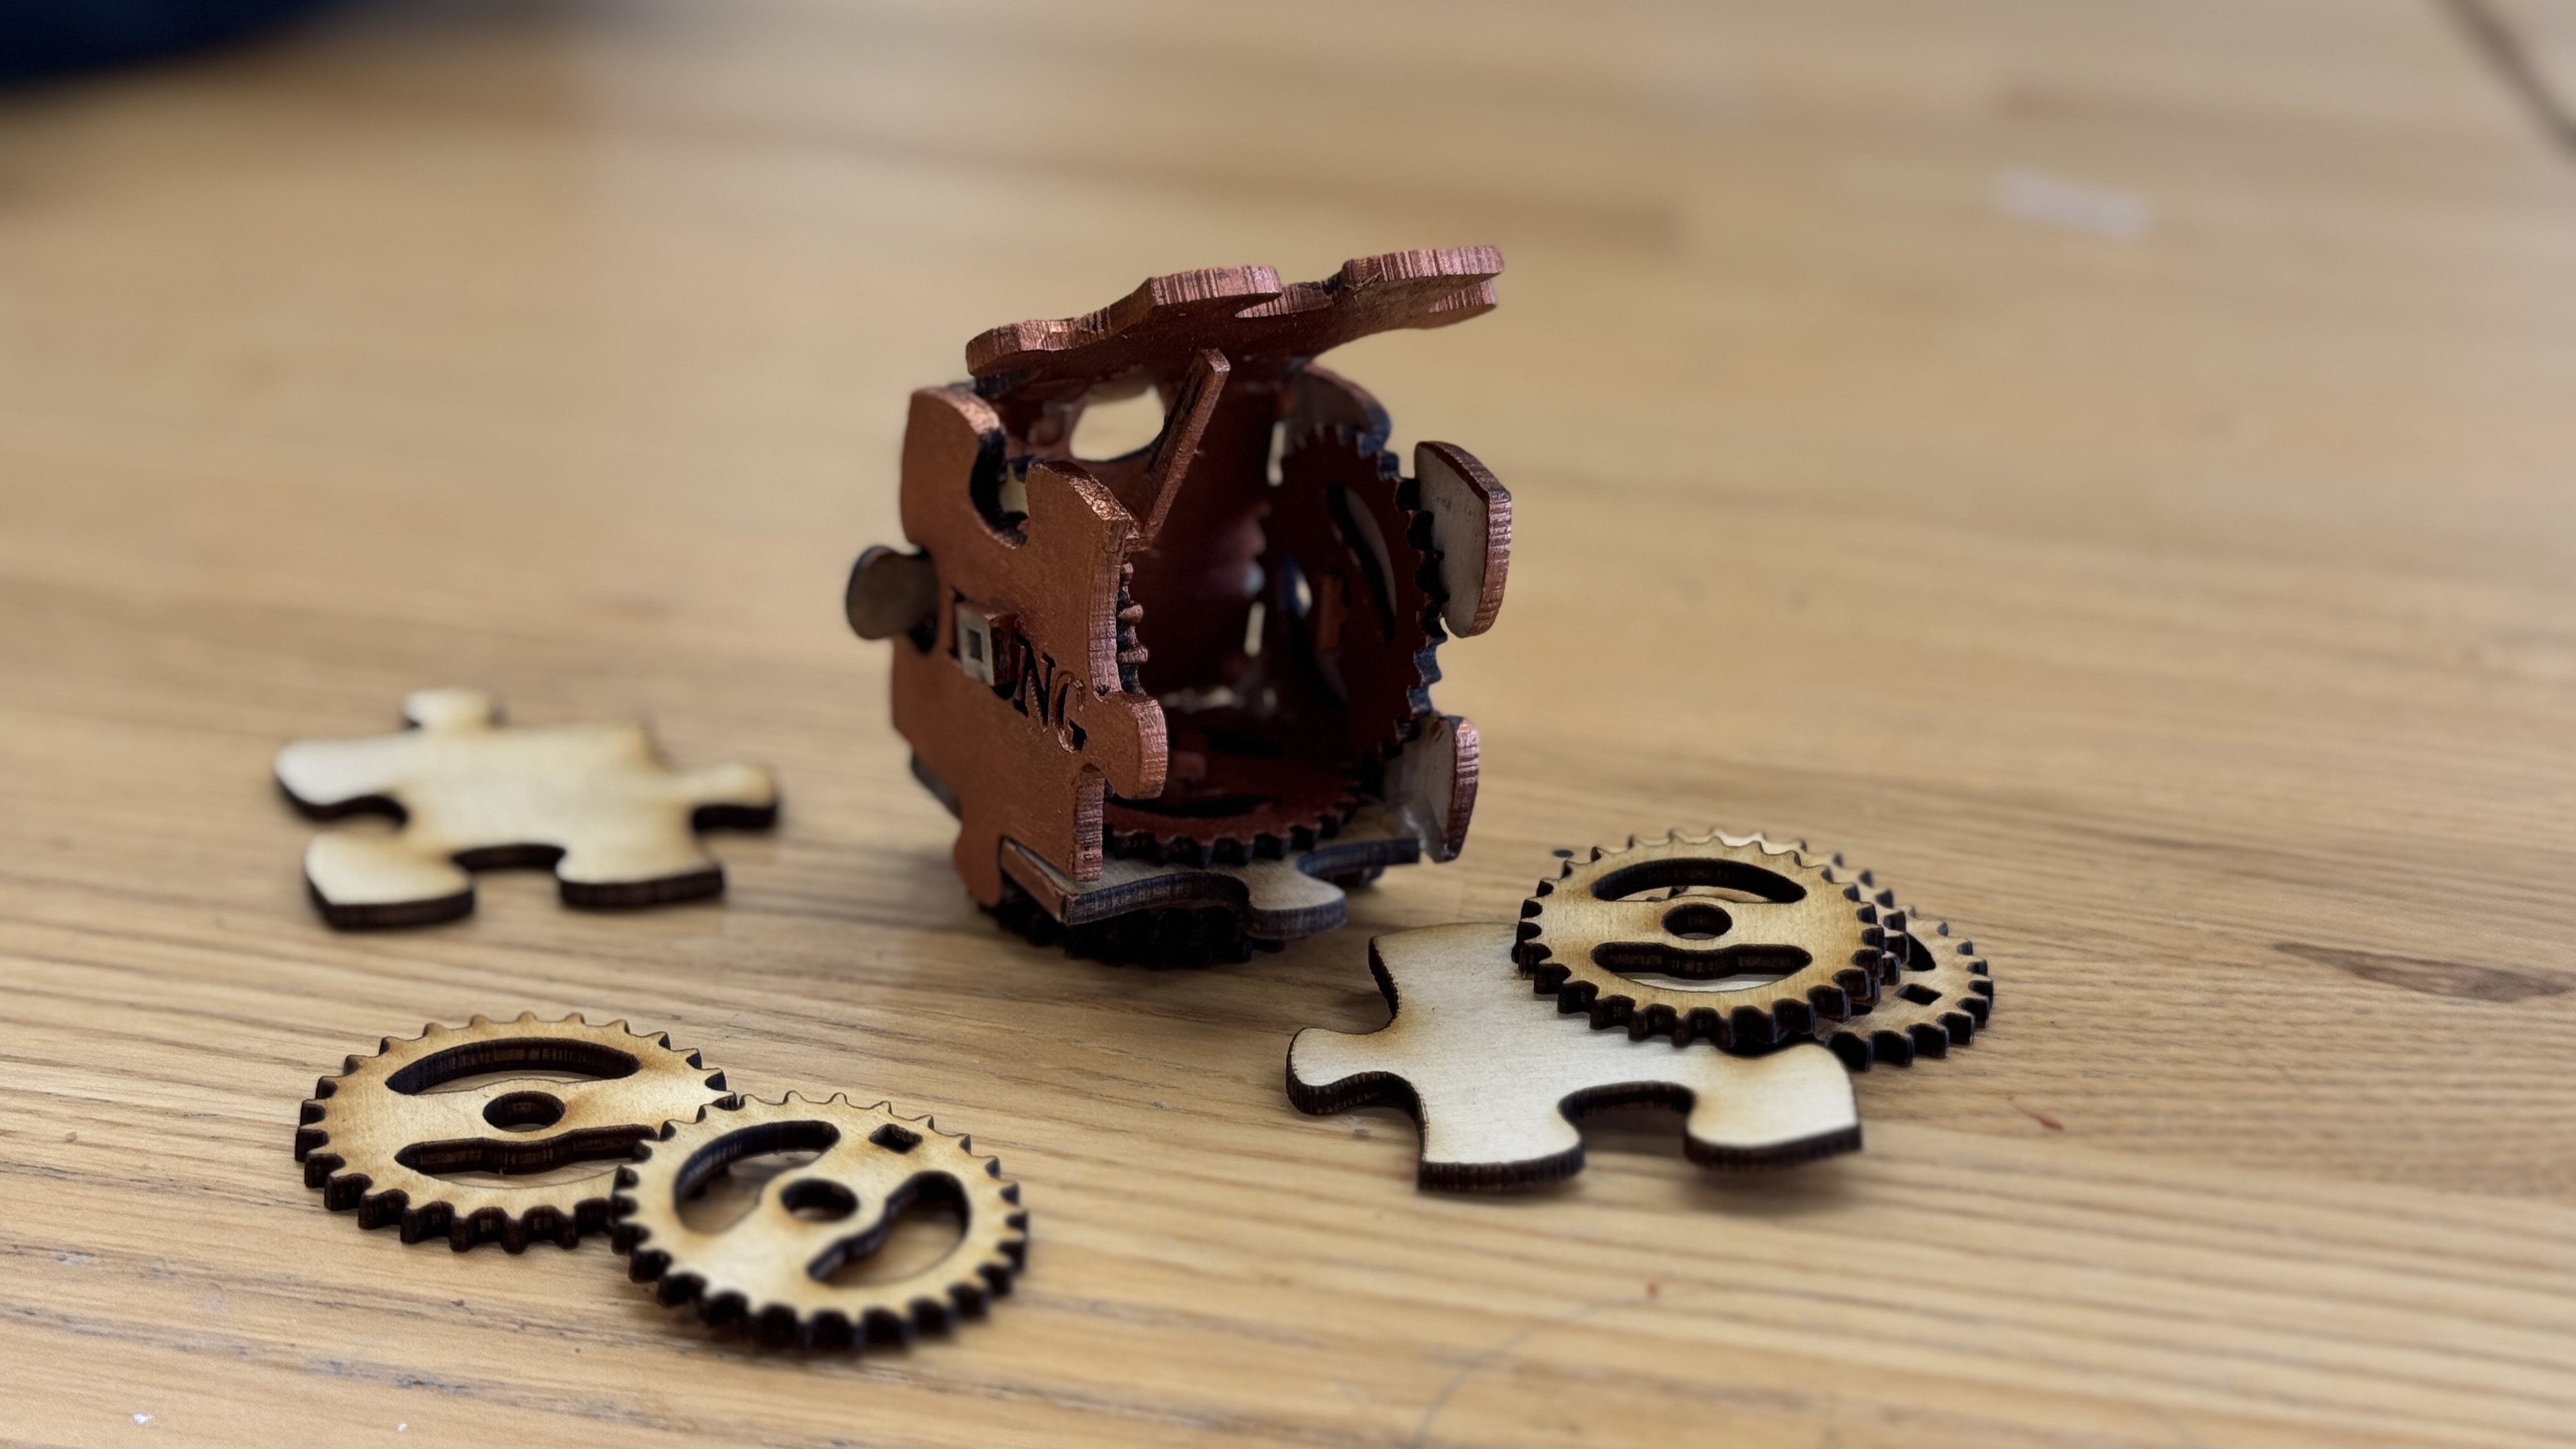
5. Glue & Color


This time, it was difficult to glue the parts with Titebond because the contact surfaces were too small. So, I ended up using a glue gun instead.

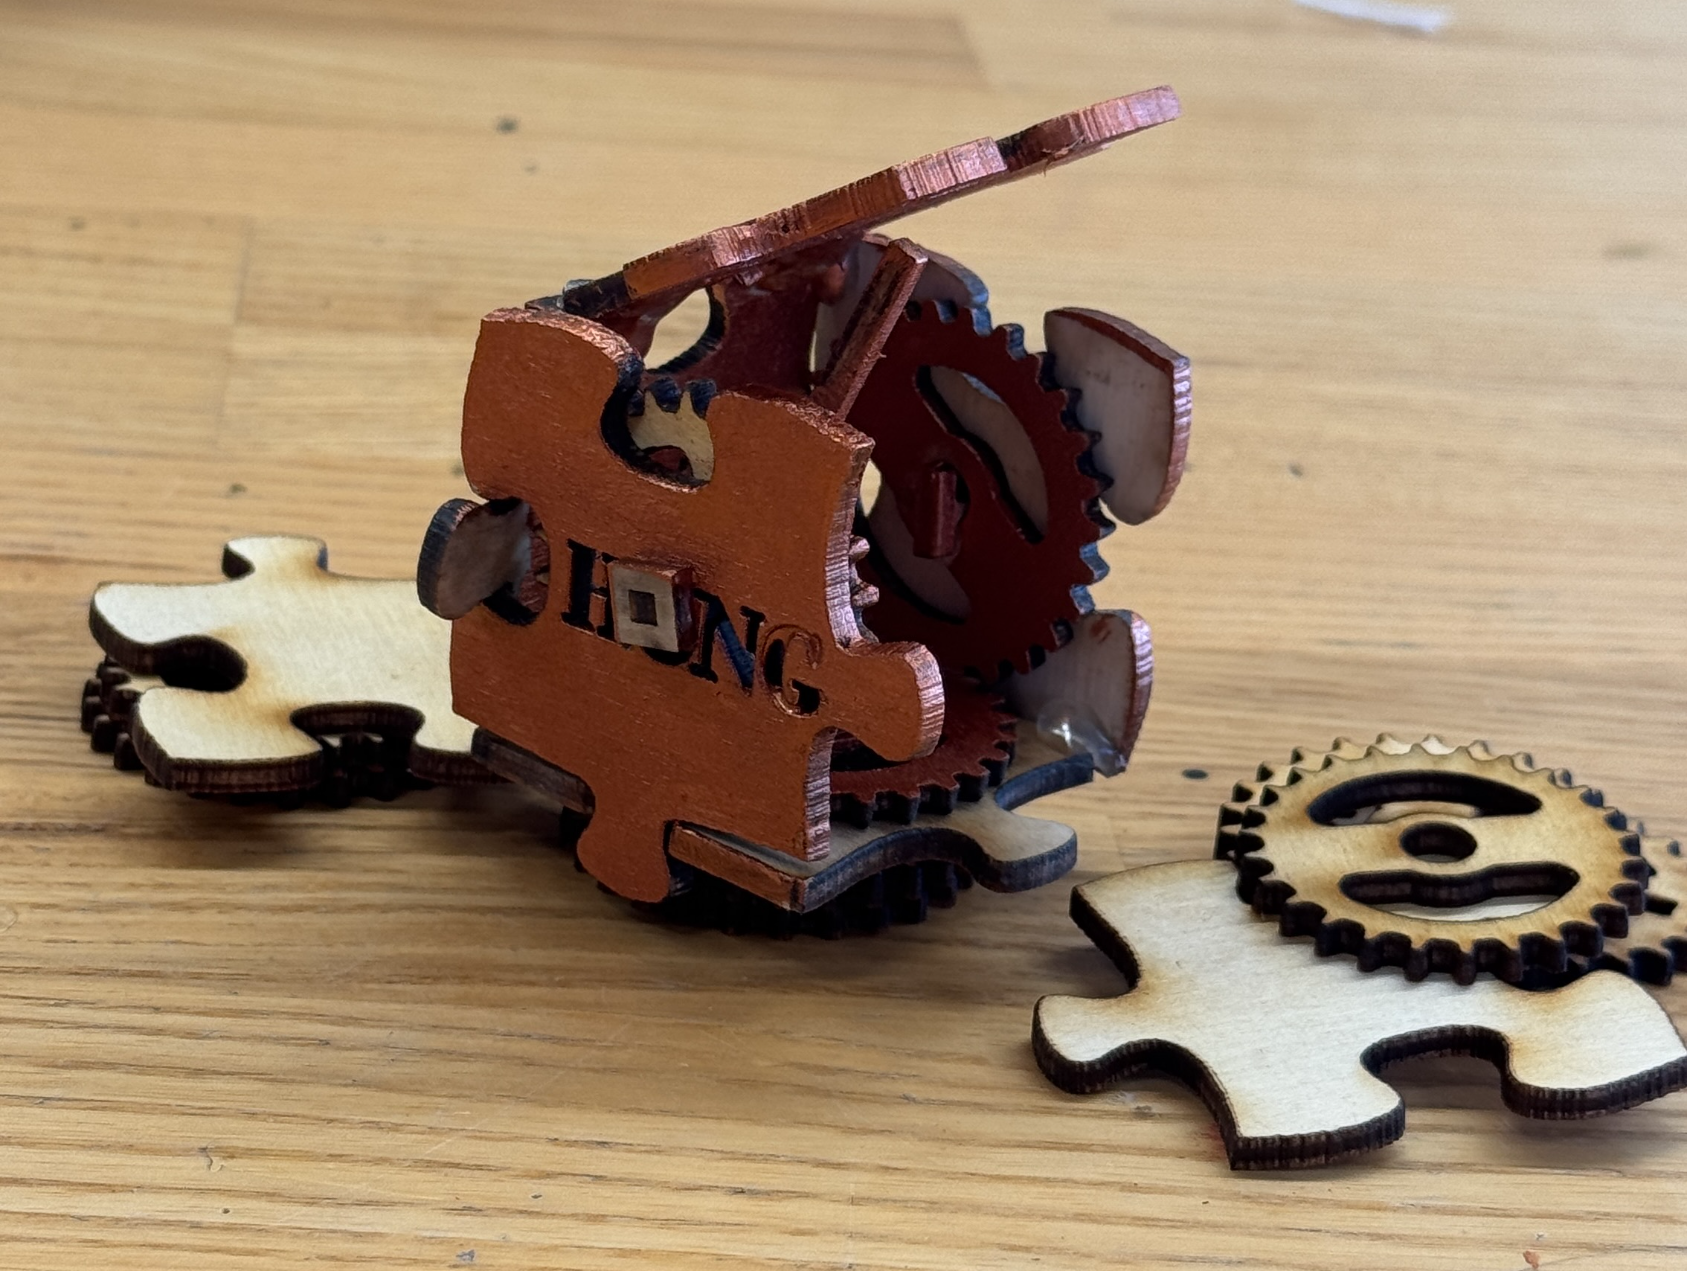
Since the facades were stained by the Titebond, I looked for some paint and decided to color a few sides and gears to improve the appearance. I chose a color that seemed to be metal.
Also, I forgot about the engraving requirement..!
To fix this, I re-cut the final piece and created a new base with additional gears to include an engraved element. As I did not want to attach the engraved piece to the cube, it needed some kind of base to stand it. Additionally, I decided to use remaining gears to decorate the base. So I came up with this design.
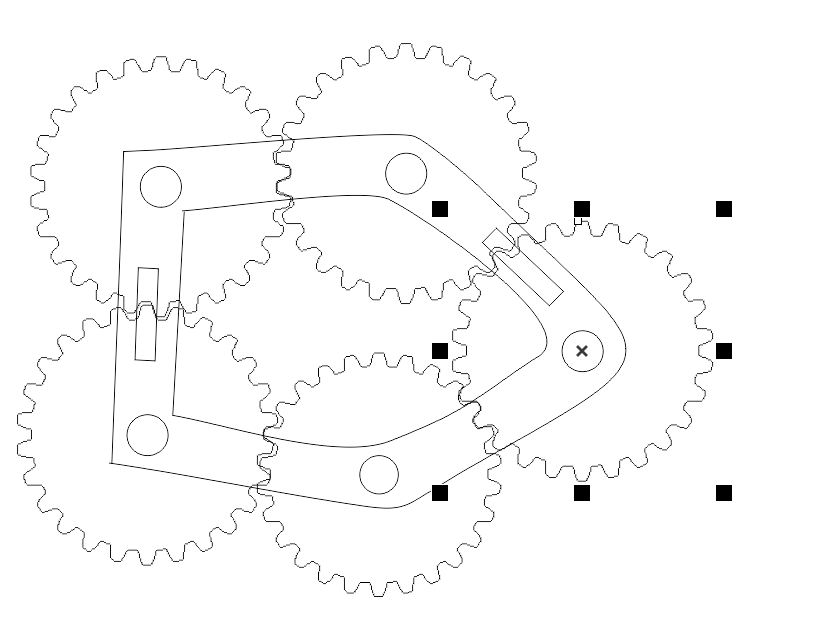
I used the images of gears to locate holes in adequate locations.

How I want to improve further:
- to move the gears with a single handle-just like an automaton!
reference: https://www.instructables.com/Mechanism-Educational-Kit-Spur-Gears/
Mechanism Educational Kit - Spur Gears
Mechanism Educational Kit - Spur Gears: On my 1st semester studying Industrial Design, I've had an introduction course dedicated to technology and manufacturing. One of the main classes was about basic common mechanisms, the aim was to teach the students t
www.instructables.com
- I want to add some circuits inside the box.
reference: https://www.instructables.com/Customizable-Plywood-and-Acrylic-Hinged-Lamp/
Customizable Plywood and Acrylic Hinged Lamp
Customizable Plywood and Acrylic Hinged Lamp: This is a re-make of Sculptural - Customizable - Plywood Lamp. It has been redesigned such that it can be made from 1/4 inch laser cut material. The pieces will be layered to form the components of the 3/4 inch
www.instructables.com
I found this cool work, and I really like the light smearing from the niches between wood parts.
I wonder if there's more time to develop this work.
'STUDY > Ed.M.' 카테고리의 다른 글
| [T519] 4. Construction Kit: Universal Connectors with 3D Printing (1) | 2025.09.20 |
|---|---|
| [T519] 3. Omni creature (0) | 2025.09.16 |
| [T519] 1. Gear Essay (0) | 2025.09.06 |
| 보스턴에서의 첫 주: 생활을 중심으로 (5) | 2025.08.16 |
| How People Learn - 주경야독 단기 체험 (7) | 2025.08.01 |


댓글