
For this week, we had to work in pairs to make a construction kit.
This week's tool was the 3D printer. Actually, I was glad to meet it again!
We forged 3D models with even TinkerCAD, which I had used about 5 years ago.
The construction kit should fulfill the following requirements:
- The connecting pieces should be 3D printed
- The material connected by these pieces should not be 3D printed (but feel free to use existing material, or to laser cut cardboard / wood / etc.)
1. Ideation
I had one day to ideate before meeting with my teammate.
The problem that I set for this project was to utilize various materials.

At first, I came up with an idea to use various sizes of straws.
Last year, there were some kits to make 3D objects to teach math to 5th graders.
http://youtube.com/watch?v=1Kma0c5B_vU
It was strong enough to make big objects; however, I was eager to use the connectors with other straws that I had.
However, it was impossible due to the specific size of the connector.
Therefore, for this time, I wanted to make a connector that is universal to various sizes of straws.
While talking with my teammate, we decided to keep the idea to make a connector for multiple materials. We decided to connect lines and planes, rather than different sizes of lines (straws). She selected egg cartons as planes, and I selected straws as lines. These are the reasons:
- I really liked the idea of utilizing egg cartons as they have beautiful forms! That would ignite children's imagination.
- Also, straws could serve as columns, making it easier to expand scale.

We came up with several ideas.
As we had only a few days to print, we decided to make two kinds of connectors.
She took the one that connects cartons, and I took the other that connects an egg carton and a straw.
2. 3D Modeling
Take 1

This was the initial design.
As I was not able to measure the width of a straw at the makerspace, I searched for the size.
The site said it's 10mm, so I set the size as 10mm.


The next day, we met at the makerspace.
It was hard to cut the egg cartons. I looked for a cardboard knife that I used to use back in Korea, but there wasn't one.
We talked about making the kit with an added 3D-printed knife.
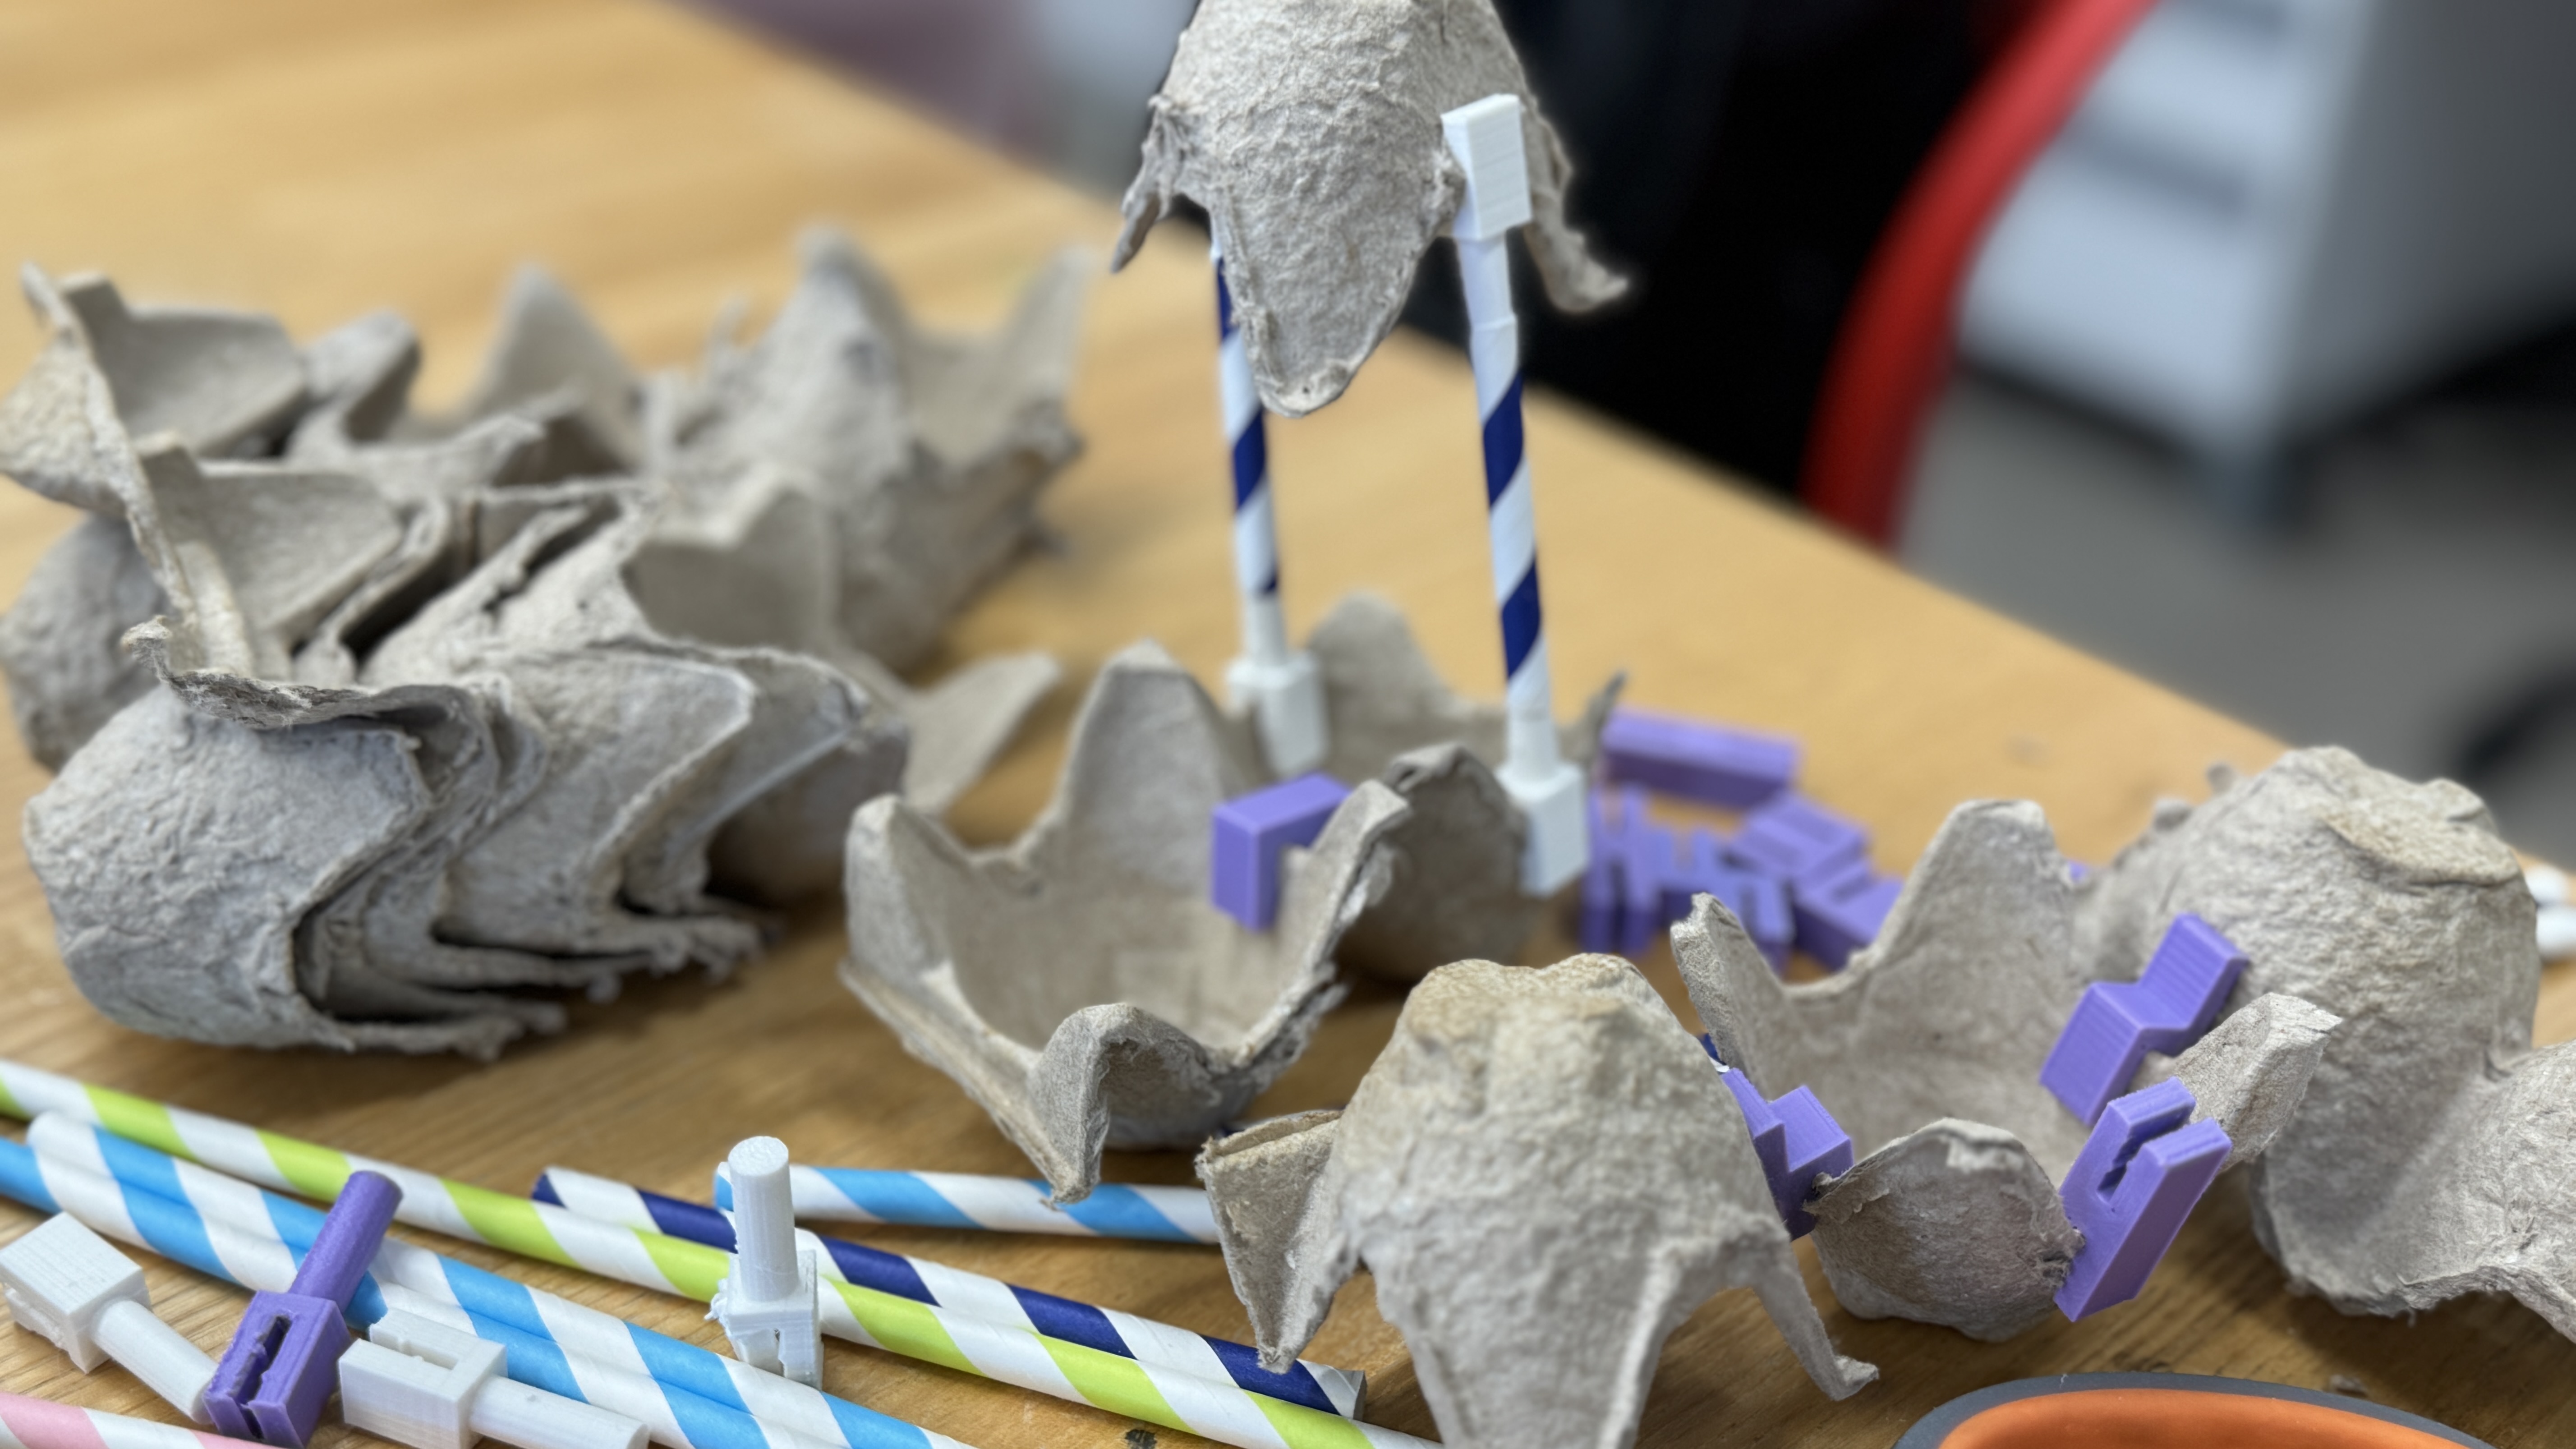
We prepared materials by cutting egg cartons and adjusted the gap size to fit egg cartons (1.3 mm).

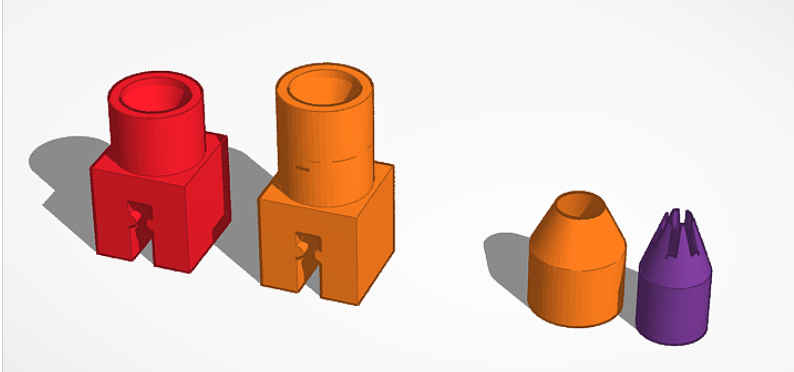
I took the red one as a test, and merged it with hers and sliced with the program.
As a slicer, we used Dremel DigiLab 3D Slicer and Dremel 3D40.


However, the part for the straw turned out to be too big! I guess the straw was for something like a frappe.
Additionally, there was some spaghetti due to my design hanging in the air.
Also, the width of the space between walls was too narrow to put an egg carton.
We set the gap to 2mm.
Take 2
We moved on to take 2.


It was much better.
The connector for egg cartons worked well, but it seemed it would be better if the gap was a little bit wider.
So we adjusted the width to 2.16mm.
Also, about the straw part, it seemed to be sturdier if it's filled and fits inside the straw.
Take 3
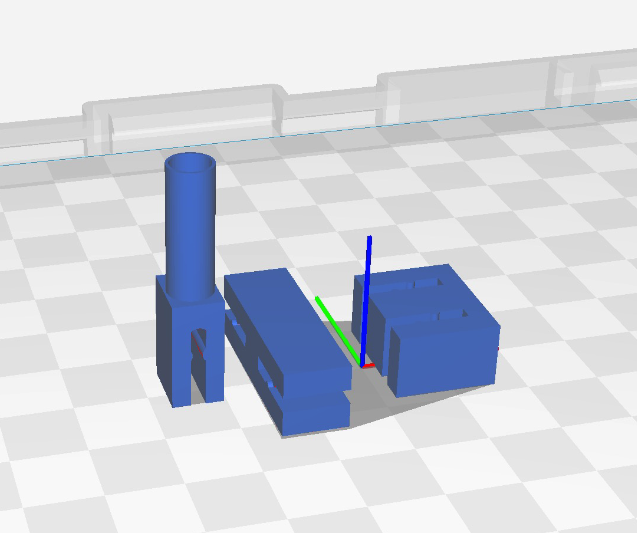
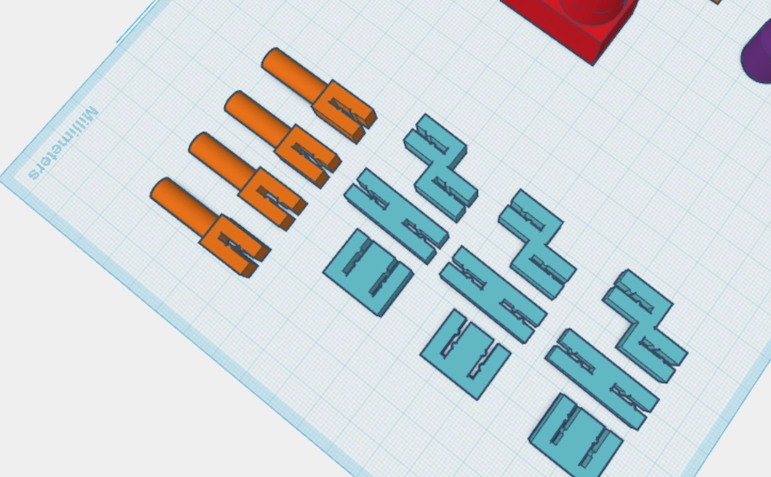
We moved onto take 3. As we were pretty sure of our design, we printed multiple objects.
I did not intend to, but printed those objects in high quality by mistake.
(I did not want to print for a long time for other students 😭)
It took about 4 hours.
My teammate added additional designs for the egg carton connectors, allowing the egg cartons to be connected from various angles.

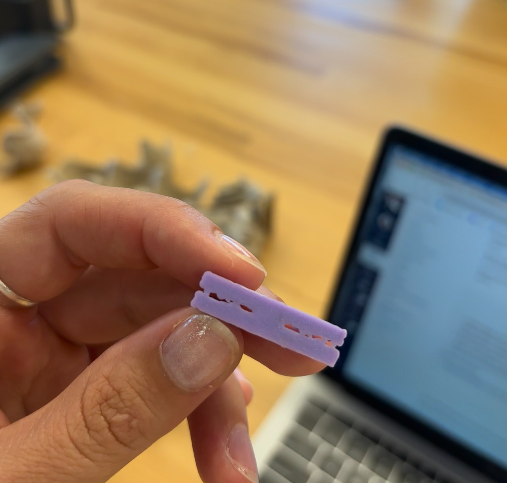
This morning, we checked our printings. Fortunately, they looked great!
There weren't any holes on the faces as they were printed at 1mm. For the last attempts, we printed in mid quality, which means they were printed at 2mm.
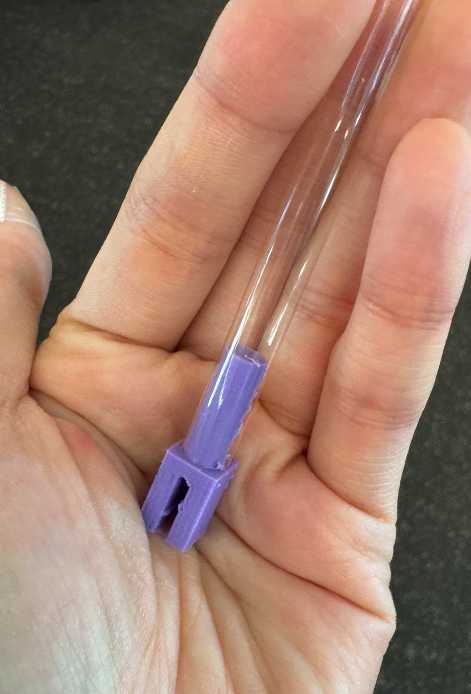
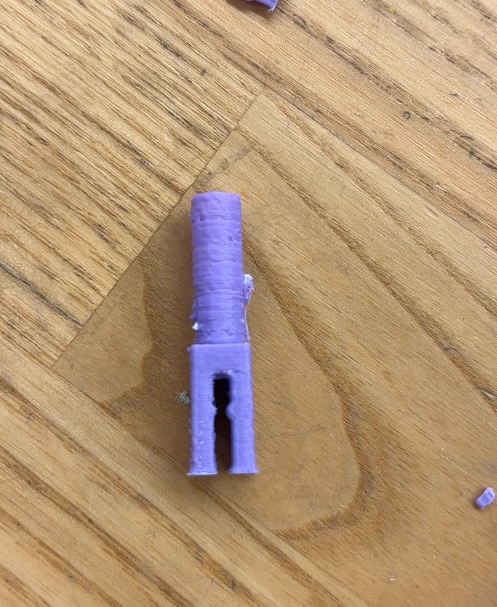
I tested the straw part with a straw at the makerspace and one at the Clover cafe at Cabot Science Library.
This time, it was hard to make it perfectly fit the straw.
So I adjusted the design to be a cone, and reprinted the straw parts again.

This time, I used the printers at the library.
Actually, at Harvard, there are many 3D printers!
https://library.harvard.edu/services-tools/3d-printing
3D Printing
Service Tech Loan Access to laptops, chargers, 360 degree cameras, VR equipment and more for members of the Harvard community.
library.harvard.edu
I could upload files to a certain printer's cloud through a platform.
Then, what I needed to do was just to build the model.


However, to be honest, the 3D printers in the library were not in good condition.
There were four, two of whose beds were damaged.
Also, there were unremoved skirts, which stuck to the bed.
I printed the file with the other two printers as I was not sure if they were okay too.
It took about 2 hours and 16 minutes.
After I received the email that they were done, I went to the library to pick them up!
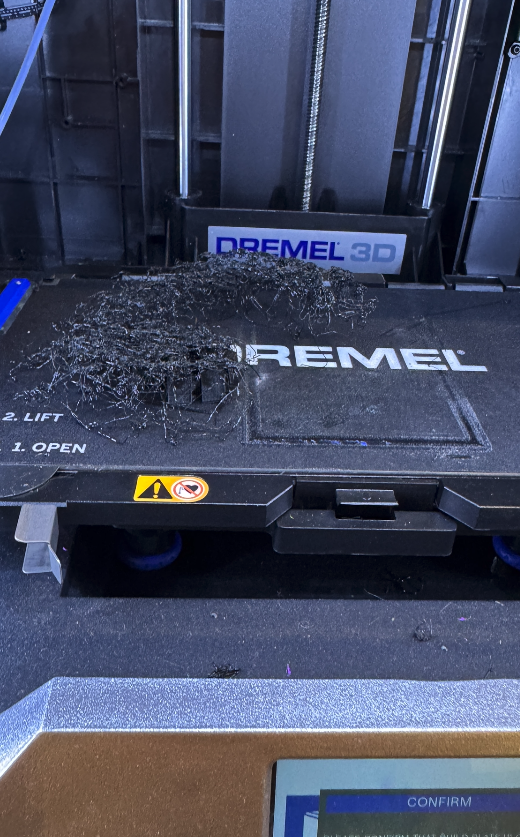
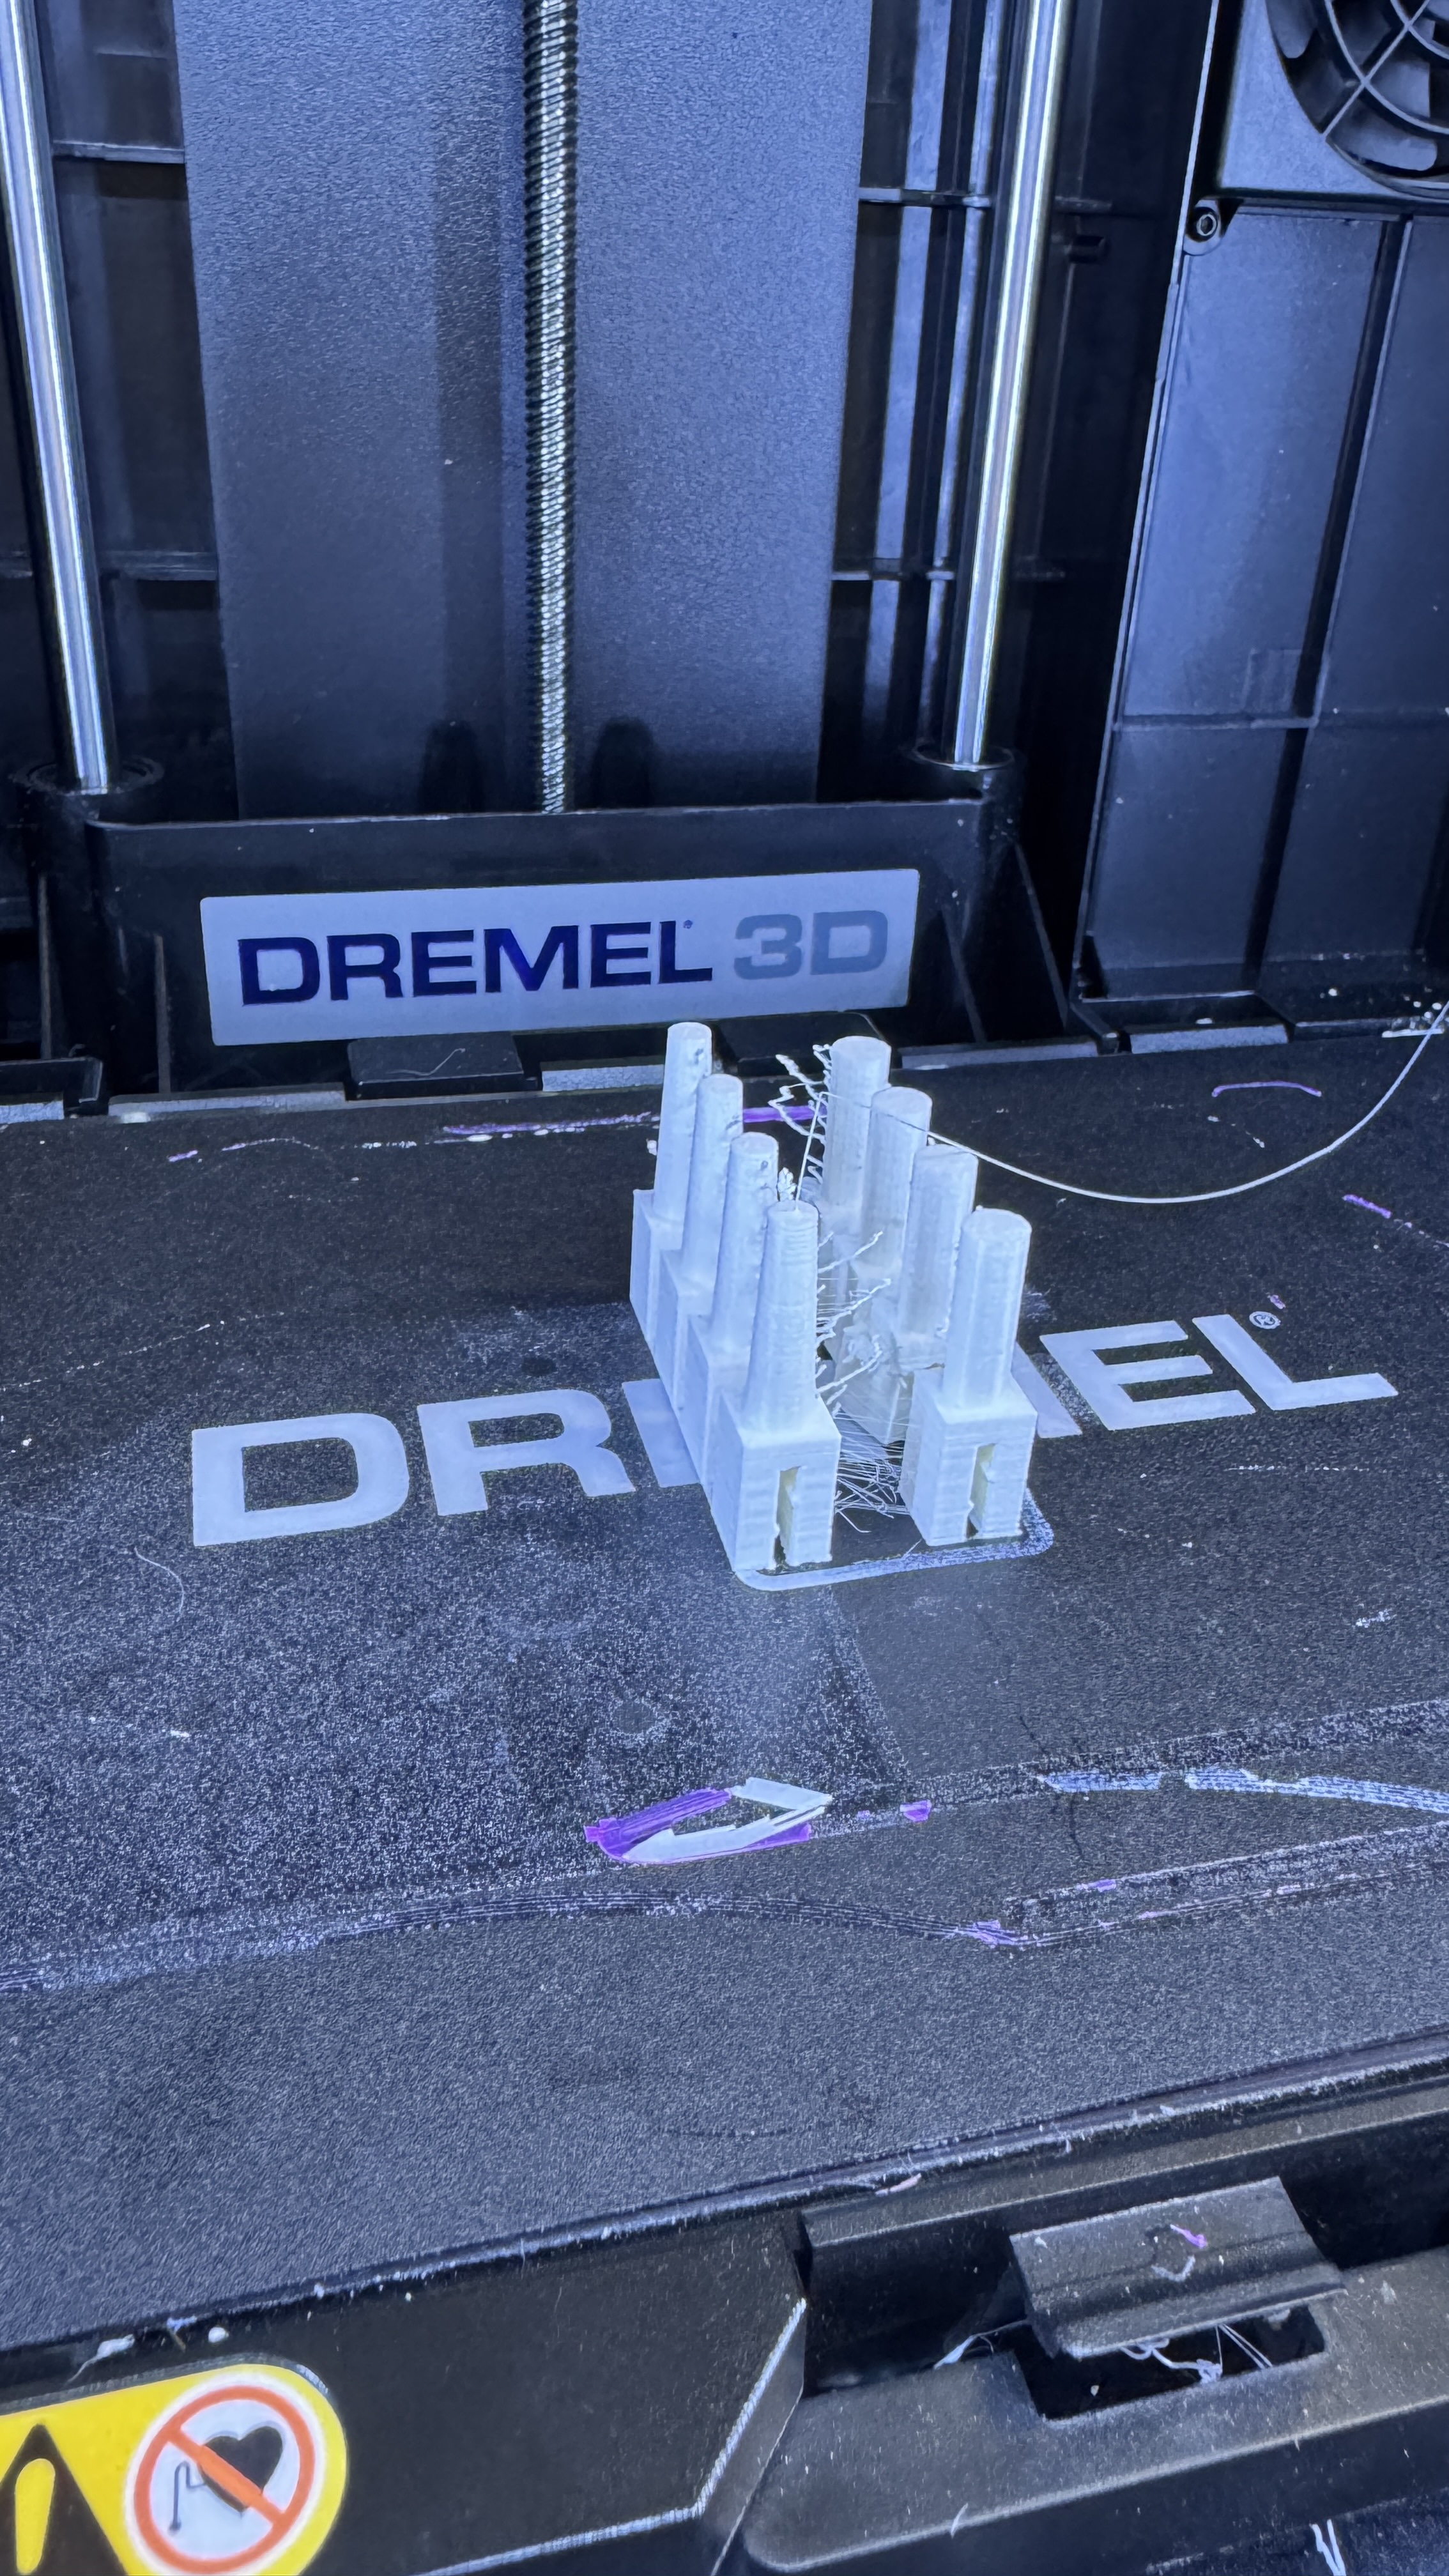
It turned out to be a great decision to use two printers.
One of them made a mess of spaghetti that looked like symbiote. It must have been due to an error in leveling.


The connector successfully fit various sizes of straw!
I really like the advantage of 3D printers that I can make anything that I imagine, however, it takes too much time indeed.
Especially after using a laser cutter, it even felt like it took longer.
However, I was so glad that I had another chance to use it again :)
'STUDY > Ed.M.' 카테고리의 다른 글
| 보스턴에서의 58일: 학습 후기 (0) | 2025.09.26 |
|---|---|
| 보스턴 캠브리지 메이커 문화와 메이커 스페이스 (1) (0) | 2025.09.24 |
| [T519] 3. Omni creature (0) | 2025.09.16 |
| [T519] 2. CoralDRAW와 레이저 커터로 이름표 만들기 (0) | 2025.09.07 |
| [T519] 1. Gear Essay (0) | 2025.09.06 |


댓글