
This week, I continued practicing with the laser cutter by creating a project inspired by a peer from my course.
Project Requirements:
- Communicate three different aspects of someone else’s identity.
- Use all base connections except the Universal Snap Fit (base shape can be modified, but holes must remain).
- All pieces must fit within a 12x18” area.
- No names included, so the creature’s owner is a mystery in class.
1. Ideation and Hand Drawing
My goal was to express three key characteristics of my peer, based on our interview:
- Rowing boat
- Him and his partner
- Sour Patch Kids
- Night
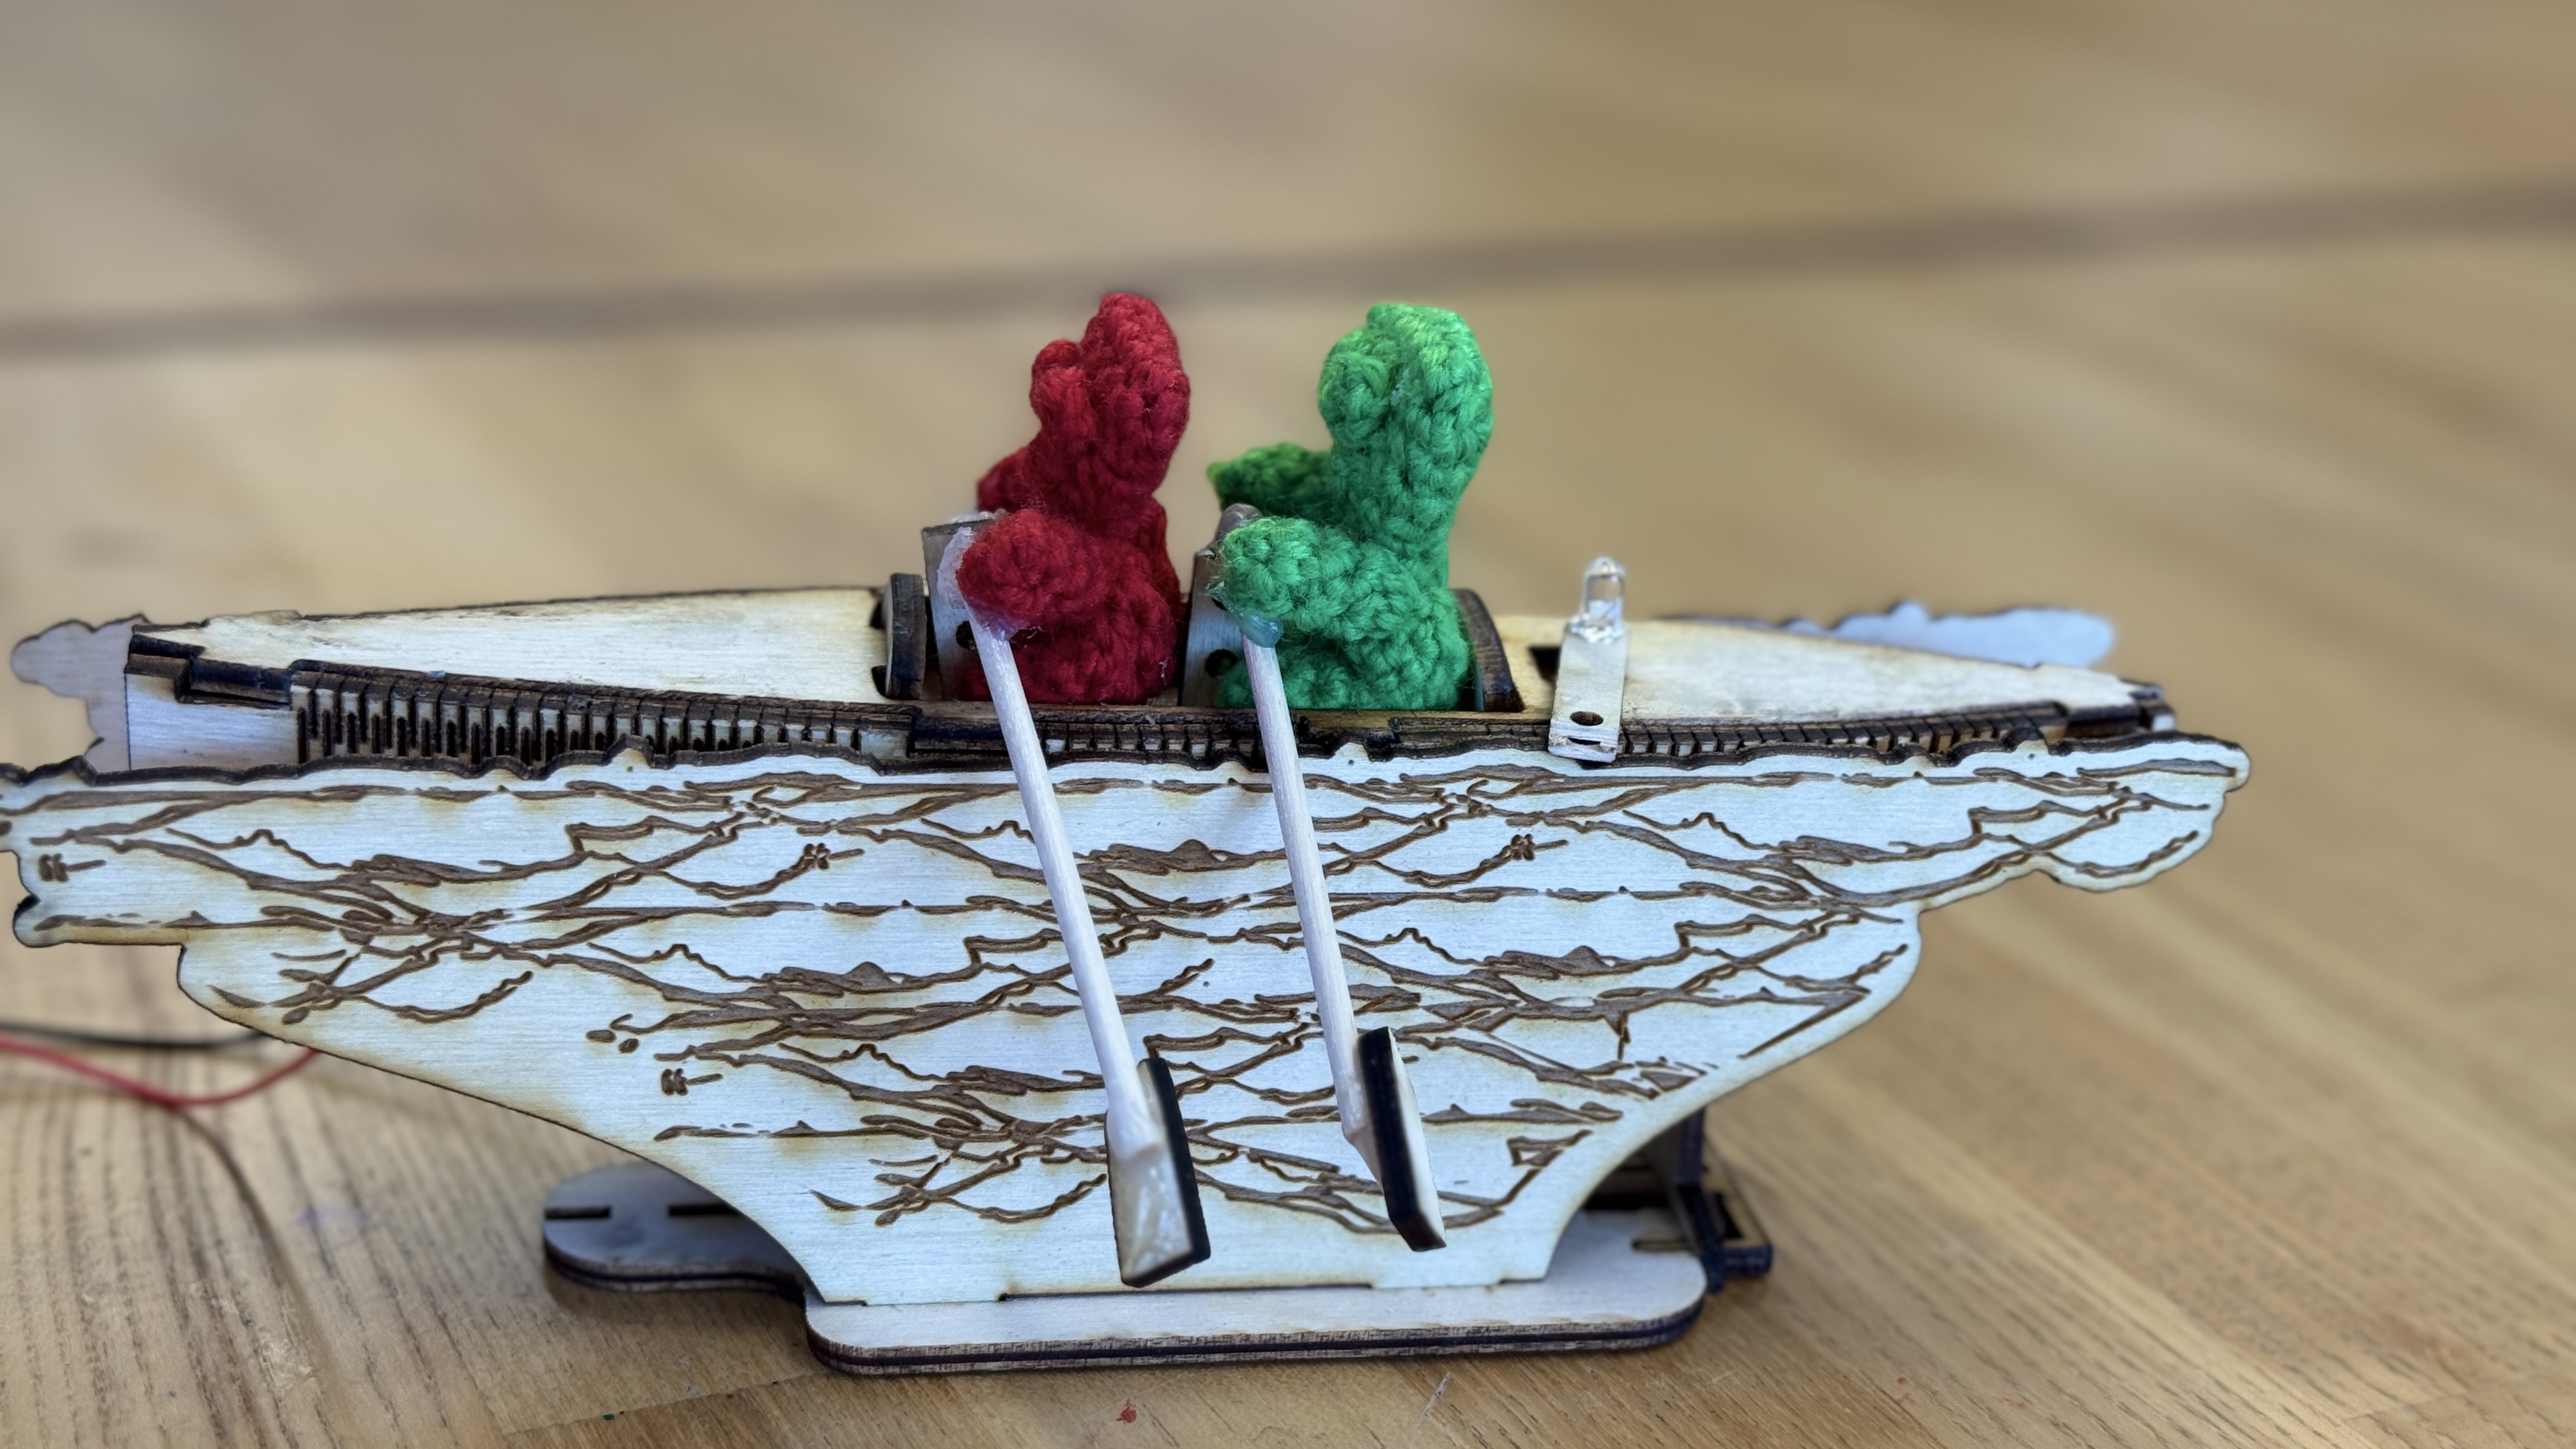
I merged all these elements into one design: two Sour Patch Kids on a rowing boat, with a night backdrop behind the boat. The two Sour Patch Kids represent my peer and his partner. He mentioned that they always had Sour Patch Kids whenever they went out for shows or movies. Given his experience as both a rowing athlete and a rowing coach, including a rowing boat felt essential.
Because I was designing and making this for someone else, I was especially careful throughout the process. In a way, it felt like a kind of social responsibility. I wanted to avoid any misinterpretation, which made me reflect on the challenges artists face when portraying others.
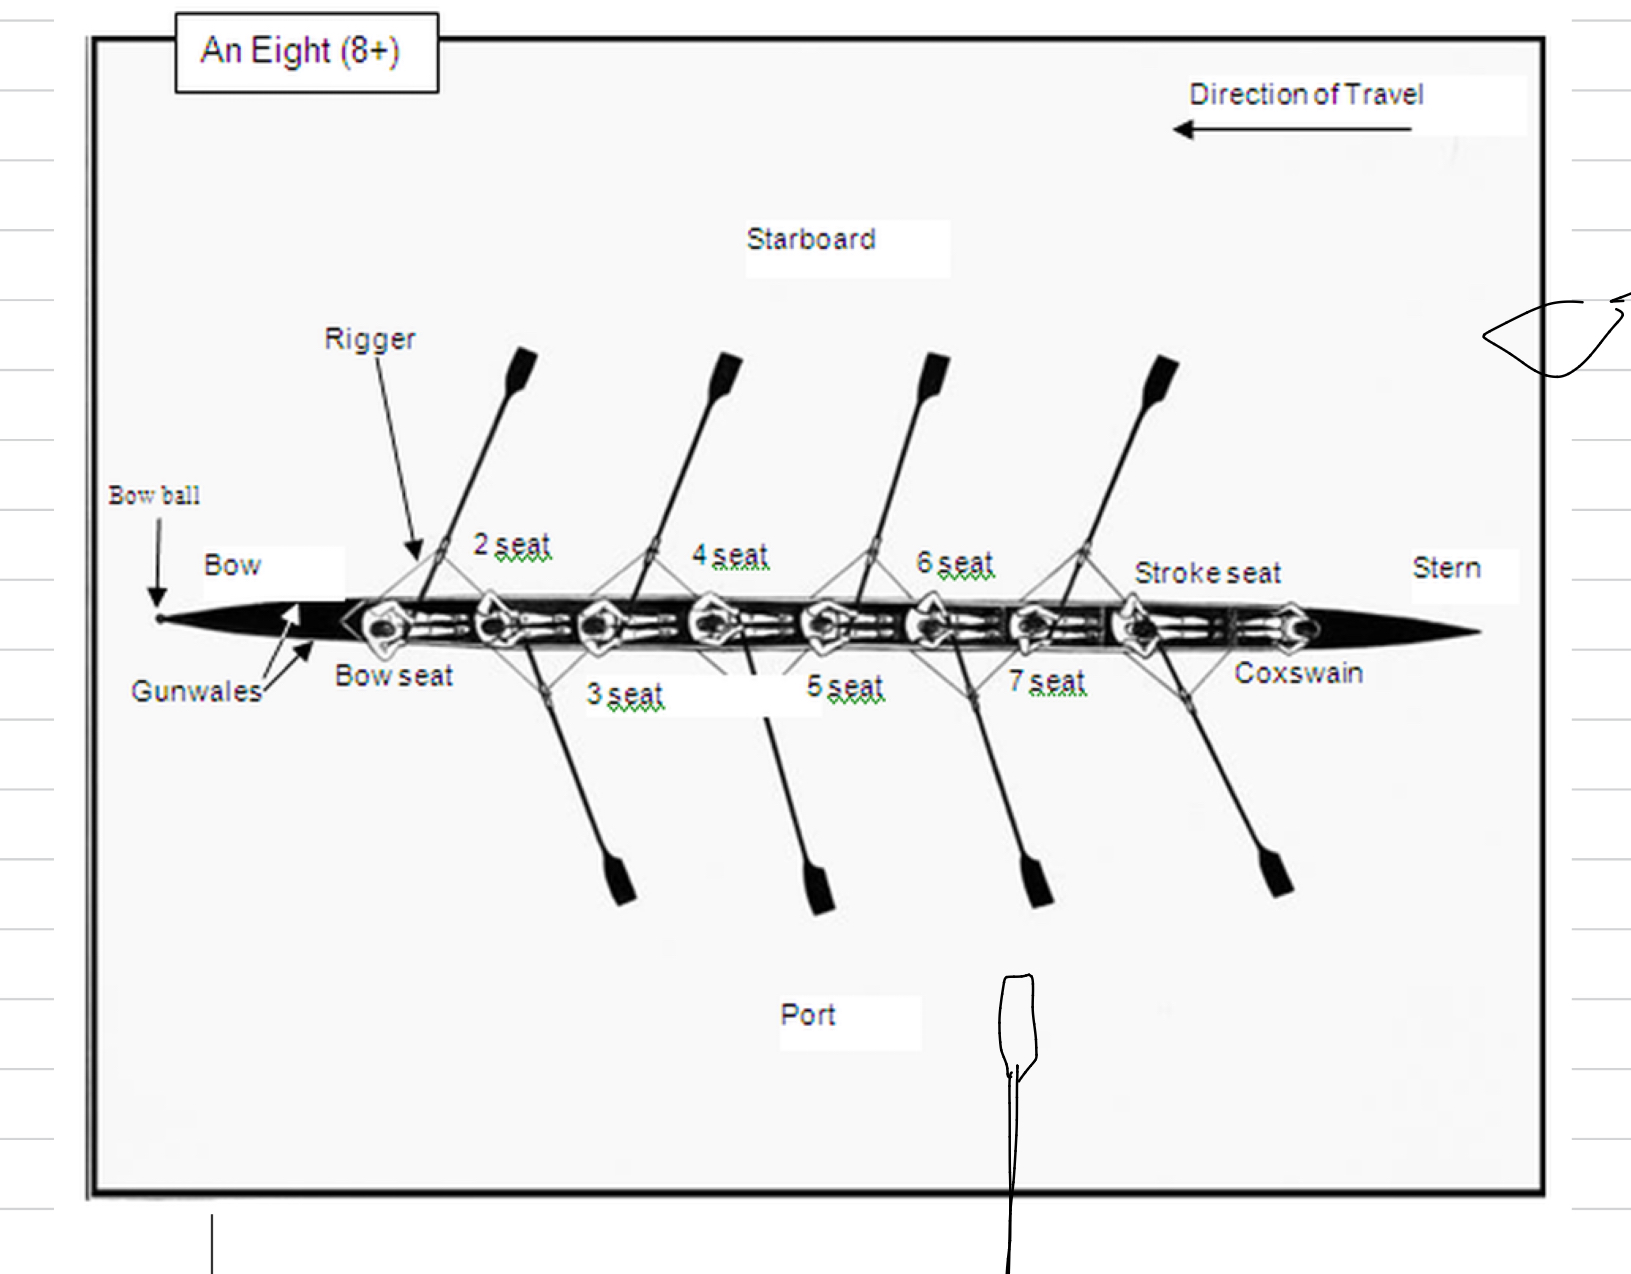
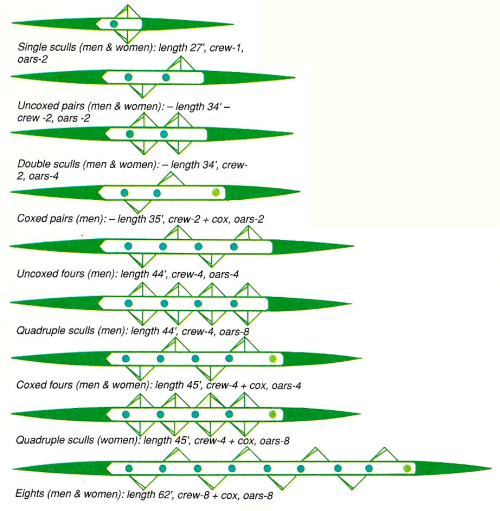
For example, I couldn’t make a rowing boat designed for 10 people because of the limited size of the plywood.

As a result, I had to design a boat for two. It was also difficult to accurately capture the curves of the boat. If I could have made the boat larger, I might have been able to shape the curve by adding more force, but the material was too thin for that. Therefore, I decided to use these curves from https://www.thingiverse.com/thing:34286.
2. Initial Circuits
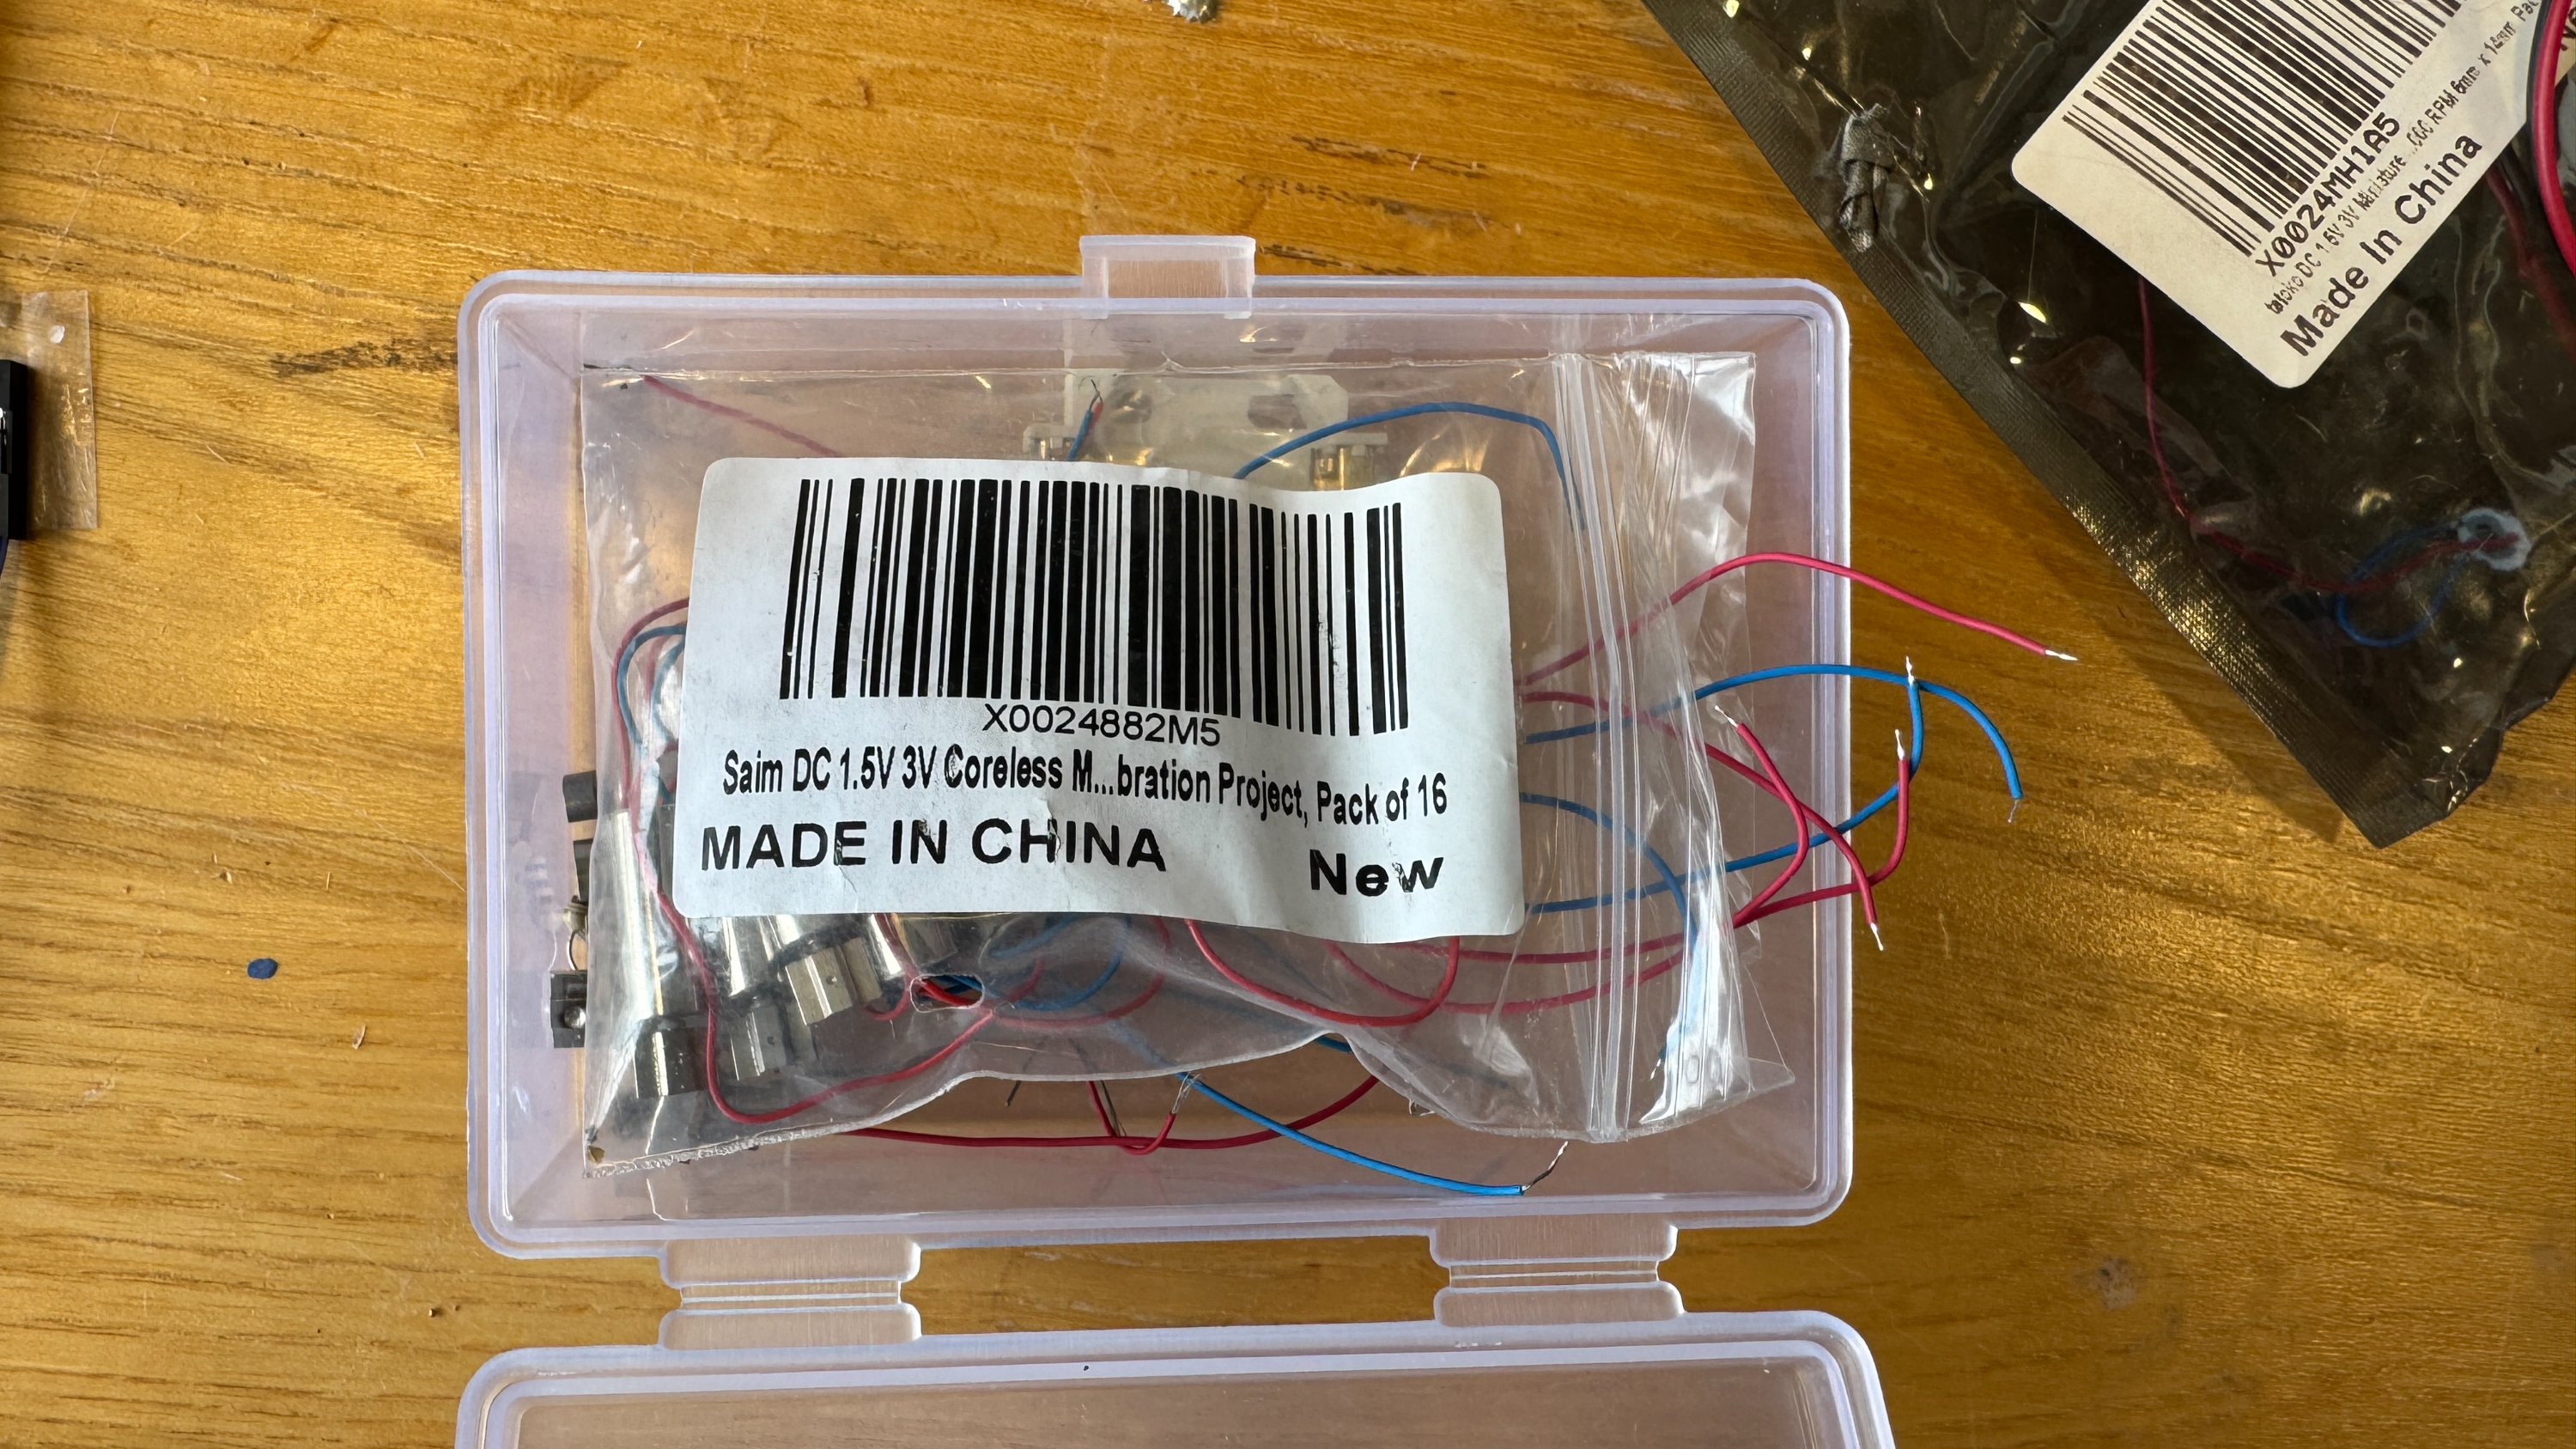

After sketching the design, I considered the electronics. I wanted movement, so I searched for small motors compatible with my compact project. A 3V coin cell powered a simple circuit, and I was excited to solder again!
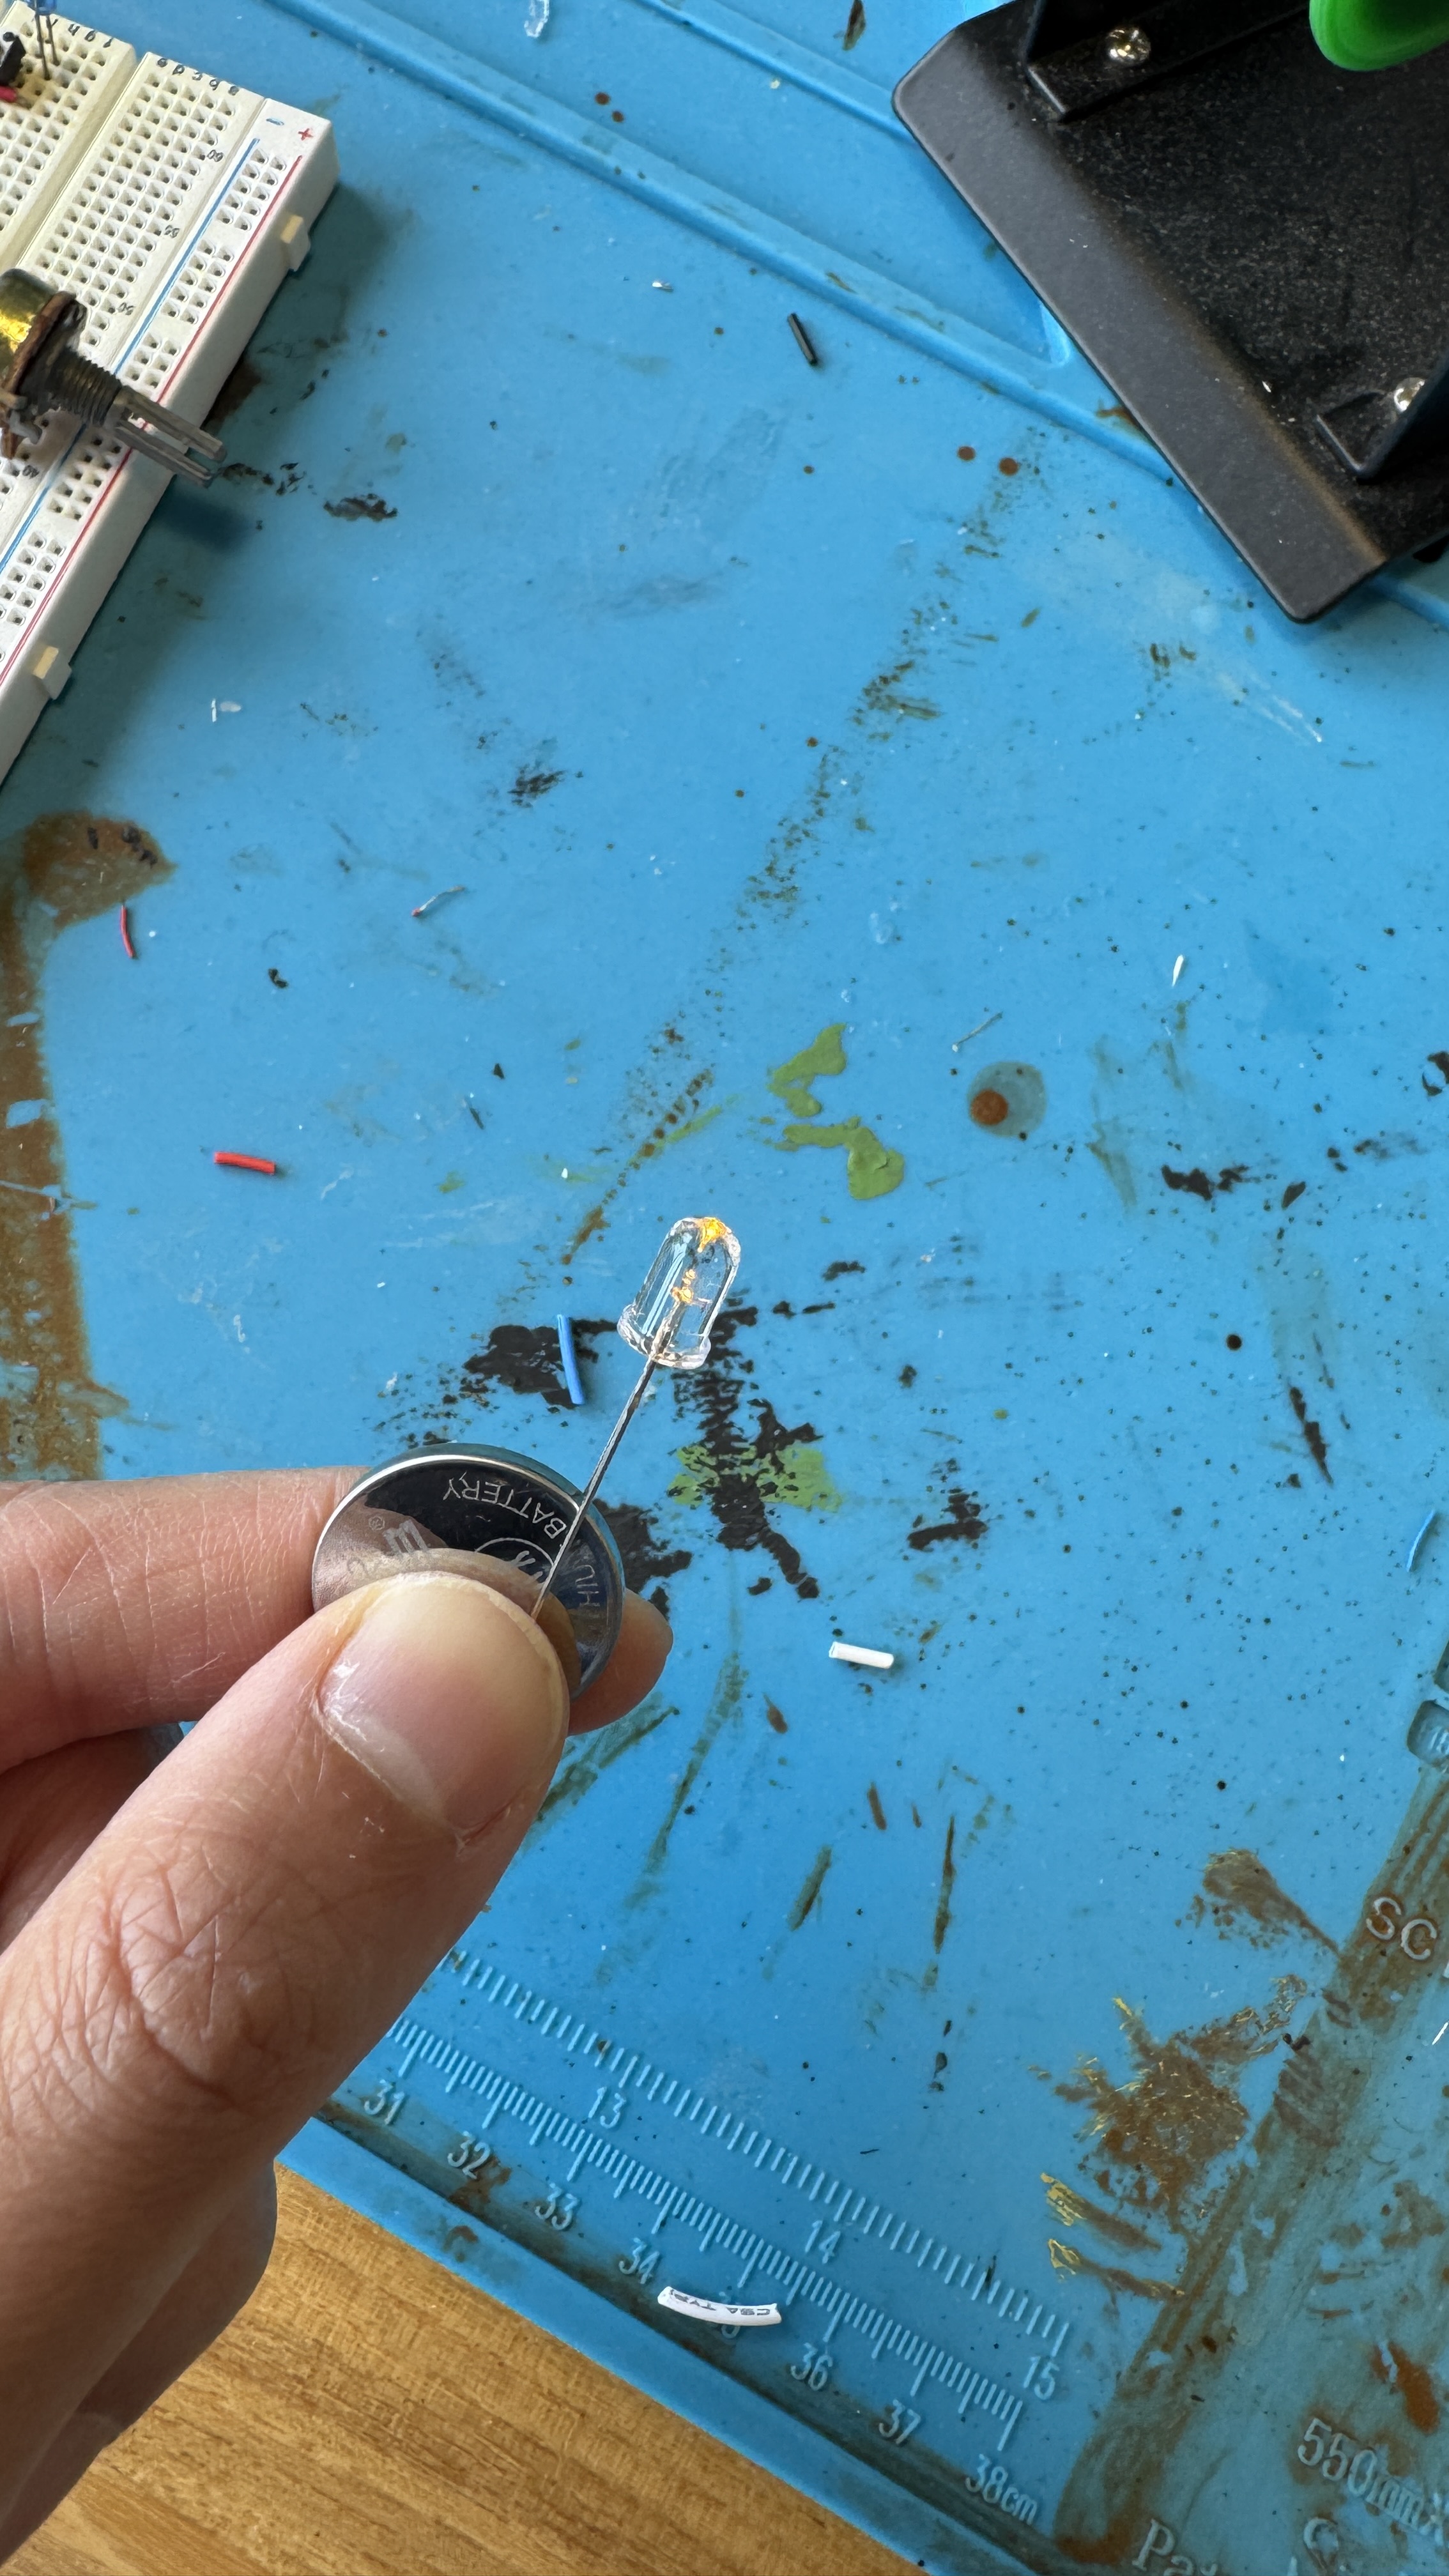
I also added a cozy LED night light.
3. Crochet

I had a great opportunity to make the Sour Patch Kids during Knit and Crochet Night for graduate students on Wednesday. Although I left my own hooks at home in Korea, I was able to borrow one.
The most challenging part was getting the head to sit properly. My first attempt took two hours to complete, but the head ended up too large to fit on the rowing boat.


So, I made another Sour Patch Kid at half the original size—about 2 cm tall.

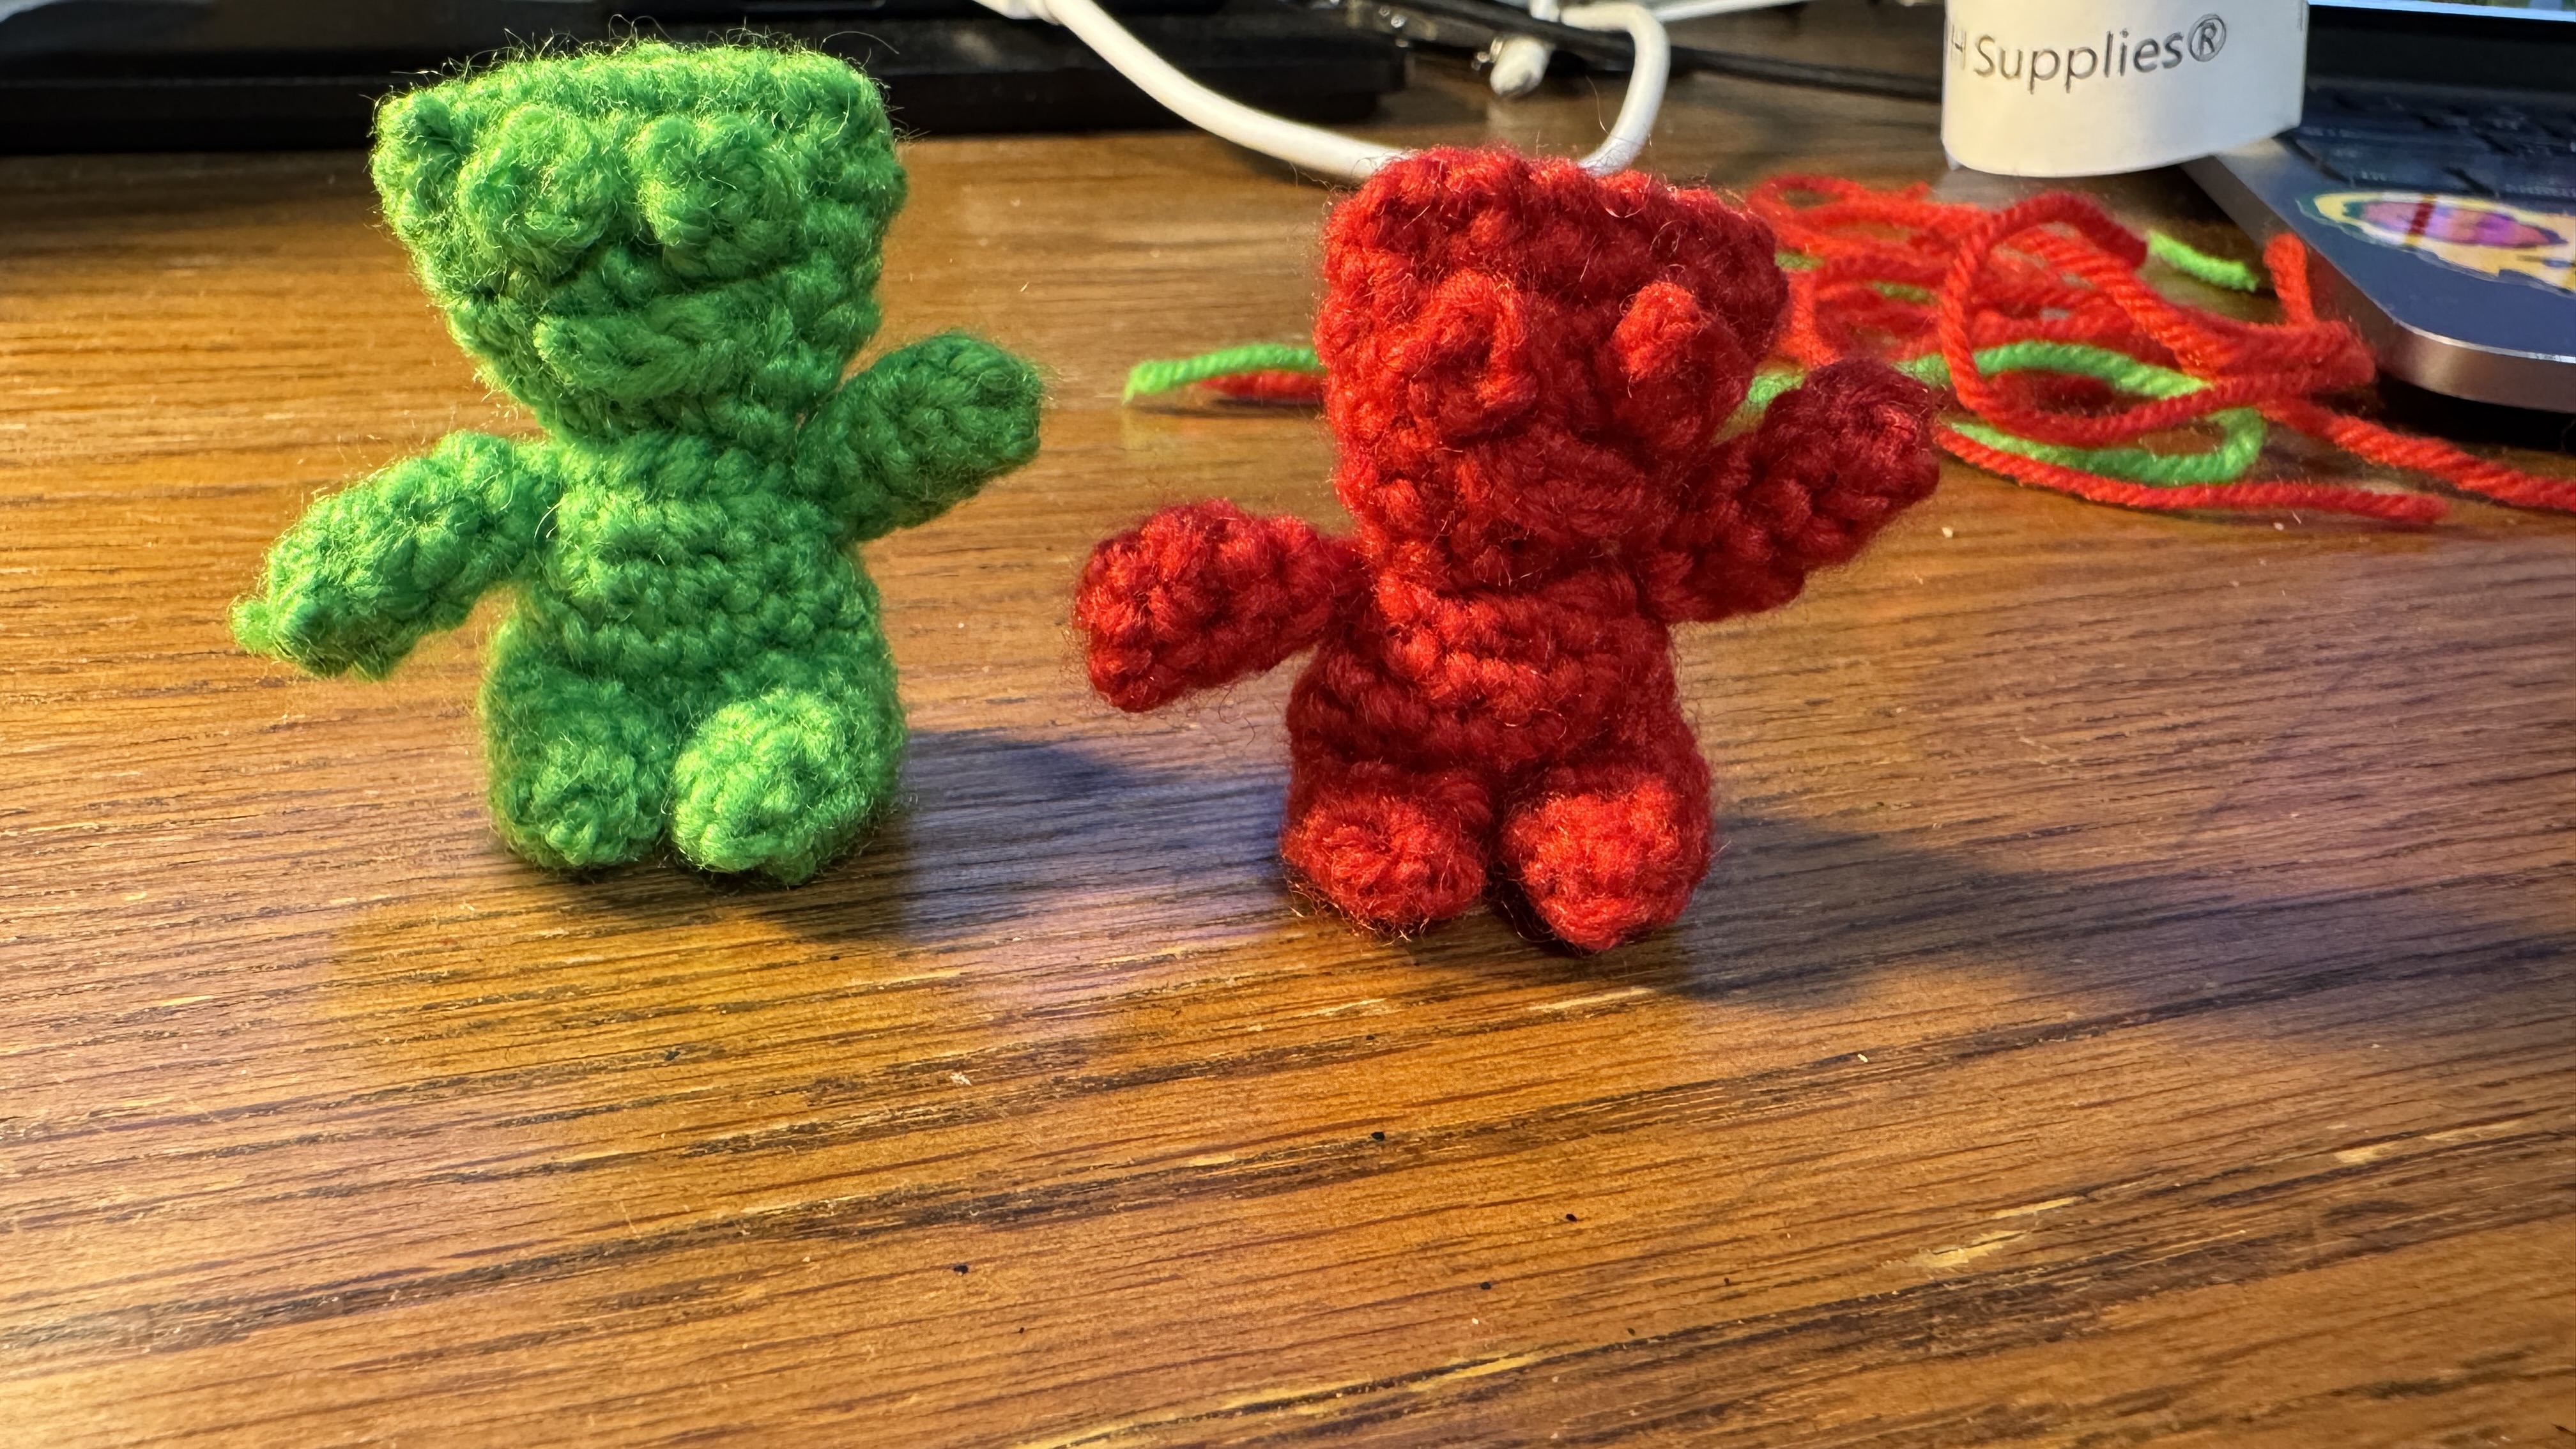
Each one took about an hour to make. With my prior experience, I started by crocheting the head first. Then, I made two legs separately and connected them, building upwards to form the body. I also wanted the arms to be able to rotate so they could “row” the boat, so I attached the arms last.
4. Design & Cut
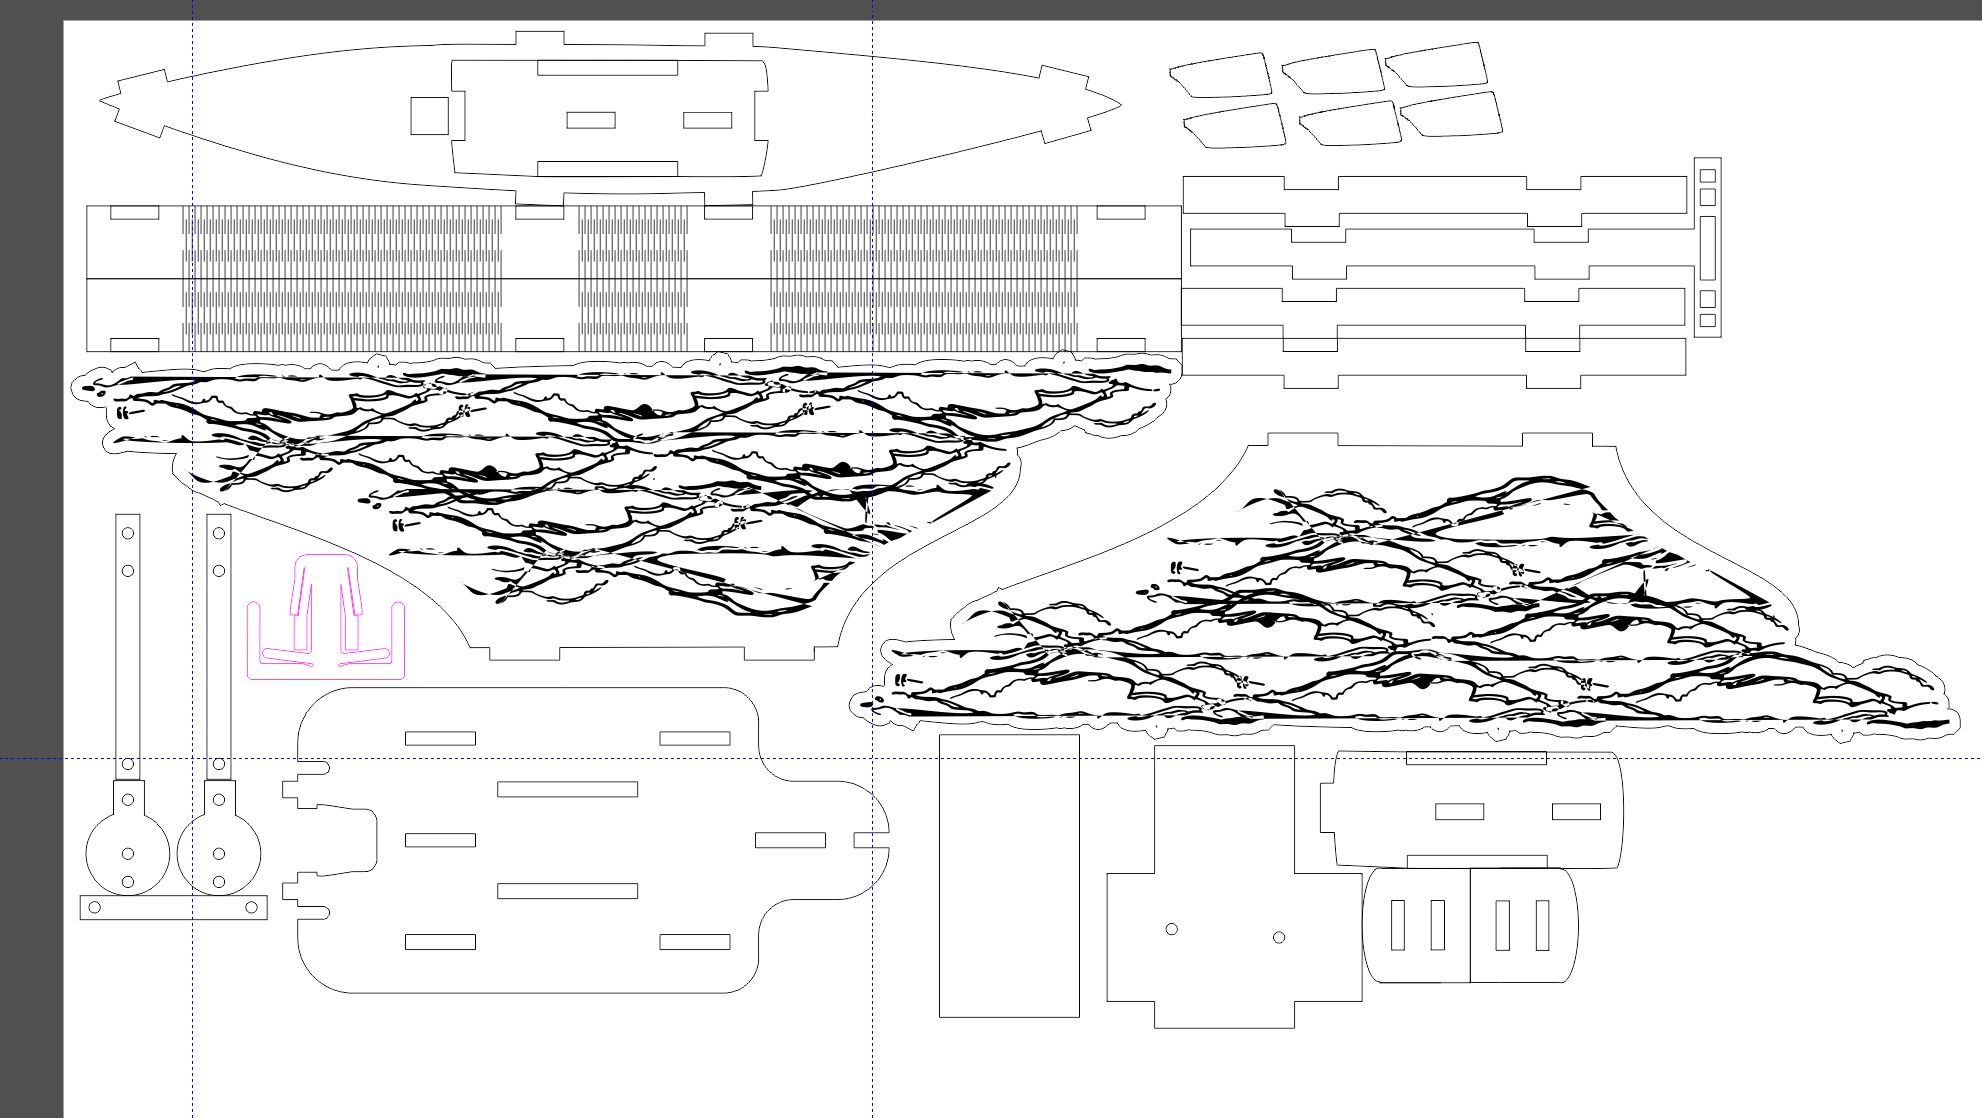
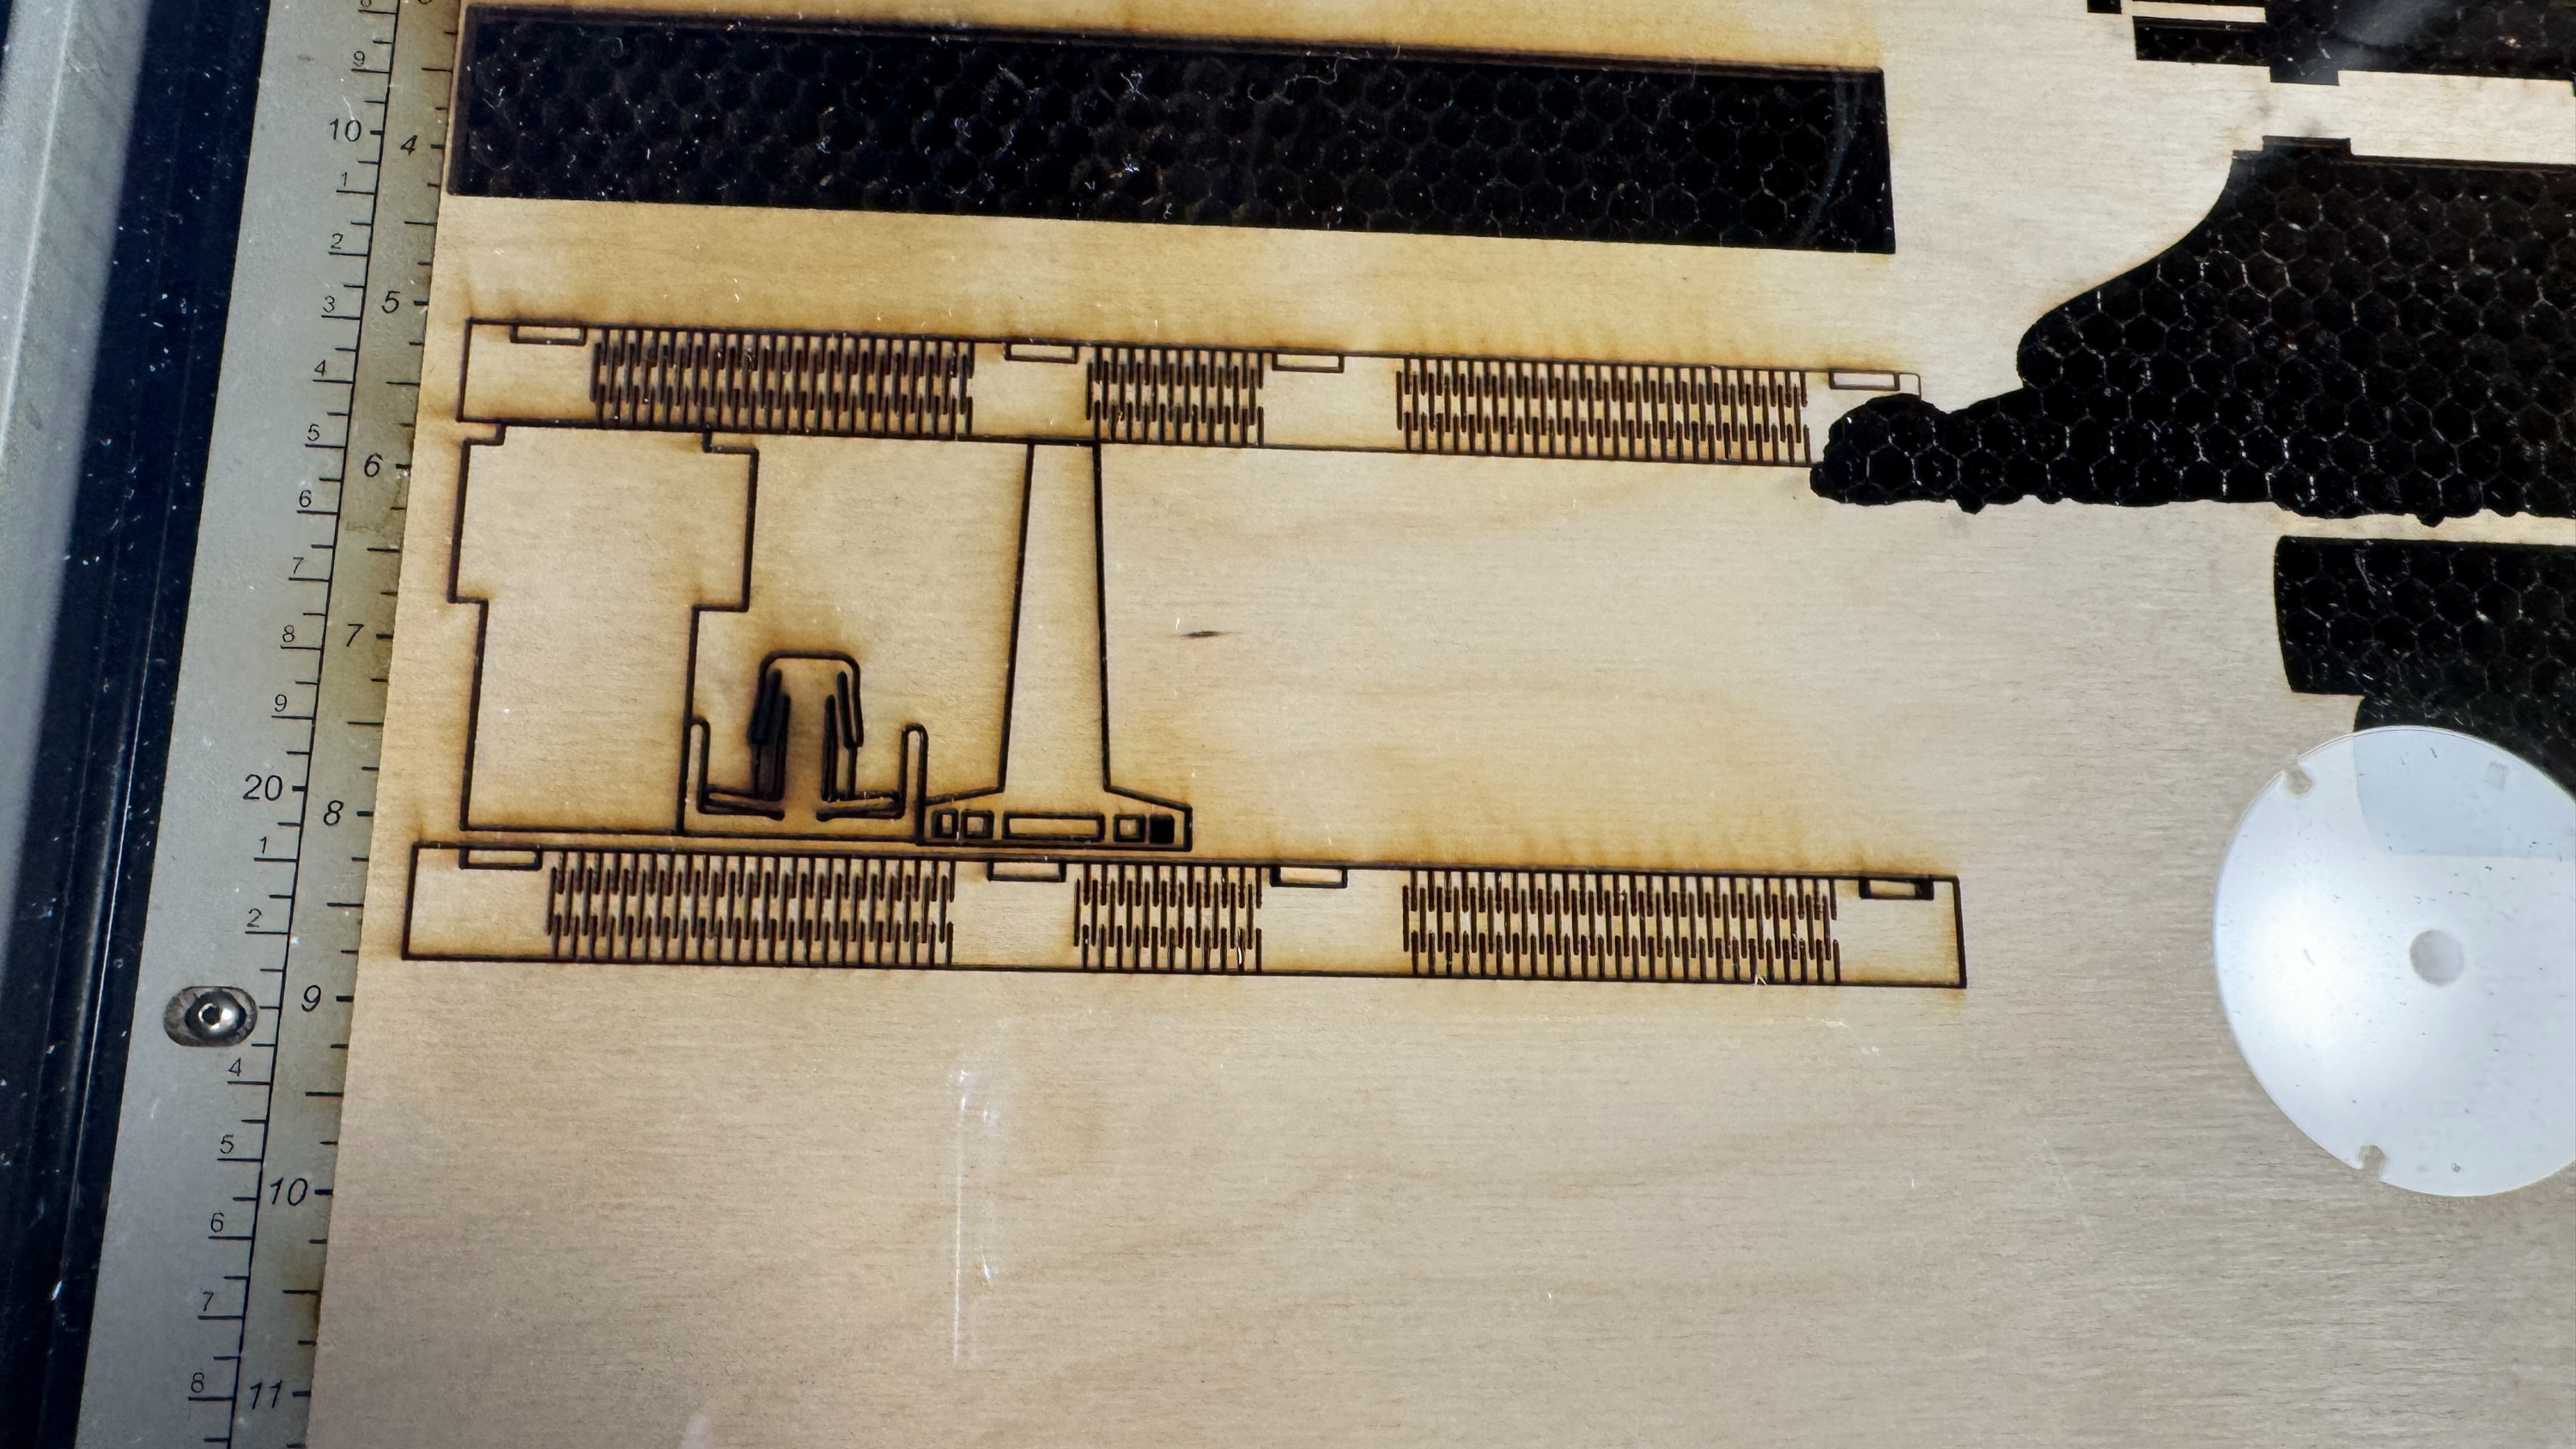
For this project, I made sure to include engraved details to depict the water. To accurately shape the boat and the oars, I began by researching rowing, using resources like this guide (https://www.ez-dock.com/blog/rowing-101/).
I used tab-slot joints as press-fit connectors to attach the boat’s bottom to the “waves” and to connect the boat stands.
Sculling vs. Rowing | Types of Rowing Boats | EZ Dock
Looking to learn more about rowing? Check out our guide that explores the differences between rowing and sculling, types of crew boats and more!
www.ez-dock.com
While searching for some references, I found an amazing project on instructables!
https://www.instructables.com/Racing-Scull-Rowing-Boat/
Racing Scull Rowing Boat
Racing Scull Rowing Boat: I have always thought it would be cool to have a fast row boat to take down to our local lake. When I saw free plans at http://koti.kapsi.fi/hvartial/scull1/scull1.htm, I thought I would give it a try. I highly recommend you study
www.instructables.com
While I tried to mimic some design elements, the small size required for my boat made it impossible to fully replicate them, so I extracted key features from both graphics and real images.


During assembly, I encountered several problems:
- Asymmetry: The boat was initially asymmetric, so I had to recut one side more than four times. Adjusting the joint positions helped achieve the right fit. I wanted it to be as accurate as possible since it was meant to depict someone else.


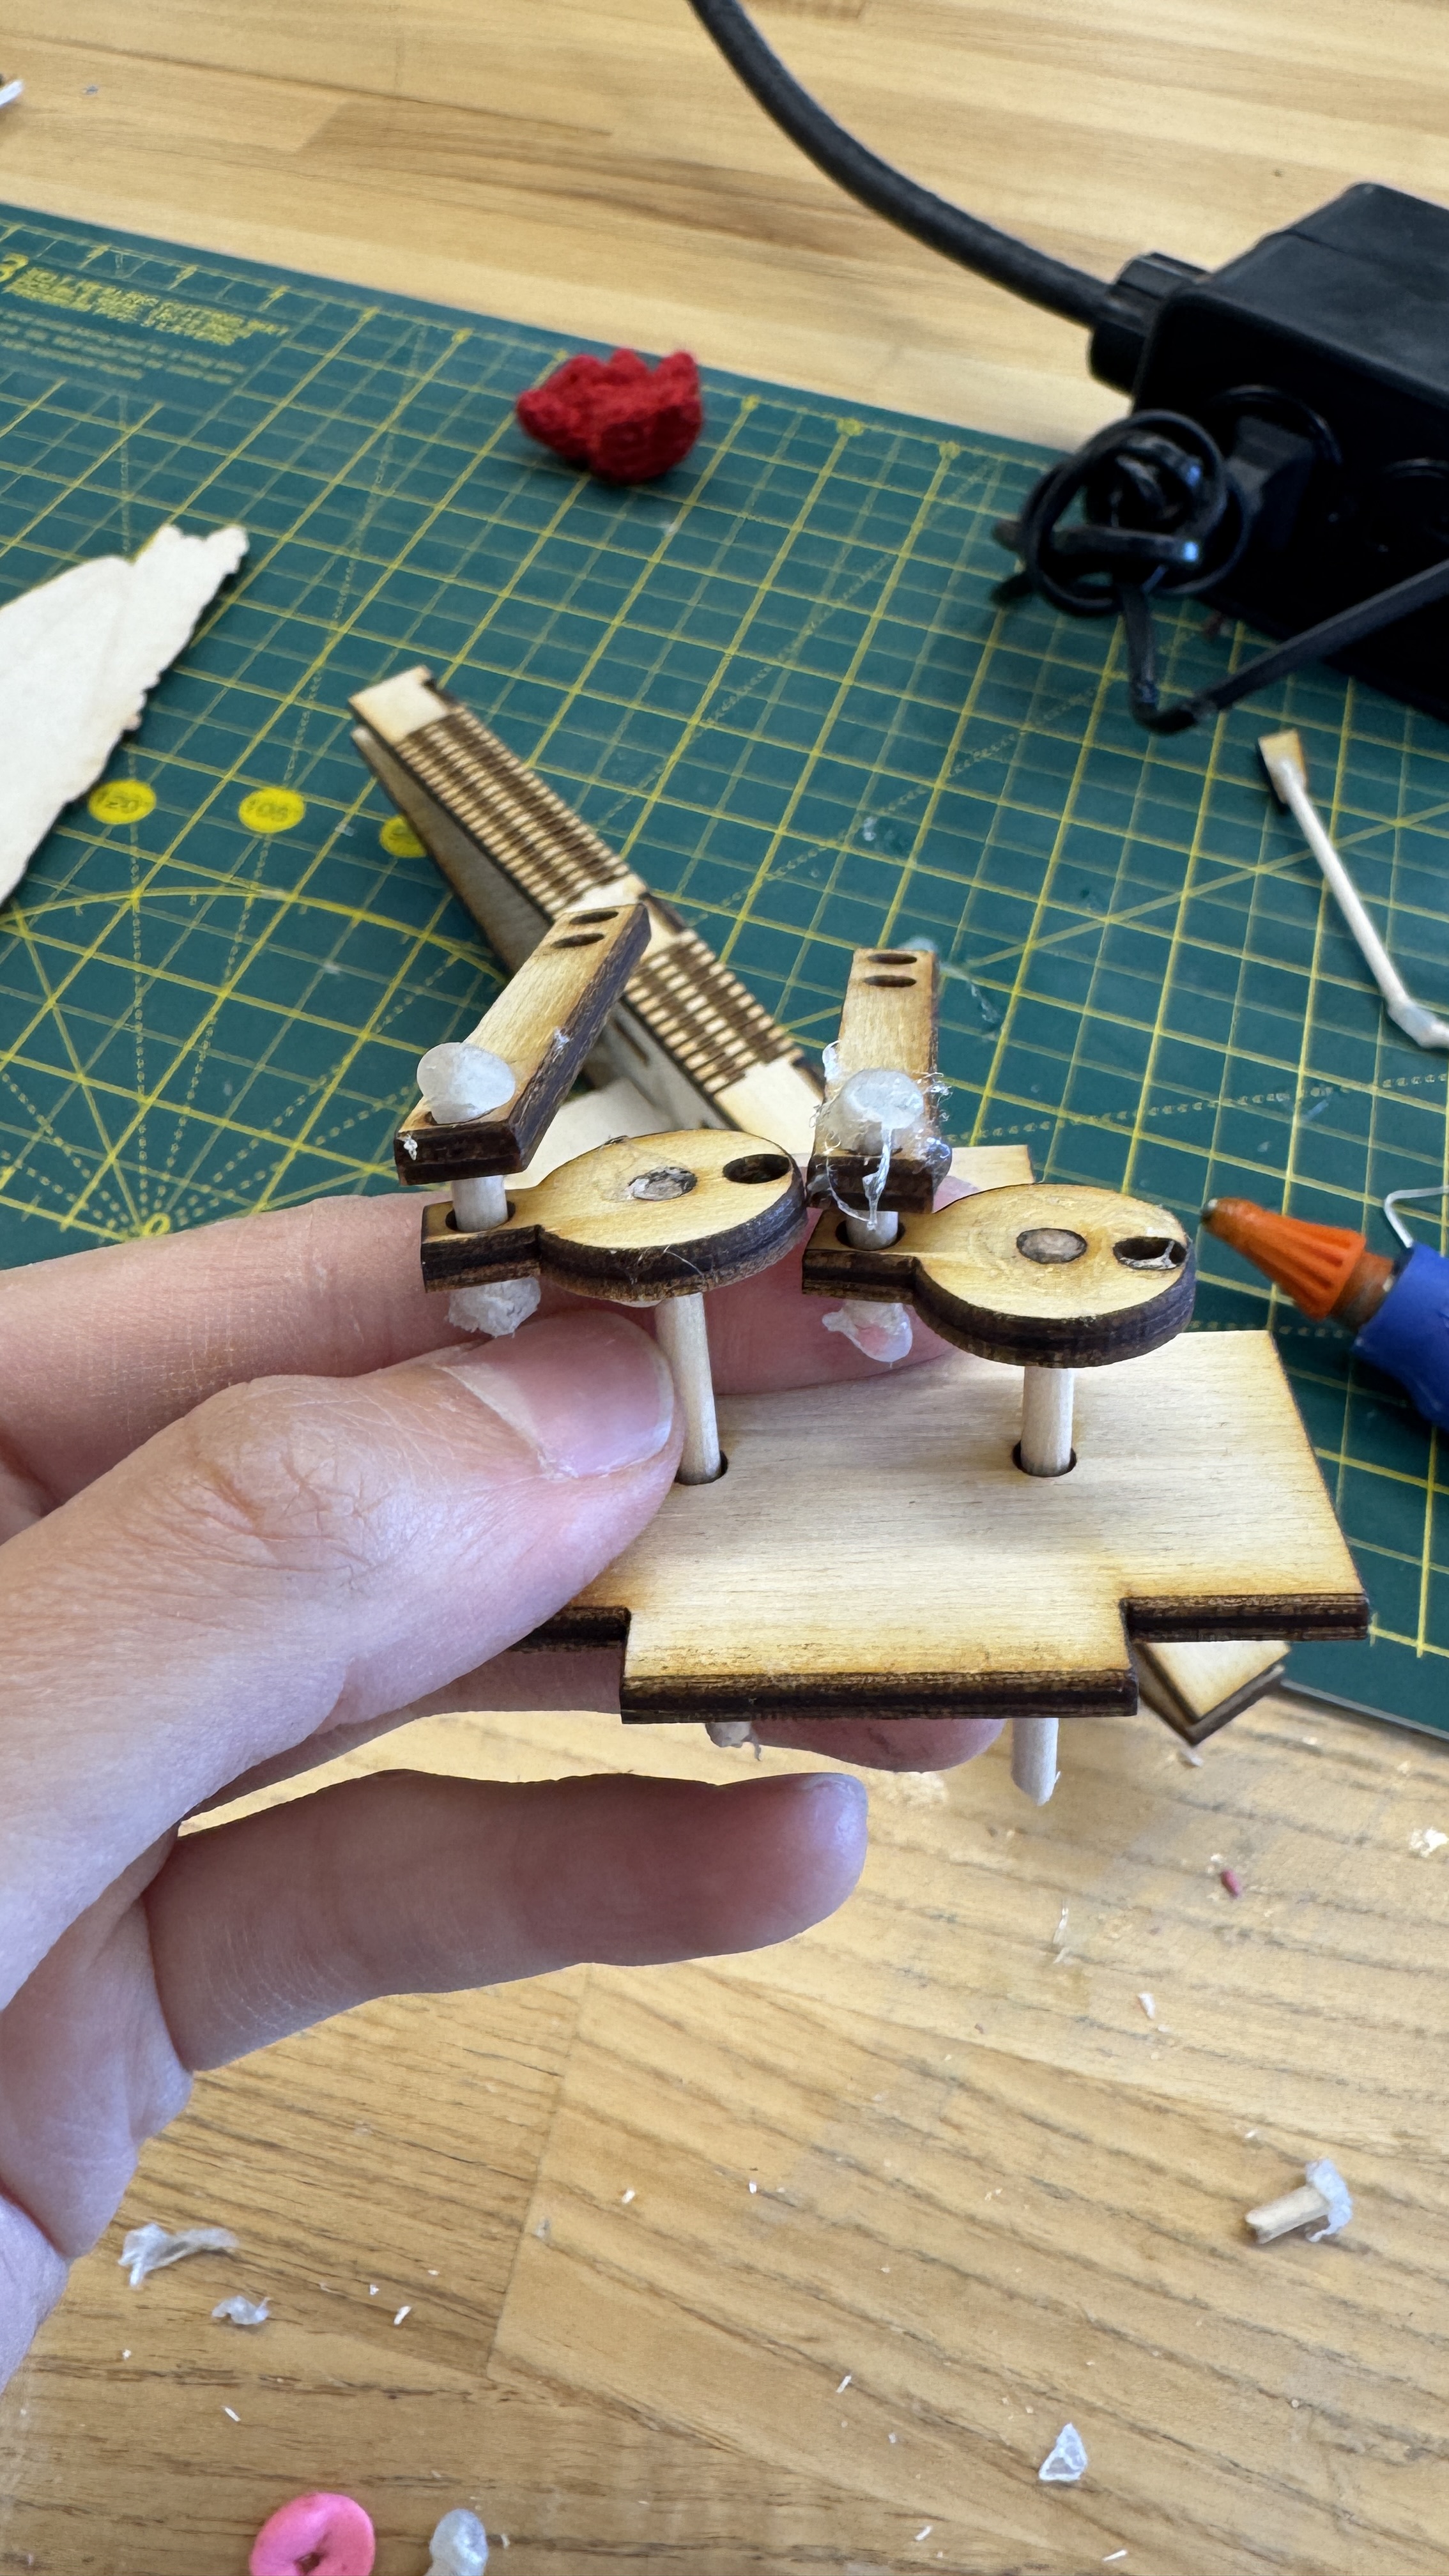

Crank mechanism challenge: One of the biggest challenges was attempting to create moving paddles, ideally powered by a motor.
I referenced this document- https://learn.birdbraintechnologies.com/hummingbirdduo/projects/laser-cut-mechanisms/laser-cut-mechanisms-cranks/ - but producing a mechanism small enough proved difficult. The holes on the bottom of the boat needed to be longer for the bars to move freely, and the space between the boat stands needed to be wider and arranged in an “A” shape. Due to these constraints, I decided to connect the circuit to the lights only.
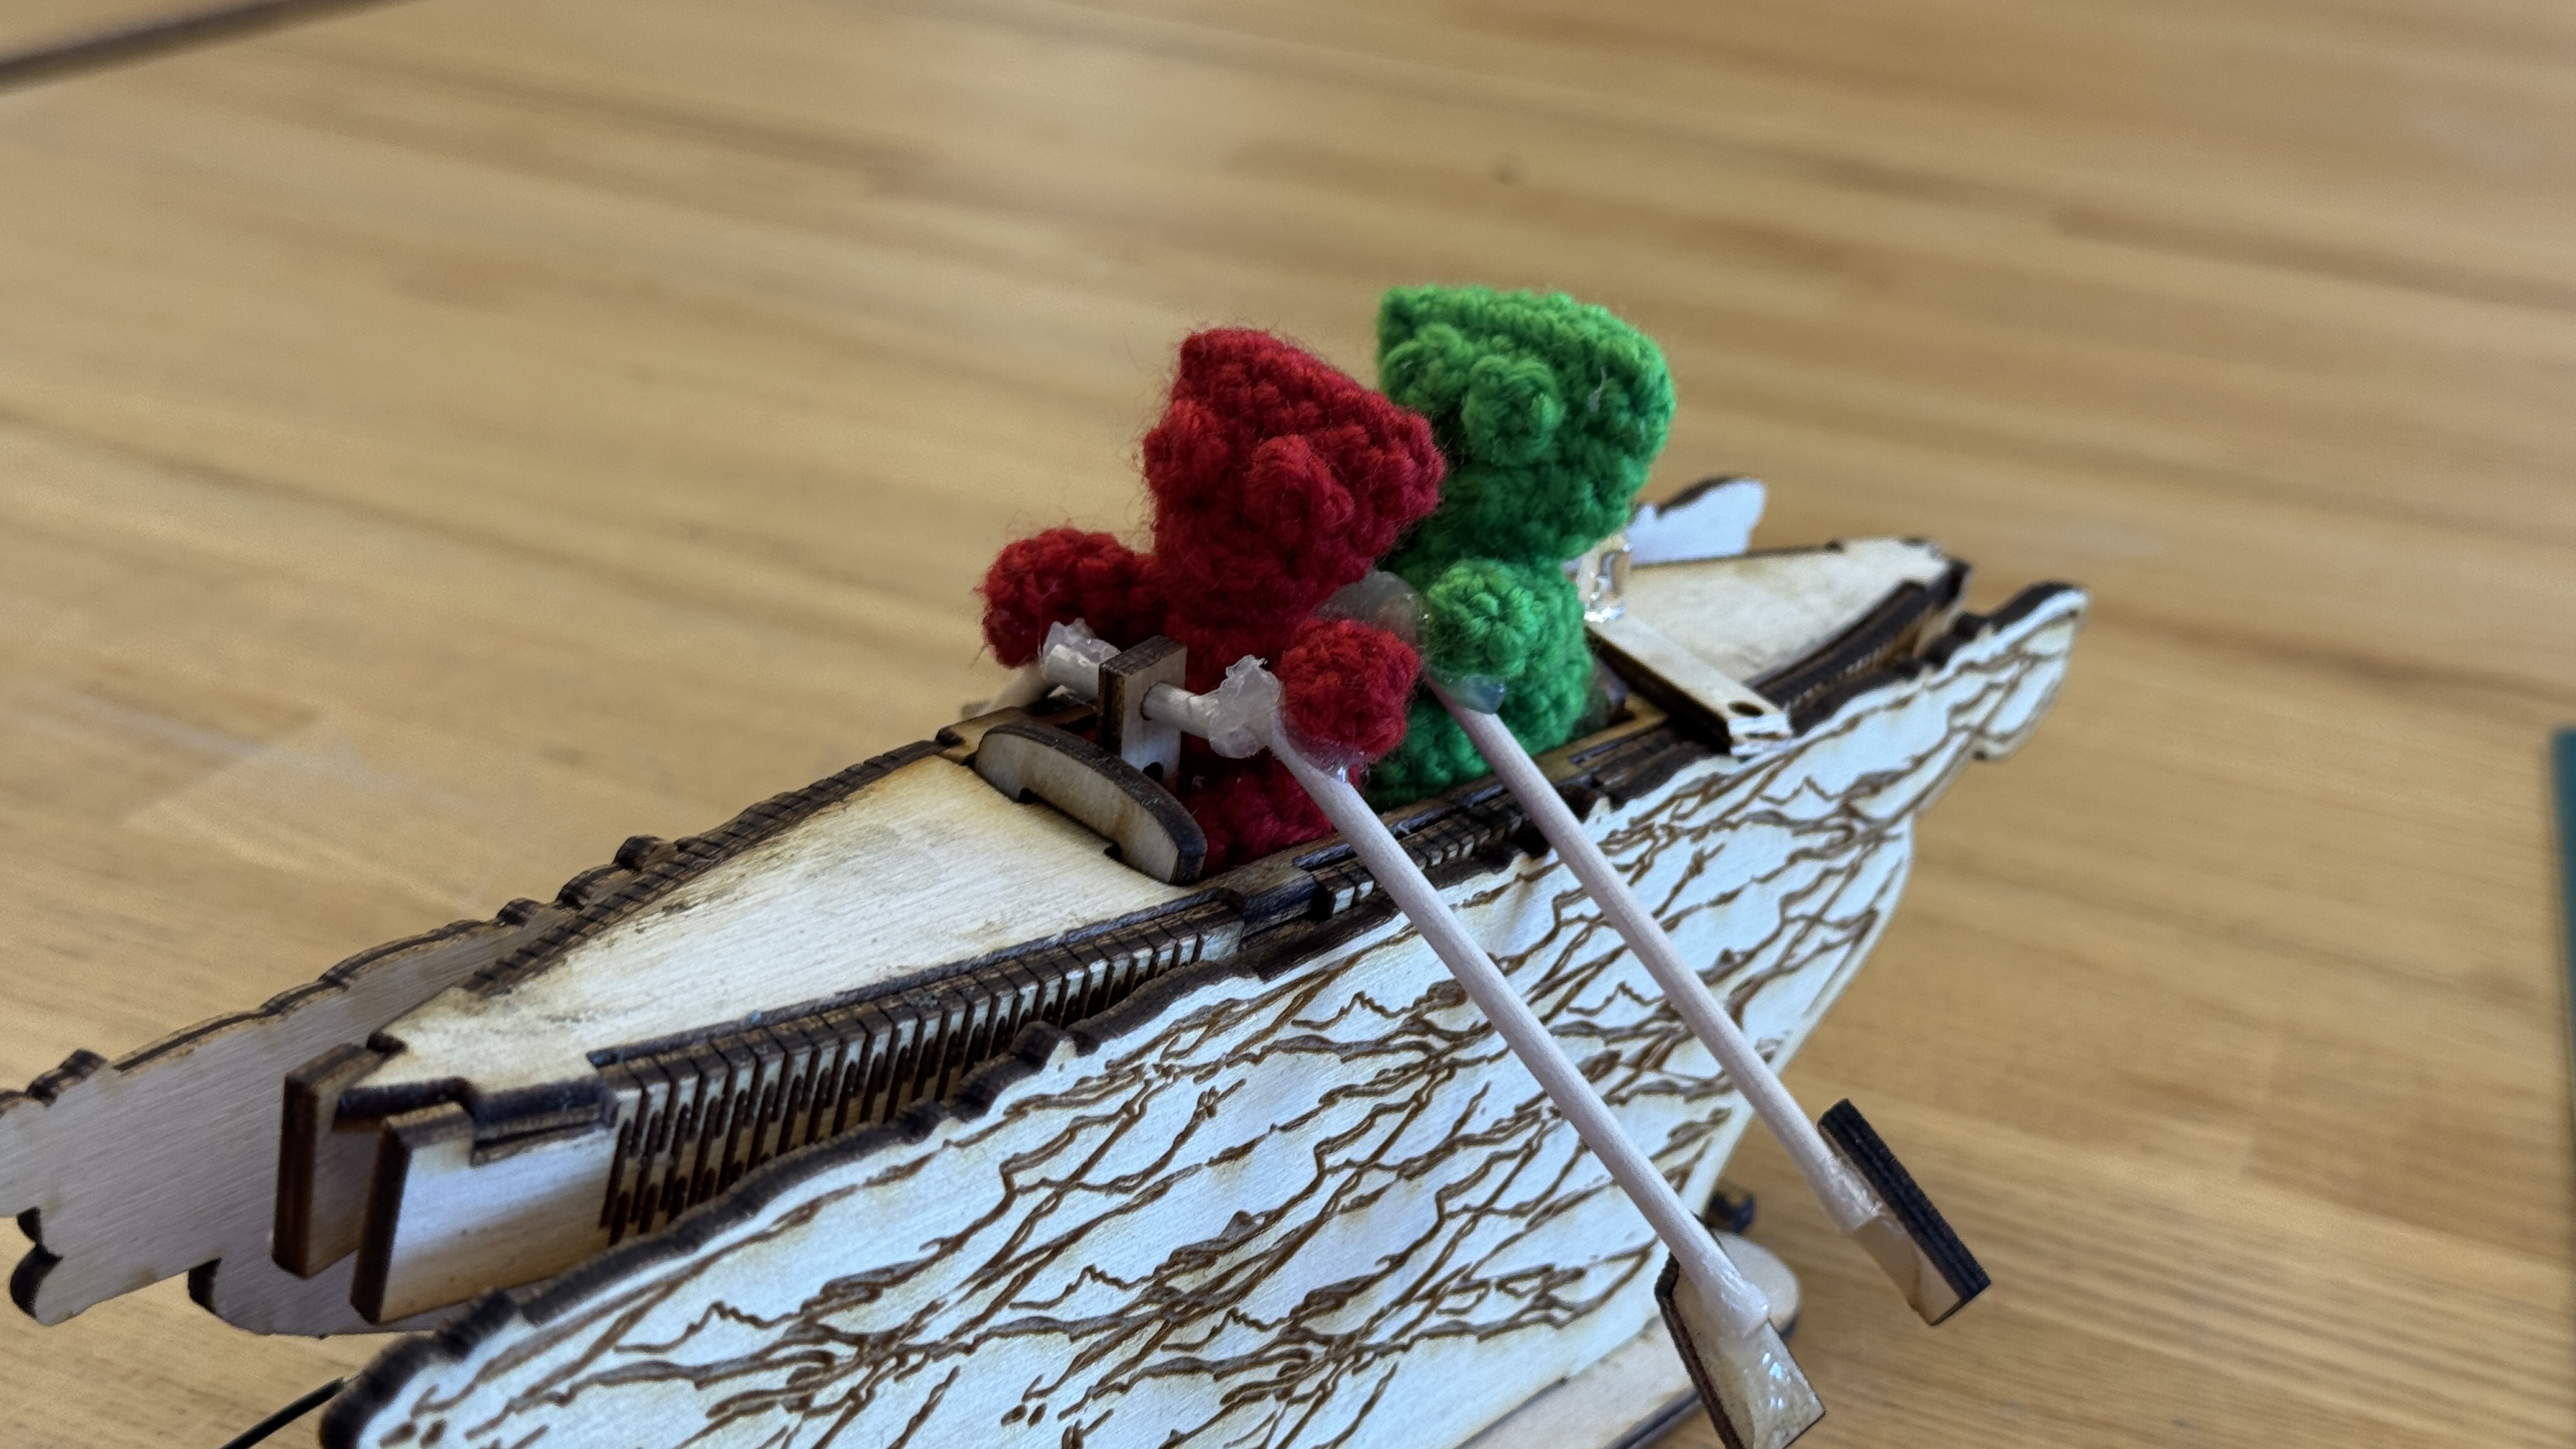
I used a glue gun only to attach the oars and the kids’ hands. One of my objectives for this project was to minimize the use of glue, and I think I succeeded!
In the end, I soldered the LED and the coin cell holder. Since the holder had a built-in switch, no additional switch was necessary.

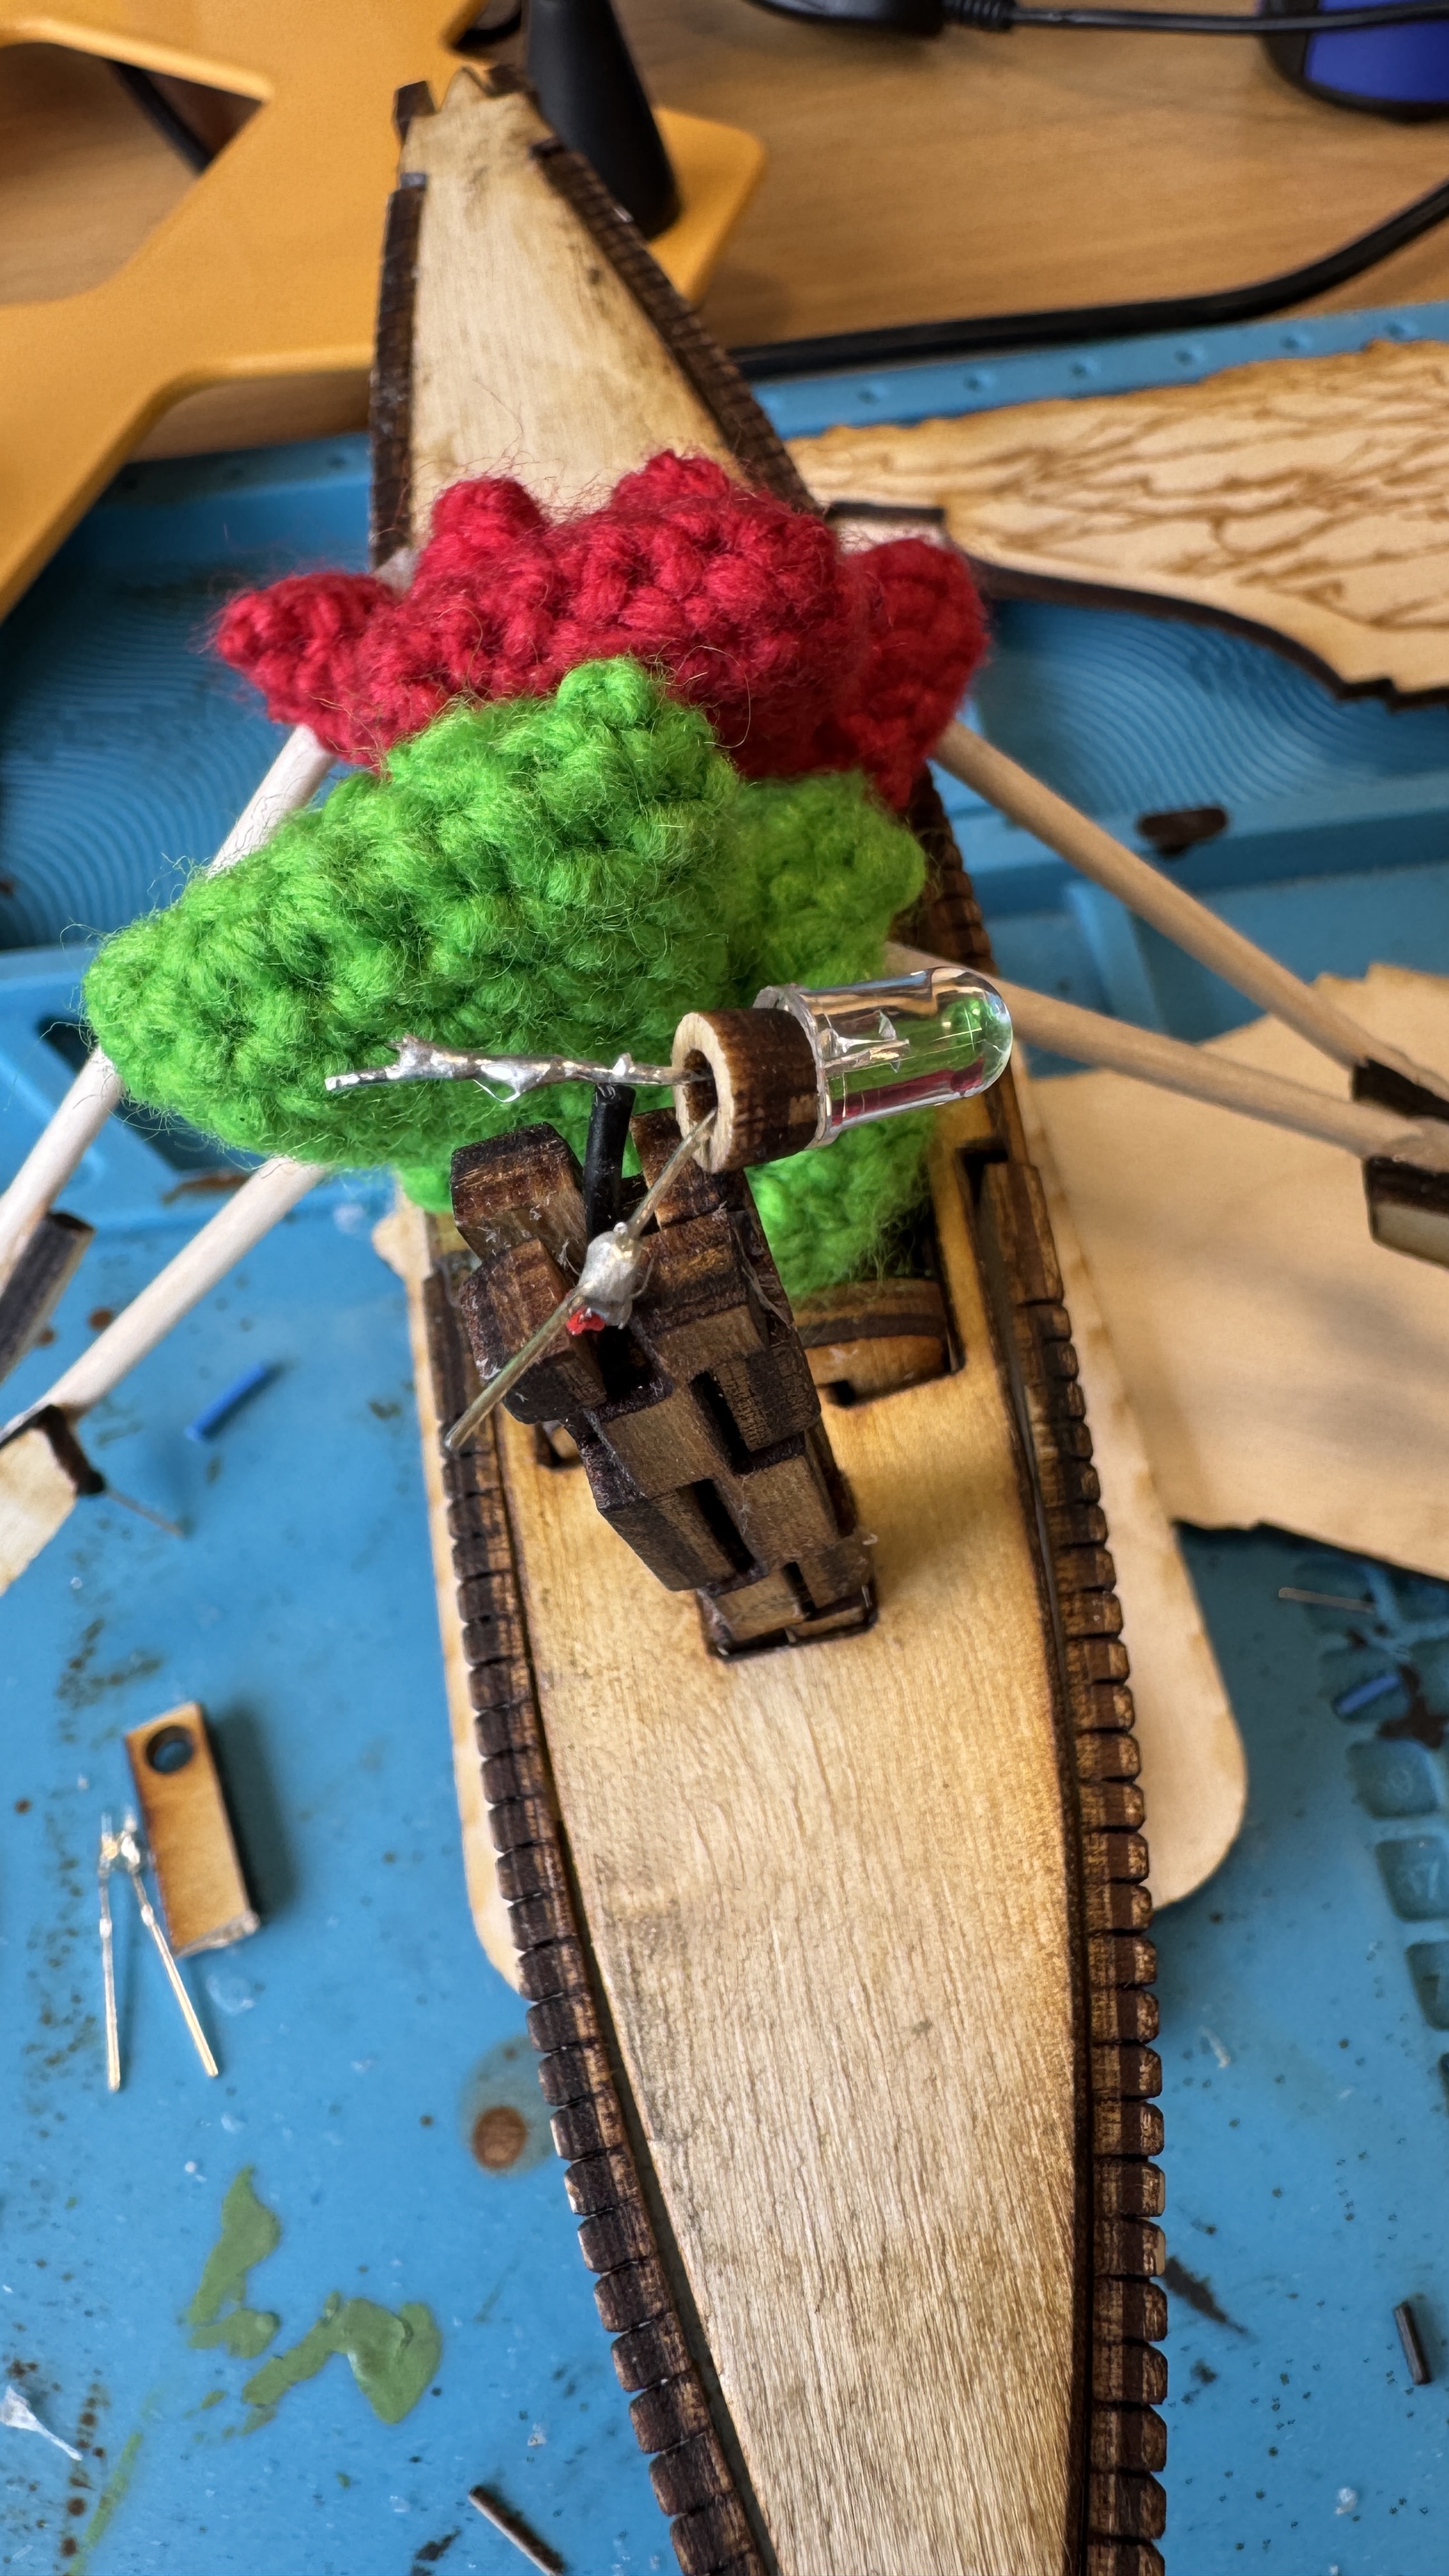
I made a light stand and glued the coin holder to the bottom plate.

The cable comes up through the

light stand, thus the light stand should fit in the hole on the boat. However, it was too small. I used a chisel to make it bigger.

To diffuse the light and create a softer glow, I initially placed a pompom on the LED. However, it ended up blocking too much light.

I found a reference suggesting the use of a balloon as a diffuser, but there weren’t any available in the makerspace.

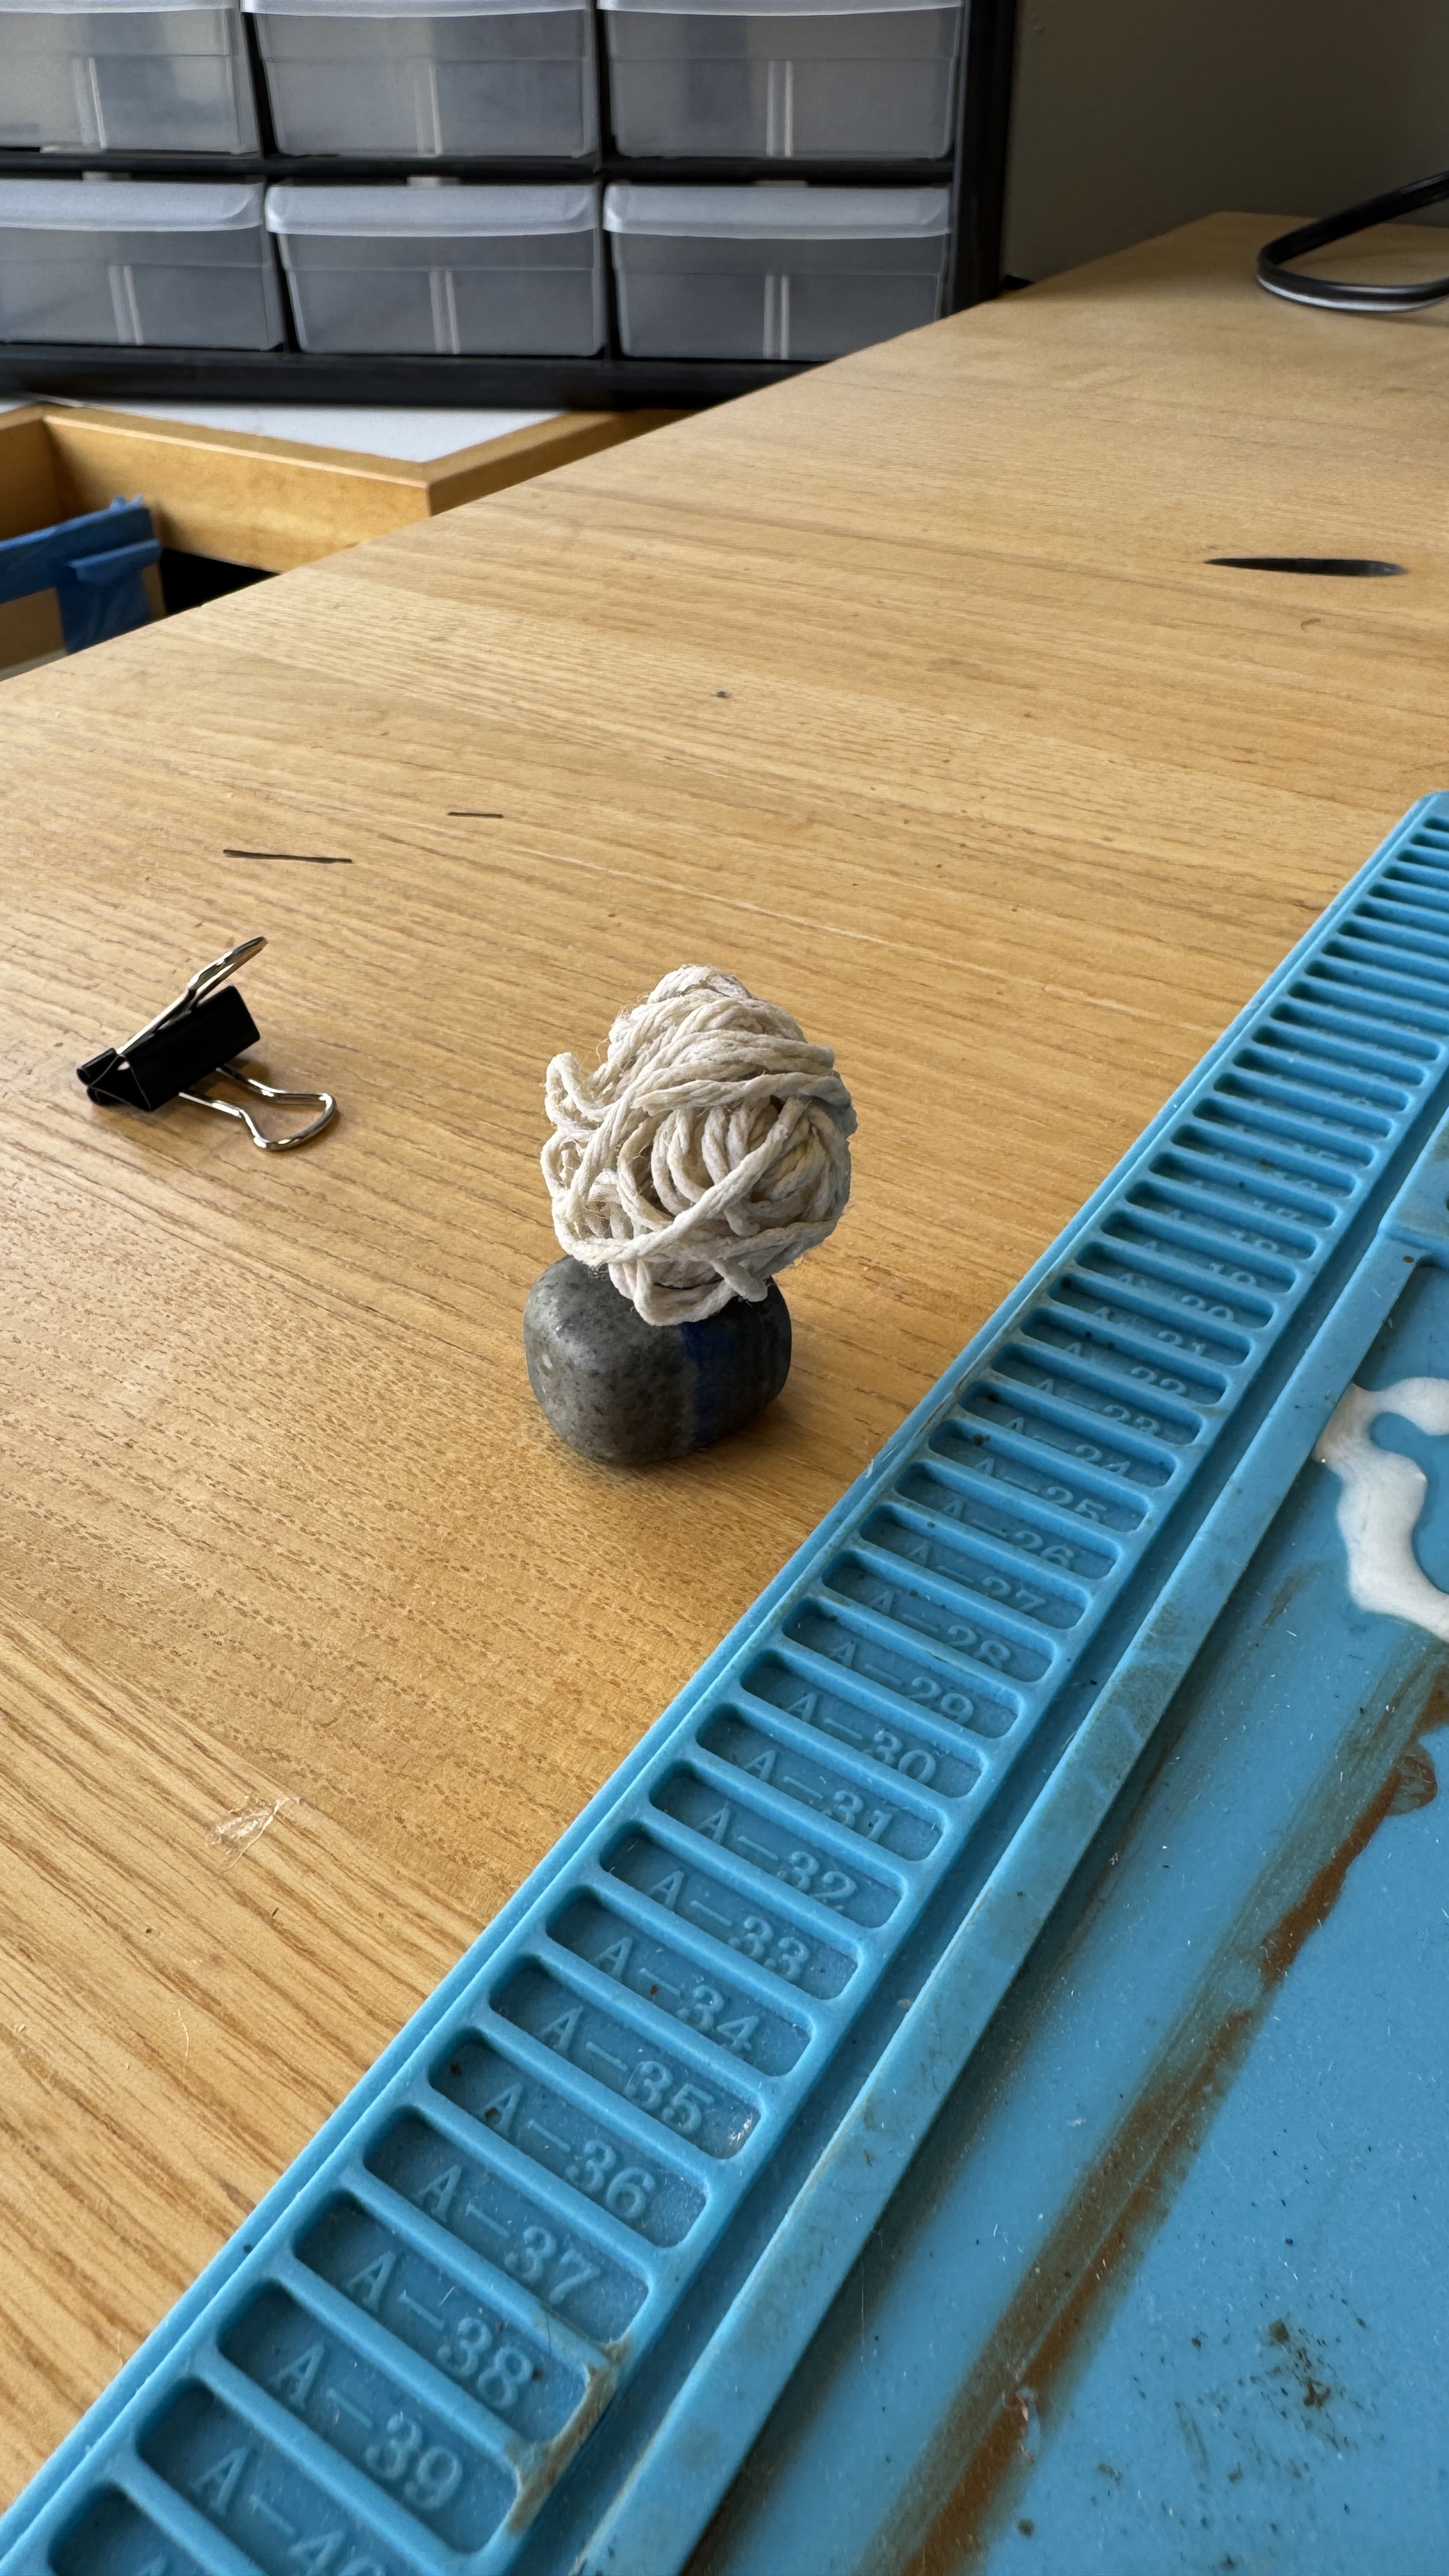
Instead, I decided to use a cube-shaped rock to achieve the effect.

And, here it is!
'STUDY > Ed.M.' 카테고리의 다른 글
| 보스턴 캠브리지 메이커 문화와 메이커 스페이스 (1) (0) | 2025.09.24 |
|---|---|
| [T519] 4. Construction Kit: Universal Connectors with 3D Printing (1) | 2025.09.20 |
| [T519] 2. CoralDRAW와 레이저 커터로 이름표 만들기 (0) | 2025.09.07 |
| [T519] 1. Gear Essay (0) | 2025.09.06 |
| 보스턴에서의 첫 주: 생활을 중심으로 (5) | 2025.08.16 |


댓글